5 Creative DIY Mason Jar Organizer Ideas for Every Room

Introduction:

5 Creative DIY Mason Jar Organizer Ideas for Every Room

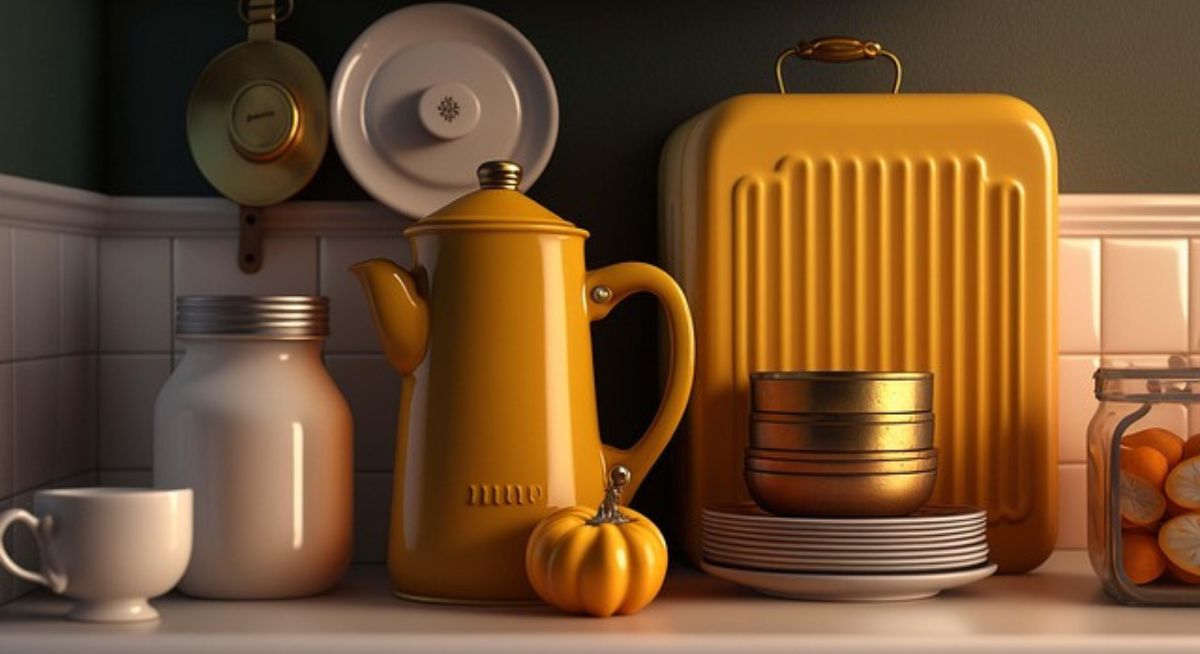
Mason jars are not just for canning; they are versatile, stylish, and perfect for organizing every room in your home. Whether you need storage in the kitchen, bathroom, or even the home office, mason jars can be repurposed in creative ways. In this article, we’ll explore five innovative DIY mason jar organizer ideas, along with tips, benefits, and expert suggestions..

5 Creative DIY Mason Jar Organizer Ideas for Every Room

source:pixabay

1. Wall-Mounted Mason Jar Organizer for Bathroom Essentials

One of the best ways to use mason jars in the bathroom is by mounting them on a wooden board. This stylish and functional organizer helps keep items like toothbrushes, cotton swabs, and makeup brushes within reach.

How to Make It:

  • Gather mason jars, a wooden board, and hose clamps.
  • Attach the hose clamps to the board and secure the jars in place.
  • Mount the board on the wall using screws.
  • Fill the jars with your essentials.

Tip:

Use frosted or tinted jars for added privacy and aesthetics.

2. Mason Jar Utensil Holder for the Kitchen

Keep your kitchen counter clutter-free by using mason jars to store utensils. This easy DIY project adds charm to your kitchen while keeping cooking tools organized.

How to Make It:

  • Use a wooden tray or a lazy Susan as a base.
  • Place three to four mason jars inside.
  • Label each jar for forks, spoons, knives, and cooking utensils.

Tip:

Paint the jars with chalk paint for a rustic look that matches farmhouse-style kitchens.

3. Desk Organizer for Office Supplies

A mason jar desk organizer is a simple yet effective way to store pens, pencils, scissors, and paper clips. This DIY project will help keep your workspace tidy and visually appealing.

How to Make It:

  • Use a small wooden crate or tray as the base.
  • Place three to five mason jars inside.
  • Arrange office supplies accordingly.

Tip:

Use different jar sizes for various office essentials to maximize organization.

4. Hanging Herb Garden with Mason Jars

Mason jars make an excellent indoor herb garden, allowing you to grow fresh herbs right in your kitchen or balcony.

How to Make It:

  • Fill mason jars with potting soil and plant herb seeds.
  • Use twine or wire to hang the jars near a sunny window.
  • Water as needed and enjoy fresh herbs year-round.

Tip:

Label each jar with the herb name using chalkboard stickers or paint for easy identification.

5. Mason Jar Light Fixture for a Cozy Ambiance

Turn mason jars into stylish lighting fixtures to add warmth and personality to any room.

How to Make It:

  • Drill a hole in the jar lid to insert a light socket.
  • Attach an LED or Edison bulb.
  • Hang multiple jars from a wooden beam or ceiling fixture.

Tip:

Use warm white LED bulbs for a cozy and inviting atmosphere.

Benefits of Mason Jar Organizers

Mason jar organizers are a stylish and functional way to declutter and organize various spaces in your home. Here are some key benefits of using them:

source:pixabay

1. Versatile Storage Solution

Mason jars can store a wide range of items, from kitchen essentials (spices, dry goods) to bathroom necessities (cotton swabs, toothbrushes) and even office supplies (pens, paper clips).

2. Eco-Friendly and Sustainable

Reusing mason jars helps reduce plastic waste, making them an environmentally friendly choice. They are made of durable glass, which is recyclable and long-lasting.

3. Cost-Effective

Instead of buying expensive storage containers, mason jars provide an affordable way to organize your home. You can even repurpose old jars for free.

4. Aesthetic Appeal

With their rustic and vintage charm, mason jars add a stylish touch to any space. They can be customized with labels, paint, or decorative lids to match your decor.

5. Space-Saving

Mason jar organizers can be mounted on walls, stored in drawers, or placed on countertops, helping you maximize space efficiently.

6. Easy to Clean and Maintain

Glass jars are easy to clean with soap and water. They don’t absorb odors or stains like plastic containers, making them a hygienic storage option.

7. Multi-Purpose Use

Mason jars aren’t just for storage—they can also be used for DIY projects like herb gardens, candle holders, or craft supply organizers.

Expert Suggestions for Maintaining Mason Jar Organizers

Here are some expert suggestions to keep your mason jar organizers functional, clean, and aesthetically pleasing for a long time:

source:pixabay

1. Choose the Right Jar Size

Select mason jars based on what you plan to store. Small jars (4-8 oz) are great for spices or cotton swabs, while larger jars (16-32 oz) work well for utensils, pantry staples, or craft supplies.

2. Label for Easy Identification

Use chalkboard labels, printable stickers, or a paint marker to label jars clearly. This prevents confusion and enhances organization.

3. Keep Lids Dry and Rust-Free

Metal lids can rust over time, especially in humid environments like bathrooms and kitchens. To prevent this:

  • Wipe lids dry after washing.
  • Use rust-resistant or plastic lids if needed.
  • Spray lids with a protective sealant for durability.

4. Regular Cleaning & Maintenance

  • Wash jars regularly to prevent residue buildup.
  • For deep cleaning, soak them in a vinegar-water solution.
  • Use a bottle brush to reach inside tall jars.

5. Proper Mounting for Wall Organizers

If you’re mounting mason jars on a wooden board or wall, make sure to:

  • Use hose clamps or metal brackets for secure attachment.
  • Check screws and fittings periodically to ensure they stay firm.

6. Store Jars in a Cool, Dry Place

Glass can crack with extreme temperature changes, so avoid placing jars near direct heat sources (e.g., stovetops, radiators).

7. Repurpose Old Jars Creatively

Instead of discarding old jars, repurpose them for different uses—turn them into flower vases, candle holders, or DIY gift jars.

Final Advice

Mason jar organizers are a creative and functional way to declutter your home while adding a touch of charm. Whether you’re making a wall-mounted storage system, a utensil holder, or a mini herb garden, these DIY projects are easy and rewarding. With a little creativity and some basic materials, you can transform simple jars into stylish and practical organizers.

FAQs

1. Can I use plastic jars instead of mason jars?

Yes, plastic jars work as a lightweight alternative, but they may not have the same aesthetic appeal as glass mason jars.

2. How do I keep my mason jar organizers from falling?

Use strong clamps, brackets, or adhesive hooks to secure them properly to walls or surfaces.

3. Can I paint my mason jars?

Absolutely! Use acrylic, chalk, or spray paint to customize them to match your decor.

4. What’s the best way to clean mason jar organizers?

Hand wash with warm soapy water or use a vinegar solution for deep cleaning.

5. Where can I buy mason jars for DIY projects?

You can find mason jars at craft stores, online retailers, or thrift shops at budget-friendly prices.

References

  1. Smith, J. (2023). Creative Home Storage Solutions. Home Organization Press.
  2. Brown, L. (2024). DIY Rustic Decor Ideas. Vintage Interiors Publishing.
  3. Green, A. (2022). Sustainable Living: Repurposing Everyday Items. EcoHome Publishers.

By following these ideas and tips, you can easily create stylish and functional mason jar organizers for every room in your home. Happy DIY-ing! 😊

12 Brilliant Furniture Makeover Tips for a Fresh New Look

Introduction

12 Brilliant Furniture Makeover Tips for a Fresh New Look

Is your furniture looking outdated or worn out? Instead of throwing it away, why not give it a stylish makeover? A little creativity, some paint, and a few DIY tricks can breathe new life into old furniture, making it look modern and fresh. Whether you’re a beginner or a DIY enthusiast, these 12 brilliant furniture makeover tips will help you transform your home decor effortlessly.

12 Brilliant Furniture Makeover Tips

source:pixabay

1. Fresh Coat of Paint

Painting is one of the simplest ways to refresh old furniture. Choose a trendy color, such as navy blue, emerald green, or classic white, to match your interior.

2. Add Stylish Wallpaper

Apply peel-and-stick wallpaper to furniture surfaces like drawers and table tops for a chic, patterned effect.

3. Replace Old Hardware

Swap outdated knobs and handles with modern, stylish alternatives like brass, crystal, or matte black finishes.

4. Try Distressing Techniques

For a vintage or farmhouse look, use sandpaper to distress painted furniture slightly, giving it a weathered appearance.

5. Stain Instead of Paint

If you prefer a natural look, use wood stains to enhance the grain of your furniture, giving it a warm and elegant finish.

6. Use Chalk Paint for a Rustic Touch

Chalk paint is excellent for creating a shabby chic or antique effect without the need for sanding or priming.

7. Upholster Old Chairs and Benches

Refresh chairs and benches with new fabric and cushioning to instantly elevate their appeal.

8. Apply Decoupage for a Unique Design

Use decorative paper, magazine cutouts, or fabric with decoupage glue to create artistic patterns on furniture surfaces.

9. Try Two-Tone Painting

Combine two complementary colors for a bold and trendy look, such as white and navy or black and gold.

10. Add Decorative Molding

Enhance plain furniture by attaching wood trim or molding to create a sophisticated, custom design.

11. Transform Furniture into Something New

Repurpose old furniture creatively—for example, turn a dresser into a stylish kitchen island or a ladder into a bookshelf.

12. Use Stencils for Custom Patterns

Create beautiful patterns using stencils and spray paint to add a designer touch to furniture pieces.

Latest Trends in Furniture Makeover

Furniture makeovers are an exciting way to breathe new life into old pieces, and the latest trends focus on sustainability, creativity, and functionality. Here are some of the hottest trends in furniture makeovers for 2025:

source:pixabay

1. Sustainable & Eco-Friendly Refinishing

  • Upcycling old furniture with non-toxic paints and finishes
  • Using reclaimed wood and repurposed materials
  • Low-VOC (volatile organic compound) paints and stains for healthier indoor air

2. Two-Tone and Color Blocking

  • Combining bold and neutral colors for contrast
  • Painting drawers or table legs in different shades for a unique aesthetic
  • Experimenting with geometric patterns for a modern twist

3. Distressed & Vintage Looks

  • Creating an aged, rustic appearance using chalk paint or distressing techniques
  • Incorporating antique-inspired hardware like brass handles or ornate knobs
  • Layering paint and sanding to reveal different colors underneath

4. Textured & Embossed Finishes

  • Adding depth with raised stencils or 3D wallpaper
  • Using plaster or textured paint for a sculptural effect
  • Upholstered furniture with tufting, rattan, or cane webbing inserts

5. Matte & Soft-Touch Finishes

  • Moving away from glossy surfaces in favor of matte chalk, milk, or clay paints
  • Achieving a velvety feel with waxed or buffed finishes
  • Earthy tones like terracotta, sage green, and deep navy gaining popularity

6. Bold & Artistic Makeovers

  • Hand-painted murals or abstract art on furniture surfaces
  • Decoupage with floral or nature-inspired designs
  • Metallic accents, like gold or copper leaf, for a glam effect

7. Multi-Functional Furniture

  • Transforming old dressers into kitchen islands or vanities
  • Adding hidden storage compartments to outdated pieces
  • Turning bookshelves into room dividers with added design elements

8. Cane, Wicker & Rattan Accents

  • Incorporating woven elements for a boho or coastal vibe
  • Restoring classic mid-century rattan chairs with fresh stains
  • Blending cane webbing with painted wood for a stylish contrast

9. Stained & Natural Wood Finishes

  • Emphasizing the raw beauty of wood with clear or tinted stains
  • Combining natural wood with painted accents for a Scandinavian feel
  • Burnt wood techniques like Shou Sugi Ban for a dramatic look

10. Furniture Flip for Profit

  • More DIYers are flipping thrifted furniture for resale
  • Custom commissions are on the rise, with people seeking personalized pieces
  • Social media platforms like Instagram and TikTok are driving DIY makeover trends

Expert Suggestions for a Successful Furniture Makeover

If you’re planning a furniture makeover, following expert advice can ensure a successful transformation. Here are some top suggestions from professionals in furniture refinishing and restoration:

source:pixabay

1. Choose the Right Piece

  • Pick a solid wood or high-quality piece for durability.
  • Avoid furniture with severe damage unless you’re skilled in repairs.
  • Test drawers, hinges, and joints to ensure they function properly.

2. Prep the Surface Thoroughly

  • Clean the furniture with mild soap and water to remove dirt and grease.
  • Sand the surface to remove old finishes and create a smooth base.
  • Use wood filler for cracks or dents before sanding again.

3. Select the Right Paint & Finish

  • Chalk paint is great for a vintage look and easy distressing.
  • Milk paint offers a natural, eco-friendly option with a soft finish.
  • Latex or acrylic paint is durable and provides vibrant color.
  • Use a topcoat (wax, polyurethane, or polycrylic) for protection.

4. Consider Modern Trends

  • Matte and chalk finishes for a contemporary, soft-touch look.
  • Two-tone designs or ombre effects to add depth and interest.
  • Stained wood accents for a mix of classic and modern appeal.

5. Invest in Quality Tools & Materials

  • Use high-quality brushes or rollers to avoid streaks.
  • A paint sprayer can help achieve a smooth, professional finish.
  • Fine-grit sandpaper (220+ grit) ensures a flawless final look.

6. Add Unique Hardware & Details

  • Swap out old knobs and handles for trendy options like gold, matte black, or ceramic.
  • Consider stencils, decoupage, or hand-painted designs for a personal touch.
  • Upholster seating areas with fresh fabric for a complete transformation.

7. Be Patient & Work in Layers

  • Apply multiple thin coats instead of one thick layer to prevent drips.
  • Allow each coat to dry fully before sanding and adding the next layer.
  • Lightly distress edges for a naturally aged look if desired.

8. Protect & Maintain Your Work

  • Use coasters and placemats to prevent damage from heat or spills.
  • Reapply protective finishes every few years to maintain durability.
  • Clean surfaces with a damp cloth and avoid harsh chemicals.

9. Experiment with Multi-Functionality

  • Convert old dressers into kitchen islands, bathroom vanities, or TV stands.
  • Add hidden storage compartments to maximize space.
  • Repurpose bookshelves as room dividers with added decorative elements.

10. Document & Share Your Makeover

  • Take before-and-after photos to track your progress.
  • Share your project on social media for inspiration and feedback.
  • Consider selling or flipping furniture as a side business if you enjoy the process.

Conclusion

Revamping old furniture is an exciting and budget-friendly way to give your home a fresh new look. With these 12 makeover tips, you can transform outdated pieces into stylish decor elements that suit your taste. Whether it’s a simple coat of paint or a complete transformation, the possibilities are endless!

References

  1. DIY Network – Furniture Makeover Ideas
  2. Better Homes & Gardens – Best DIY Painting Techniques
  3. Home Depot – Guide to Choosing the Right Paint for Furniture

FAQs

Q1: What is the best paint for furniture makeovers?
A: Chalk paint, latex paint, and acrylic paint are excellent choices, depending on the desired finish.

Q2: How do I prepare furniture before painting?
A: Clean the surface, sand it lightly, and use a primer if necessary for a smooth application.

Q3: Can I paint laminate furniture?
A: Yes, but you should sand it lightly and use a bonding primer before applying paint.

Q4: How long does it take for painted furniture to dry?
A: It depends on the type of paint, but typically, furniture takes 24-48 hours to dry completely.

Q5: What’s the easiest way to update furniture without painting?
A: Changing hardware, adding wallpaper, using decals, or upholstering can refresh furniture without painting.

With these insights, you’re ready to start your next furniture makeover project! Happy DIYing! 🎨✨

10 Creative Chalkboard Wall Ideas for Every Room

Introduction

10 Creative Chalkboard Wall Ideas for Every Room

Chalkboard walls are a versatile and stylish way to add functionality and creativity to any space in your home. Whether you want a message board in the kitchen, an interactive wall for kids, or a trendy decor element in your office, chalkboard paint can transform ordinary walls into dynamic, writable surfaces. In this article, we’ll explore ten creative chalkboard wall ideas that you can incorporate into different rooms, along with tips, trends, and suggestions for the best results.

10 Creative Chalkboard Wall Ideas for Every Room

SOURCE:PIXABAY

1. Kitchen Menu Board

Turn a section of your kitchen wall into a chalkboard menu. Use it to plan weekly meals, list grocery items, or leave messages for family members. This idea helps keep your kitchen organized while adding a rustic charm.

2. Home Office Productivity Wall

Enhance your productivity by adding a chalkboard wall in your home office. Use it for to-do lists, brainstorming sessions, or as a calendar for tracking important dates and deadlines.

3. Kids’ Playroom Creativity Corner

A chalkboard wall in a child’s playroom allows them to express their creativity without making a mess. It provides a safe and reusable space for drawing, learning, and playing.

4. Living Room Accent Wall

Make a bold statement in your living room by using a chalkboard accent wall. It can serve as a space for seasonal artwork, inspirational quotes, or a constantly changing display of creative designs.

5. Bedroom Inspiration Board

Incorporate a chalkboard wall in your bedroom as an inspiration board. Write down motivational quotes, reminders, or personal goals to keep yourself inspired every day.

6. Entryway Welcome Board

Greet guests with a chalkboard wall in your entryway. You can use it for decorative messages, important reminders, or even as a space to jot down daily affirmations.

7. Dining Room Event Planner

A chalkboard wall in the dining area can be used for planning special occasions, dinner party menus, or even displaying a family calendar to keep everyone informed.

8. Bathroom Reminder Board

Surprisingly, a chalkboard wall in the bathroom can be useful for reminders, daily affirmations, or even fun doodles that brighten up your day.

9. Closet Organization Helper

If you struggle with closet organization, a chalkboard wall can help by serving as a checklist for your wardrobe essentials, outfit planning, or seasonal clothing rotation notes.

10. Garage or Laundry Room Checklist Board

Utilize a chalkboard wall in the garage or laundry room to jot down maintenance tasks, reminders for cleaning schedules, or quick notes about household chores.

Tips for Creating a Chalkboard Wall

Creating a chalkboard wall can add a stylish and functional element to your home or workspace. Here are some essential tips to ensure the best results:

SOURCE:PIXABAY

1. Choose the Right Wall and Location

  • High-Traffic Areas – Ideal locations include kitchens (for menus and lists), home offices (for notes and schedules), kids’ playrooms, or cafes.
  • Smooth Surface – Avoid textured walls; a smooth surface allows for better writing and erasing.
  • Well-Ventilated Space – Chalk dust can accumulate, so consider ventilation or a dust-free chalk option.

2. Pick High-Quality Chalkboard Paint

  • Matte, Non-Reflective Finish – Ensures a true chalkboard effect.
  • Tinted Chalkboard Paint – Try deep blue, green, or gray for a unique look.
  • Magnetic Chalkboard Paint – Adds extra functionality (great for kitchens or offices).

3. Prepare the Wall for a Smooth Finish

  • Clean Thoroughly – Remove dust, dirt, and grease.
  • Fill in Imperfections – Patch holes or uneven textures with spackling paste.
  • Sand the Surface – A smooth wall helps the chalk adhere evenly.

4. Apply the Chalkboard Paint Correctly

  • Use a Foam Roller – Avoid brush marks for a sleek look.
  • Multiple Thin Coats – Apply at least 2-3 coats, letting each one dry for 24 hours.
  • Allow Proper Curing Time – Wait at least 3 days before using the wall.

5. Condition the Chalkboard Wall Before First Use

  • Rub White Chalk Sideways over the entire surface.
  • Erase with a Dry Cloth to prevent permanent ghosting.

6. Choose the Right Chalk and Cleaning Methods

  • Classic Chalk or Dust-Free Chalk – Regular chalk is easy to erase, while dust-free options reduce mess.
  • Liquid Chalk Markers – Great for precise lettering but require a damp cloth for removal.
  • Use a Microfiber Cloth for regular cleaning and a vinegar-water mix for deep cleaning.

7. Get Creative with Design & Functionality

  • Add a Wooden Frame for a polished look.
  • Combine with Shelving for extra organization.
  • Use Stencils for professional-looking lettering or artwork.

Trends in Chalkboard Wall Decor

Chalkboard walls continue to be a popular design trend, bringing both functionality and aesthetics to homes, offices, and commercial spaces. Here are some of the latest trends in chalkboard wall decor:

SOURCE:PIXABAY

1. Interactive and Functional Designs

  • Calendar and Planner Walls – Homeowners and businesses are using chalkboard walls to create large-scale planners, to-do lists, and scheduling boards.
  • Menu Boards in Kitchens – A stylish and practical way to write grocery lists, meal plans, or recipes.
  • Kids’ Creative Spaces – Parents are dedicating sections of walls for children to draw, fostering creativity without mess.

2. Chalkboard Paint in Unique Colors

  • While classic black and dark gray remain popular, colored chalkboard paint (such as deep blue, forest green, or even pastel tones) is gaining traction for a softer and more customized look.

3. Artistic and Hand-Lettered Murals

  • Many are incorporating chalkboard calligraphy and hand-drawn illustrations, from inspirational quotes to intricate floral patterns.
  • Professional chalk artists are being hired to create custom wall art in cafes, restaurants, and boutiques.

4. Combination with Other Textures

  • Chalkboard + Wood – Framing chalkboard sections with reclaimed wood for a rustic farmhouse feel.
  • Chalkboard + Metallic Accents – Using gold, brass, or copper elements to make the design more elegant and modern.
  • Half-and-Half Walls – Pairing a chalkboard wall with exposed brick, wainscoting, or tiles for a stylish contrast.

5. Minimalist and Modern Approaches

  • Clean, simple chalk outlines instead of fully detailed drawings, blending seamlessly with Scandinavian and modern decor styles.

6. Smart Chalkboards & Digital Integration

  • Some are incorporating magnetic chalkboard paint to make the walls functional beyond just writing.
  • There’s also an emerging trend of digital smart chalkboards for a high-tech twist on traditional blackboard walls.

Suggestions for the Best Chalkboard Wall Results

Creating a chalkboard wall can be a fun and functional design choice, but to get the best results, follow these key tips:

1. Choose High-Quality Chalkboard Paint

  • Opt for well-reviewed, durable chalkboard paint (such as Rust-Oleum or Benjamin Moore).
  • Consider matte finishes for a smooth, non-glare surface.
  • If you want a pop of color, use tinted chalkboard paint instead of the standard black.

2. Prepare the Surface Properly

  • Smooth It Out – Sand down rough surfaces before painting to ensure the chalk writes and erases easily.
  • Prime and Seal – If painting over a glossy wall, use a primer first to help the chalkboard paint adhere better.

3. Apply Multiple Thin Coats

  • Use a Foam Roller for a smooth finish (brushes can leave streaks).
  • Apply 2-3 Thin Coats instead of one thick layer for better durability.
  • Let each coat dry at least 24 hours before adding the next.

4. Condition the Chalkboard Before Use

  • Once the paint is fully dry, rub a piece of chalk sideways over the entire surface and wipe it off. This prevents “ghosting” (faint chalk marks that won’t erase completely).

5. Choose the Right Chalk or Markers

  • Classic Chalk – Use soft white or colored chalk for an authentic look.
  • Dust-Free Chalk – Helps reduce mess, especially in kitchens and kids’ areas.
  • Liquid Chalk Markers – Great for crisp lettering but may require a damp cloth or magic eraser for removal.

6. Clean and Maintain Regularly

  • Wipe with a dry microfiber cloth for daily cleaning.
  • Use a damp sponge or vinegar-water mix for deeper cleaning.
  • Avoid harsh chemicals that could damage the paint.

7. Get Creative with Designs

  • Use stencils for intricate patterns or lettering.
  • Frame the chalkboard wall with wood trim for a finished look.
  • Combine with pegboards, magnets, or shelving for extra functionality.

Conclusion

Chalkboard walls offer a unique combination of functionality and creativity, making them a perfect addition to any home. From kitchens and offices to bedrooms and garages, these walls provide endless opportunities for organization and artistic expression. By following the latest trends and implementing practical tips, you can create an inspiring and interactive space that suits your lifestyle.

References

  1. Home Decor Trends: Chalkboard Wall Inspiration – HomeDesigns.com
  2. DIY Chalkboard Wall Tips – DIYHomeProjects.net
  3. Chalkboard Paint Guide – InteriorDecorMag.com

FAQs

1. Is chalkboard paint safe for all wall types?

Yes, but it’s best applied to smooth, non-textured walls for better results.

2. Can I use regular chalk on a chalkboard-painted wall?

Yes, both traditional chalk and chalk markers work well on chalkboard walls.

3. How do I remove chalk residue from the wall?

Use a damp cloth or chalkboard eraser for regular cleaning. For deep cleaning, a mixture of water and vinegar works well.

4. Can I repaint a chalkboard wall with regular paint?

Yes, you’ll need to sand it and apply a primer before painting over it with a standard wall paint.

5. What are some creative ways to decorate a chalkboard wall?

Try seasonal drawings, motivational quotes, framed sections for different categories, or even a chalkboard calendar layout.

By incorporating these creative chalkboard wall ideas, you can enhance your home’s decor while adding a practical and interactive element to your living space.

5 Easy Steps to Create Floating Shelves from Reclaimed Wood

Introduction

5 Easy Steps to Create Floating Shelves from Reclaimed Wood

Floating shelves made from reclaimed wood are a perfect way to add rustic charm and functional storage to any space. Not only do they offer a unique aesthetic, but they are also an eco-friendly choice. Follow these five easy steps to create your own stylish floating shelves from reclaimed wood.

5 Easy Steps to Create Floating Shelves from Reclaimed Wood

source:pixabay

1. Gather Your Materials

Before you start, collect the necessary materials:

  • Reclaimed wood planks
  • Floating shelf brackets
  • Measuring tape
  • Saw
  • Sandpaper
  • Wood stain or sealant
  • Drill and screws
  • Level

2. Measure and Cut the Wood

Measure the space where you want to install the shelves. Mark and cut the reclaimed wood planks to your desired length. Use sandpaper to smooth the edges and remove any rough spots.

3. Prepare the Wood

If you want a polished look, apply wood stain or sealant to enhance the wood’s natural beauty and protect it from wear. Let it dry completely before proceeding.

4. Install the Brackets

Use a level to mark where the floating shelf brackets should be placed on the wall. Drill holes and secure the brackets using screws. Ensure they are evenly spaced and sturdy to support the weight of the shelves.

5. Attach the Shelves

Carefully place the reclaimed wood planks onto the brackets. Secure them with additional screws if necessary. Double-check that they are level before adding décor or storage items.

Tips for a Perfect Finish

A perfect finish on floating shelves ensures they look stylish, polished, and durable. Here are some expert tips to achieve a professional look:

source:pixabay

1. Choose the Right Material

  • Use high-quality wood (e.g., oak, walnut, or plywood with veneer) for a smooth finish.
  • If using MDF, ensure it’s properly sealed before painting.

2. Sand Properly

  • Start with medium-grit (120-150) sandpaper and move to fine-grit (220-320) for a smooth finish.
  • Always sand in the direction of the grain to prevent scratches.

3. Apply a Primer

  • If painting, use a high-quality primer to help the paint adhere better and prevent blotches.
  • For stained wood, use a wood conditioner before applying stain to ensure even absorption.

4. Use High-Quality Paint or Stain

  • For painting: Choose durable latex or oil-based paint with a satin or semi-gloss finish.
  • For staining: Apply an even coat, let it sit for a few minutes, then wipe off excess stain with a clean cloth.

5. Apply Multiple Thin Coats

  • Whether painting or staining, thin layers prevent drips and uneven coverage.
  • Allow each coat to dry completely before applying the next one.

6. Seal for Protection

  • Use polyurethane (for stained shelves) or polycrylic (for painted shelves) to protect against scratches and moisture.
  • A matte or satin finish keeps it looking natural, while gloss adds shine.

7. Install with Precision

  • Use hidden brackets or strong wall anchors to ensure a seamless floating effect.
  • Use a level to make sure they are straight before securing them.

8. Final Touches

  • Wipe down the shelves with a microfiber cloth to remove dust.
  • Avoid placing heavy items until the finish has fully cured (24-48 hours).

Maintain reclaimed wood shelves

Maintaining reclaimed wood shelves ensures they stay beautiful and durable for years. Here are some essential care tips:

source:pixabay

1. Regular Dusting

  • Use a soft microfiber cloth or feather duster to remove dust.
  • Avoid harsh brushes that can scratch the wood.

2. Gentle Cleaning

  • Use a damp (not wet) cloth with mild soap and water for routine cleaning.
  • Avoid strong chemical cleaners, as they can strip the natural patina.

3. Protect Against Moisture

  • Wipe spills immediately to prevent warping or staining.
  • In humid areas, use a wood sealant or apply beeswax to add a protective barrier.

4. Prevent Scratches and Dents

  • Use felt pads under decorative items or books.
  • Avoid dragging heavy objects across the surface.

5. Maintain the Finish

  • If the wood looks dry, apply linseed oil, tung oil, or a natural beeswax polish to restore its luster.
  • For stained or sealed wood, reapply a protective coat every 1-2 years.

6. Protect from Sun Damage

  • Keep shelves out of direct sunlight to prevent fading and drying.
  • Use UV-protective finishes if placed near windows.

7. Inspect for Pests

  • Reclaimed wood can sometimes attract insects like termites.
  • If you notice small holes or sawdust, treat with borate-based wood preservatives.

Trending Designs for Floating Shelves

Floating shelves are a stylish and functional way to enhance home decor. Here are some trending designs for 2025:

1. Minimalist Wood Shelves

  • Simple, sleek designs with natural wood finishes like oak, walnut, or pine.
  • Ideal for modern, Scandinavian, and Japandi-style interiors.

2. Industrial Metal Brackets

  • Black or bronze metal supports with wooden planks.
  • Perfect for rustic, farmhouse, or industrial-themed spaces.

3. Geometric and Asymmetrical Shelves

  • Unique hexagonal, zigzag, or staggered layouts.
  • Adds an artistic touch to any room.

4. Glass Floating Shelves

  • Gives a sleek, airy feel, especially in bathrooms and kitchens.
  • Works well in modern and contemporary settings.

5. Invisible Brackets (Seamless Look)

  • Hidden hardware for a true floating effect.
  • Ideal for minimalist and contemporary decor.

6. Live Edge Wood Shelves

  • Uses natural, unfinished edges to showcase wood’s raw beauty.
  • Great for rustic, boho, or organic interiors.

7. LED-Lit Floating Shelves

  • Integrated lighting adds ambiance and functionality.
  • Works well in bedrooms, living rooms, and gaming setups.

8. Multi-Tiered & Layered Shelving

  • Stacked designs for more storage while maintaining aesthetics.
  • Useful for books, plants, and decor items.

9. Floating Corner Shelves

  • Maximizes space in small rooms or awkward corners.
  • Great for displaying small plants, candles, or decorative pieces.

10. Mixed-Material Shelves

  • Combines wood, metal, glass, or even concrete for a unique look.
  • Blends well with modern and eclectic interiors.

Conclusion

Floating shelves from reclaimed wood are a stylish and sustainable way to enhance your home’s décor. With just a few materials and simple steps, you can create a unique and functional storage solution. Whether for books, plants, or decorative pieces, these shelves add both beauty and practicality to any space. Start your DIY project today and enjoy the beauty of handcrafted shelving!

Frequently Asked Questions (FAQs)

Q1: Is reclaimed wood strong enough for floating shelves?
A: Yes, as long as the wood is properly treated and supported with sturdy brackets, reclaimed wood can be highly durable.

Q2: Can I install floating shelves on drywall?
A: Yes, but it’s recommended to use wall anchors or find studs for better support.

Q3: How do I maintain reclaimed wood shelves?
A: Regularly dust and occasionally apply wood conditioner to keep the wood from drying out.

References

  • DIY Woodworking Guides – www.diywoodworkingtips.com
  • Home Décor Trends 2025 – www.homedecortrends.com
  • Sustainable Living Magazine – www.sustainableliving.com

READ MORE

7 Must-Have Scents for DIY Candles and 5 Common Mistakes to Avoid

Introduction:-

7 Must-Have Scents for DIY Candles and 5 Common Mistakes to Avoid

Homemade scented candles are a fantastic way to create a cozy atmosphere, personalize gifts, and enjoy the benefits of aromatherapy. However, choosing the right scents and avoiding common mistakes can make a significant difference in your candle-making experience. In this guide, we’ll explore seven must-have scents for DIY candles and five common mistakes to steer clear of.

7 Must-Have Scents for DIY Candles

source:pixabay

1. Lavender

Lavender is a classic choice known for its calming and stress-relieving properties. Perfect for relaxation and bedtime, lavender-scented candles create a peaceful environment in any space.

2. Vanilla

Warm, comforting, and sweet, vanilla is a timeless scent that enhances coziness. It pairs well with other fragrances like cinnamon, coconut, and coffee for a delightful blend.

3. Citrus (Lemon, Orange, or Grapefruit)

Citrus scents are uplifting, refreshing, and energizing. They are ideal for brightening up your home and enhancing focus and concentration.

4. Peppermint

Known for its invigorating and refreshing qualities, peppermint-scented candles are great for boosting alertness and reducing fatigue.

5. Cinnamon

Cinnamon provides a warm and spicy aroma, making it perfect for fall and winter. It pairs well with vanilla, apple, and clove for a cozy ambiance.

6. Eucalyptus

Eucalyptus offers a crisp, clean scent that promotes relaxation and clear breathing. It’s a great choice for bathrooms and home offices.

7. Sandalwood

Sandalwood is a luxurious, woody scent that creates a soothing and meditative atmosphere. It blends well with floral and spicy notes for a sophisticated touch.

5 Common Mistakes to Avoid When Making Scented Candles

source:pixabay

1. Using Too Much or Too Little Fragrance Oil

Adding too much fragrance oil can cause uneven burning, while too little may result in a weak scent throw. The recommended amount is usually 6-10% of the wax weight.

2. Choosing the Wrong Wick Size

The wick size affects how your candle burns. A wick that’s too small can create tunneling, while a wick that’s too large can cause excessive soot and an uneven melt pool.

3. Pouring Wax at the Wrong Temperature

Pouring wax when it’s too hot can lead to fragrance evaporation, while pouring too cool can cause imperfections like sinkholes and frosting. Check the recommended pouring temperature for your wax type.

4. Not Mixing Fragrance Oil Properly

To ensure an even scent distribution, always mix fragrance oil thoroughly into the melted wax at the right temperature (usually between 175-185°F).

5. Skipping the Curing Process

Candles need time to cure for the fragrance to fully develop. Most soy candles require at least 24-48 hours, while paraffin candles can cure in a shorter time.

Tips for Making High-Quality DIY Candles

Making high-quality DIY candles requires attention to detail, the right materials, and proper techniques. Here are some essential tips to ensure your homemade candles look great, burn well, and last long:

source:pixabay

1. Choose the Right Wax

  • Soy Wax – Burns clean and slow, great for beginners.
  • Paraffin Wax – Offers strong scent throw but can release more soot.
  • Beeswax – Natural and long-lasting but has a mild honey scent.
  • Coconut Wax – Smooth and slow-burning, blends well with other waxes.

2. Use the Right Wick

  • Wick size affects how evenly the candle burns.
  • Cotton wicks are ideal for clean burning.
  • Wood wicks create a crackling effect and work best with soy or coconut wax.
  • Test different wicks to find the best fit for your wax and container size.

3. Melt Wax Properly

  • Use a double boiler to melt wax evenly and prevent burning.
  • Keep the temperature between 170-185°F (77-85°C) for most wax types.
  • Avoid overheating, as it can cause discoloration and poor burning quality.

4. Add Fragrance Correctly

  • Use high-quality fragrance or essential oils.
  • Add fragrance at the correct temperature (usually 170°F for soy wax).
  • Use 6-10% fragrance load (per wax weight) for the best scent throw.

5. Choose the Right Container

  • Glass, ceramic, and metal containers work best for candles.
  • Ensure the container is heat-resistant and clean before pouring wax.

6. Use Proper Dye for Color

  • Use candle-safe dyes or natural colorants like mica powder.
  • Stir well to distribute color evenly in the wax.

7. Avoid Air Bubbles & Cracks

  • Pour wax slowly into the container at the right temperature.
  • Pre-warm containers to prevent sinkholes and cracking.

8. Cure Candles for Better Performance

  • Let candles cure for at least 24-48 hours before burning.
  • Soy candles improve scent throw with 1-2 weeks of curing.

9. Trim the Wick Before Each Use

  • Keep wick trimmed to 1/4 inch for a clean, even burn.
  • Long wicks can cause excessive smoke and uneven melting.

10. Store Candles Properly

  • Keep candles in a cool, dry place away from direct sunlight.
  • Cover candles to preserve their scent and color.

Benefits of DIY Scented Candles

DIY scented candles offer numerous benefits, from cost savings to personalized fragrances. Here’s why making your own scented candles is a great idea:

1. Cost-Effective

  • Store-bought scented candles can be expensive, but DIY candles are budget-friendly.
  • Buying materials in bulk reduces costs even more.

2. Customizable Scents & Colors

  • You can create unique fragrance blends using essential or fragrance oils.
  • Customize candle colors to match your home décor or mood.

3. Healthier & Non-Toxic

  • Store-bought candles often contain synthetic chemicals and paraffin wax, which can release toxins.
  • DIY candles allow you to use natural waxes like soy, beeswax, or coconut wax for a cleaner burn.

4. Eco-Friendly

  • Choose sustainable waxes and reusable or recyclable containers.
  • Avoid synthetic additives and petroleum-based waxes.

5. Therapeutic & Relaxing

  • The process of making candles is calming and rewarding.
  • Aromatherapy benefits:
    • Lavender – Promotes relaxation and sleep.
    • Citrus scents – Boosts energy and mood.
    • Vanilla & Cinnamon – Creates a cozy atmosphere.

6. Great for Gifting & Selling

  • Handmade candles make thoughtful, personalized gifts.
  • DIY candles can be a profitable side business if you enjoy crafting.

7. Better Burn Quality

  • By choosing the right wick and wax, you can ensure an even and longer-lasting burn.
  • No black soot or overpowering artificial scents.

8. Safe for Pets & Kids

  • You control the ingredients, avoiding harmful chemicals that may affect sensitive pets and children.
  • Use natural fragrances that won’t trigger allergies.

9. Creative & Fun Hobby

  • Experiment with different molds, decorations, and layering techniques.
  • Express your creativity while making something useful.

Conclusion

Making DIY scented candles is a rewarding and enjoyable hobby that allows you to create custom fragrances while avoiding harmful chemicals found in some store-bought candles. By selecting the right scents and avoiding common mistakes, you can craft high-quality candles that enhance your home’s ambiance and promote well-being.

FAQs

1. What is the best wax for scented candles?

Soy wax is a popular choice due to its clean burn and strong scent throw, but paraffin, coconut, and beeswax are also great options.

2. How long should I let my candles cure before using them?

Soy candles need at least 24-48 hours to cure, while paraffin candles can be used within a few hours.

3. Can I use essential oils instead of fragrance oils?

Yes, but essential oils may not be as strong or long-lasting as fragrance oils in candles.

4. How can I make my candles smell stronger?

Use the recommended fragrance oil percentage (6-10%), mix it at the right temperature, and allow proper curing time.

5. Why is my candle tunneling?

Tunneling occurs when the wick is too small or the candle isn’t burned long enough for the wax to melt evenly.

References

By following these tips and guidelines, you’ll be able to create beautiful, fragrant, and long-lasting homemade candles. Happy candle-making!

4 Common Macrame Plant Hanger Mistakes and How to Fix Them

Introduction

4 Common Macrame Plant Hanger Mistakes and How to Fix Them

Macrame plant hangers are a beautiful and functional way to display plants, adding a touch of bohemian charm to any space. However, many beginners make common mistakes that can affect the durability, aesthetics, and functionality of their plant hangers. Whether you’re new to macrame or looking to improve your technique, identifying these mistakes and learning how to fix them will help you create stunning and long-lasting designs.

4 Common Macrame Plant Hanger Mistakes and Fixes

SOURCE:PIXABAY

1. Uneven Knotting

Mistake: One of the most frequent issues is knots that are unevenly spaced or inconsistently tightened, leading to a lopsided plant hanger.

How to Fix It:

  • Ensure all strands are of equal length before starting.
  • Maintain consistent tension while tying knots.
  • Use a measuring tape or ruler to check spacing between knots.
  • Practice basic knots, such as the square knot and spiral knot, to develop uniformity.

2. Using the Wrong Type of Cord

Mistake: Choosing an inappropriate cord type can result in a weak or frayed macrame plant hanger.

How to Fix It:

  • Use 100% cotton cord, which is durable, flexible, and easy to work with.
  • Avoid synthetic cords that may be too slippery or difficult to manipulate.
  • Choose a thickness between 3mm and 6mm for optimal strength and aesthetics.

3. Incorrect Plant Sizing

Mistake: A common issue is making a hanger that is too small or too large for the intended plant pot, leading to instability.

How to Fix It:

  • Measure the diameter and height of your plant pot before designing the hanger.
  • Adjust the knot placement and spacing to fit the pot snugly.
  • Test the hanger with the pot before finalizing the knots to ensure a secure fit.

4. Weak Hanging Support

Mistake: Improper anchoring of the macrame hanger can cause it to fall or damage the ceiling/hook.

How to Fix It:

  • Use a sturdy hook rated for the weight of the plant.
  • Install the hook securely into a wall stud or ceiling joist rather than just drywall.
  • Consider using S-hooks or metal rings for additional support.

Trends in Macrame Plant Hanger Designs

Macramé plant hangers have evolved over the years, blending traditional knotting techniques with modern aesthetics. Here are some of the latest trends in macramé plant hanger designs:

SOURCE:PIXABAY

1. Minimalist Macramé Hangers

  • Simple, clean designs with fewer knots and neutral colors.
  • Perfect for modern and Scandinavian-style homes.
  • Uses cotton cords in white, beige, or gray.

2. Boho-Chic Layered Hangers

  • Features intricate knots, fringes, and tassels.
  • Often paired with wooden beads or driftwood for a natural look.
  • Complements bohemian and rustic décor.

3. Multi-Tiered Plant Hangers

  • Designed to hold two or more plants in a cascading arrangement.
  • Saves space while creating a stunning vertical garden.
  • Ideal for apartments and small spaces.

4. Colorful & Dip-Dyed Hangers

  • Moving away from traditional neutrals, designers are incorporating colorful threads.
  • Ombre and dip-dyed effects add a playful and artistic touch.
  • Great for brightening up indoor and outdoor spaces.

5. Geometric & Symmetrical Patterns

  • Incorporates precise, angular knots and symmetrical designs.
  • Inspired by Art Deco and modern geometric trends.
  • Works well in contemporary and industrial interiors.

6. Macramé with Wooden or Metal Rings

  • Instead of the usual looped top, some designs feature a wooden or metal ring.
  • Adds a refined and polished look.
  • Provides more stability and structure.

7. Macramé Shelf Hangers

  • A fusion of macramé and shelving, allowing small potted plants or decorative items.
  • Uses wooden planks integrated into the macramé knots.
  • Perfect for displaying succulents or decorative elements.

8. Outdoor-Friendly Macramé

  • Made with weather-resistant materials like nylon or polyester instead of cotton.
  • UV-resistant cords to prevent fading and wear.
  • Suitable for patios, balconies, and garden spaces.

9. Eco-Friendly & Sustainable Designs

  • Use of recycled or organic cotton cords.
  • Handmade by artisans supporting fair trade and sustainable practices.
  • Focus on biodegradable and low-impact materials.

10. Personalized & Custom Macramé Hangers

  • Custom knot patterns, initials, or symbols woven into the design.
  • DIY kits and workshops allowing personalization.
  • Unique gifts and home decor pieces.

Expert Suggestions for a Professional Finish

For a polished and professional finish in macramé plant hangers, experts recommend the following techniques and details:

SOURCE:PIXABAY

1. Use High-Quality Cord

  • Opt for 100% cotton, recycled cotton, or nylon for durability.
  • Choose the right thickness (3mm-5mm for delicate designs, 6mm+ for sturdy hangers).

2. Keep Knot Tension Consistent

  • Uneven knots can make the hanger look sloppy.
  • Maintain steady hand pressure to ensure uniformity.

3. Measure Cord Length Accurately

  • Use a formula (typically 4x the finished length) to avoid running short.
  • Always cut extra if unsure—it’s easier to trim than extend.

4. Secure Loose Ends Neatly

  • Wrap knots (gathering knots) help keep ends from fraying.
  • Burn or glue synthetic cords to prevent unraveling.

5. Incorporate Beads & Rings with Precision

  • Choose wooden, metal, or ceramic beads that complement the design.

Ensure rings (wood or metal) are strong enough for the plant’s weight.

6. Maintain Symmetry & Balance

  • Align knots evenly and use a flat surface or tape measure for accuracy.
  • Check the balance before finishing by hanging and adjusting.

7. Finish with a Clean Trim

  • Use sharp fabric scissors for a crisp, professional look.
  • Try a straight, angled, or fringe cut depending on the aesthetic.

8. Block & Steam for a Polished Look

  • Use steam to relax fibers and remove creases.
  • Block the design by laying it flat and pinning it into shape before drying.

9. Use a Secure Hanging Method

  • Sturdy ceiling hooks or wall mounts ensure safety.
  • Test weight capacity before adding a plant.

10. Experiment with Unique Designs

  • Mix different knot techniques (e.g., square knots, spiral knots).
  • Play with color variations or dip-dyeing for a modern touch.

Conclusion

By avoiding these common macrame plant hanger mistakes, you can ensure your creations are both stylish and functional. Paying attention to knot consistency, cord choice, plant sizing, and support will result in beautiful and sturdy plant hangers. With patience and practice, your macrame skills will improve, allowing you to craft professional-quality pieces that enhance your home decor.

References

FAQs

1. What is the best cord for macrame plant hangers?

100% cotton cord between 3mm-6mm thickness is ideal for strength and flexibility.

2. How much cord do I need for a macrame plant hanger?

The amount varies based on design, but typically 6-8 times the intended finished length.

3. Can I use synthetic rope for macrame plant hangers?

While possible, natural cotton cords are recommended for better grip and aesthetics.

4. How do I prevent my macrame hanger from stretching over time?

Use a sturdy cord, secure knots tightly, and avoid excessive weight on the hanger.

READ MORE

15 Peel-and-Stick Backsplash Hacks to Make Installation Easier

Introduction

15 Peel-and-Stick Backsplash Hacks to Make Installation Easier

Peel-and-stick backsplashes are a popular and budget-friendly way to upgrade kitchens and bathrooms without the hassle of traditional tiling. With easy installation, stylish designs, and minimal maintenance, these backsplashes have become a go-to option for homeowners and renters alike. However, achieving a flawless finish requires the right techniques and preparation. In this article, we’ll explore 15 expert hacks to make installing a peel-and-stick backsplash easier and more effective..

15 Peel-and-Stick Backsplash Hacks

source:pixabay

1. Choose the Right Surface

Ensure that the surface is smooth, clean, and dry before applying the tiles. Avoid sticking them on porous or uneven surfaces like bare drywall or textured walls.

2. Clean the Wall Thoroughly

Use a degreaser or a mixture of warm water and dish soap to remove dirt, grease, and dust. Let the surface dry completely before installing.

3. Measure Twice, Cut Once

Before peeling off the backing, measure and mark where each tile should go. Use a level or a ruler for straight alignment.

4. Use a Sharp Utility Knife

A sharp blade ensures clean and precise cuts, especially around corners, outlets, and edges.

5. Lay Out the Design Before Sticking

Arrange the tiles on a flat surface to visualize the pattern and adjust any inconsistencies before applying them to the wall.

6. Start from the Center or a Straight Edge

To avoid misalignment, begin from the center of the wall or along a straight countertop edge.

7. Peel Off the Backing Slowly

Gradually remove the backing while smoothing the tile onto the surface. This helps prevent air bubbles and misplacement.

8. Use a Squeegee or Roller

A squeegee or rolling pin helps press the tiles firmly against the wall, ensuring better adhesion and eliminating bubbles.

9. Apply Heat for Better Adhesion

Use a hairdryer to slightly warm the adhesive before sticking tiles onto the wall. This helps them bond more securely.

10. Trim Carefully Around Outlets

Remove outlet covers before installation and use a ruler to measure accurate cutouts for a professional finish.

11. Use a Level for Perfect Alignment

Even minor misalignment can be noticeable. A level ensures straight and even placement throughout the process.

12. Mix and Match Tile Styles

For a unique look, combine different peel-and-stick tile patterns or textures to create an accent wall.

13. Seal the Edges for Durability

Apply a thin bead of clear silicone caulk around the edges to prevent moisture from loosening the adhesive over time.

14. Remove Air Bubbles with a Pin

If air bubbles form, gently puncture them with a pin and press them flat with a credit card or roller.

15. Let the Tiles Set Properly

Avoid exposing the backsplash to water or steam for at least 24 hours to ensure proper adhesion.

Trends in Peel-and-Stick Backsplash Designs

Peel-and-stick backsplash designs have gained popularity as an easy and affordable way to upgrade kitchens and bathrooms. Here are some of the latest trends in this space:

source:pixabay

1. Textured and 3D Designs

Modern peel-and-stick tiles now offer realistic textures that mimic materials like natural stone, wood, and brick. These add depth and visual interest to the space.

2. Bold Patterns and Geometrics

From Moroccan-inspired prints to Art Deco patterns, bold and intricate designs are trending. Hexagons, chevrons, and herringbone layouts are especially popular.

3. Marble and High-End Lookalikes

Faux marble, quartz, and granite designs give a luxurious feel without the high cost of real stone, making them a go-to option for budget-friendly renovations.

4. Metallic and Reflective Finishes

Gold, silver, and copper accents are being incorporated into peel-and-stick backsplashes, adding a touch of elegance and a modern industrial vibe.

5. Subway Tiles with a Twist

Classic subway tiles remain a favorite, but newer versions come with beveled edges, different color options, and unique finishes like matte or high gloss.

6. Waterproof and Heat-Resistant Innovations

Advanced materials now make peel-and-stick backsplashes more durable, ensuring they can withstand moisture and heat, making them ideal for kitchens and bathrooms.

7. Sustainable and Eco-Friendly Options

With a growing interest in sustainability, eco-friendly materials like recycled glass and non-toxic adhesives are becoming more common.

Expert Suggestions for a Professional Finish

Here are some expert suggestions to ensure a professional finish when installing a peel-and-stick backsplash:

source:pixabay

1. Choose High-Quality Tiles

Not all peel-and-stick tiles are created equal. Opt for thicker, durable materials with strong adhesives to ensure long-lasting results. Look for waterproof and heat-resistant options, especially for kitchens.

2. Prep the Surface Properly

  • Clean the wall thoroughly with a degreaser to remove any dust, grease, or residue.
  • Ensure the surface is completely dry and smooth—textured walls may require sanding or a primer.

3. Plan Your Layout Before Sticking

  • Dry-fit your tiles before peeling the backing to visualize the pattern and ensure symmetry.
  • Use a level and a pencil to mark guidelines, preventing uneven placements.

4. Cut with Precision

  • Use a utility knife, scissors, or a tile cutter for clean, straight cuts.
  • For intricate cuts around outlets or corners, a heat gun or hairdryer can soften the tile, making it easier to cut.

5. Apply Pressure for a Strong Bond

  • Press firmly using a roller or a credit card to eliminate air bubbles and ensure strong adhesion.
  • Start from the center and move outward for the best fit.

6. Use Caulk for a Seamless Finish

  • Apply clear or matching caulk along the edges and seams to prevent water infiltration and create a polished look.
  • This step is especially important in kitchens and bathrooms.

7. Allow Proper Curing Time

  • Avoid touching or cleaning the tiles for at least 24–48 hours to let the adhesive fully bond.

8. Maintain with Care

  • Clean with a gentle, non-abrasive cleaner to maintain shine and durability.
  • Avoid excessive heat exposure near stovetops—install a heat shield if needed.

Conclusion

Peel-and-stick backsplashes are an excellent way to enhance your home’s look without breaking the bank. By following these 15 hacks, you can ensure an easy and long-lasting installation. Whether you choose a classic or trendy design, careful planning and execution will help achieve a flawless and professional finish.

References

  • Home Improvement Blogs
  • Manufacturer Guidelines for Peel-and-Stick Tiles
  • Interior Design Experts’ Recommendations

FAQs

1. Can I install a peel-and-stick backsplash over existing tiles?

Yes, as long as the existing tiles are smooth and clean. Use a primer if needed for better adhesion.

2. How long does a peel-and-stick backsplash last?

With proper installation and care, they can last 5-10 years.

3. Can I remove a peel-and-stick backsplash without damaging the wall?

Yes, use a hairdryer to warm the adhesive and peel the tiles off gently.

4. Are peel-and-stick backsplashes waterproof?

Most are water-resistant, but sealing the edges can improve durability in humid areas.

5. Can I use peel-and-stick backsplash in a rental home?

Yes! They are removable, making them a great option for renters looking to upgrade their space temporarily.

By using these hacks and insights, you can achieve a stunning backsplash transformation effortlessly! Need more home improvement tips? Stay tuned to Daily New Tips!

The Top 5 Benefits of Decorating Your Home with Antique Furniture

Introduction

The Top 5 Benefits of Decorating Your Home with Antique Furniture

Antique furniture brings timeless elegance and unique character to any home. Unlike mass-produced modern pieces, antiques offer a rich history, intricate craftsmanship, and lasting durability. Whether you are a vintage enthusiast or simply want to add a touch of classic charm to your home, decorating with antique furniture provides several advantages. Here are the top five benefits of incorporating antique furniture into your home decor.

The Top 5 Benefits of Decorating Your Home with Antique Furniture

source:pixabay

1. Timeless Aesthetic Appeal

Antique furniture never goes out of style. Whether you prefer Victorian, Art Deco, or Mid-Century Modern, these pieces add an element of sophistication and history to your home. Their distinctive designs make them stand out as statement pieces that enhance any interior style.

2. Superior Craftsmanship and Durability

Many antique furniture pieces were handcrafted with high-quality materials, such as solid wood, brass, and iron. Unlike modern, mass-produced furniture, antiques are built to last. Investing in antique pieces means you are bringing home furniture that has already stood the test of time and will continue to do so.

3. Eco-Friendly and Sustainable Choice

Decorating with antique furniture is an environmentally friendly choice. By reusing and repurposing old furniture, you help reduce waste and the demand for new resources. Choosing antiques over newly manufactured furniture also reduces carbon emissions associated with production and transportation.

4. Unique and One-of-a-Kind Pieces

Unlike mass-produced furniture that lacks individuality, antiques have their own stories and character. Each piece is unique, with intricate carvings, hand-painted details, or distinct craftsmanship that cannot be replicated. Adding antique furniture to your home ensures that your decor is truly one of a kind.

5. Great Investment Value

Antique furniture often retains or even increases in value over time. While modern furniture depreciates quickly, well-maintained antiques can become valuable collector’s items. Investing in antiques is not just about style; it’s also a smart financial decision.

Suggestions for Decorating with Antique Furniture

Decorating with antique furniture can add character, charm, and a sense of history to your home. Here are some suggestions to help you incorporate antique pieces seamlessly into your décor:

source:pixabay

1. Blend Old with New

  • Mix antique furniture with modern or contemporary pieces to create a balanced, eclectic look.
  • Use neutral colors to help antique pieces stand out without overwhelming the space.

2. Highlight Statement Pieces

  • Make an antique piece the focal point of a room, such as a vintage dining table, an ornate dresser, or an antique armoire.
  • Use accent lighting to draw attention to the details and craftsmanship.

3. Refurbish and Repurpose

  • Restore old furniture with a fresh coat of paint or new upholstery to match your decor while maintaining its charm.
  • Repurpose antiques, like turning an old wooden trunk into a coffee table or a vintage ladder into a bookshelf.

4. Incorporate Textures and Layers

  • Pair antique wood furniture with soft textiles like linen or velvet for contrast.
  • Use vintage rugs, lace curtains, or embroidered cushions to enhance the antique aesthetic.

5. Use Antiques in Unexpected Places

  • Consider using a vintage vanity in the bathroom or an old writing desk as an entryway table.
  • Antique mirrors can add elegance and make smaller spaces appear larger.

6. Mix Antique Styles

  • Combine different periods and styles, such as a Victorian chair with a rustic farmhouse table.
  • A well-curated mix prevents the space from feeling like a museum.

7. Preserve Natural Patina

  • Let the age and imperfections of antiques shine through rather than over-restoring them.
  • The patina and wear on wood and metal add authenticity and warmth.

8. Accessorize Thoughtfully

  • Pair antique furniture with vintage accessories like old clocks, porcelain vases, or brass candlesticks.
  • Layer framed vintage prints or paintings for an authentic antique look.

9. Consider Functionality

  • Use antique furniture in practical ways, such as a vintage sideboard for extra storage.
  • Ensure pieces are sturdy and comfortable for daily use.

10. Curate a Timeless Look

  • Stick to classic colors and materials like wood, iron, and stone to ensure the space remains timeless.
  • Avoid overly trendy additions that clash with the antique charm.

Final Advice

1. Research History, Authenticity, and Condition

Before purchasing antique furniture, take the time to research its background. Look for details like:

  • Provenance: Where the piece came from and its historical significance.
  • Materials and Craftsmanship: Older furniture is often handcrafted with high-quality materials like solid wood, brass, and hand-cut joinery.
  • Markings and Labels: Some pieces have maker’s marks, serial numbers, or labels that help verify their authenticity.
  • Condition: Check for damages like woodworm, cracks, or missing parts. Minor wear is expected, but extensive damage may require costly restoration.

2. Avoid Overloading Your Space

Too many antiques in one room can make the space feel cluttered and outdated rather than stylish. Instead:

  • Use antiques as statement pieces, such as a grand dining table, a vintage dresser, or an ornate mirror.
  • Balance the look by mixing modern and antique elements for an eclectic but cohesive feel.
  • Keep the layout open and breathable, allowing each antique to stand out rather than compete for attention.

3. Consult an Expert or Antique Dealer

If you’re investing in high-value antiques, an expert opinion can be valuable. They can help you:

  • Identify authentic pieces and avoid reproductions.
  • Determine the fair market value of an item.
  • Offer guidance on preserving and restoring antiques without diminishing their value.
  • Suggest trending antiques or rare finds that could appreciate in value over time.

4. Shop at Estate Sales, Auctions, and Vintage Shops

The best antique finds often come from places like:

  • Estate Sales: Families selling heirlooms and vintage furniture—great for unique, well-kept items.
  • Auctions: Can offer rare and high-quality antiques, but bidding requires careful budgeting.
  • Vintage Shops and Flea Markets: Great for discovering hidden gems at more affordable prices.
  • Online Marketplaces: Websites like eBay, 1stDibs, or Ruby Lane can have good deals, but always verify authenticity before purchasing.

Conclusion

Decorating your home with antique furniture offers more than just aesthetic appeal—it provides durability, uniqueness, sustainability, and investment value. Whether you choose a single statement piece or fully embrace vintage decor, antiques can transform your home into a timeless and elegant space. By incorporating these classic furnishings, you not only enhance your interior design but also contribute to environmental conservation and smart financial investment.

References

  1. Smith, J. (2023). The Art of Antique Furniture Selection. Vintage Press.
  2. Brown, L. (2022). Timeless Decor: Mixing Antique and Modern Pieces. HomeStyle Magazine.
  3. Antique Furniture Association. (2021). A Guide to Authentic Antique Furniture.

FAQs

1. How do I know if my antique furniture is valuable?

Look for manufacturer markings, quality craftsmanship, and historical significance. Consulting an antique expert can also help determine value.

2. Can antique furniture be mixed with modern decor?

Yes! Blending antique and contemporary pieces creates a stylish and unique look that enhances both styles.

3. How should I care for antique wooden furniture?

Avoid direct sunlight, use a gentle wood polish, and regularly dust to maintain its original finish.

4. What’s the best way to restore antique furniture?

Restoration should be done carefully to preserve its value. Use mild cleaning solutions and seek professional restoration for major repairs.

5. Where can I find authentic antique furniture?

Reputable antique stores, estate sales, online auctions, and specialty vintage markets are great places to start.

Avoid These 5 Mistakes While Making a Rope Basket in Just 6 Steps

Introduction

Avoid These 5 Mistakes While Making a Rope Basket in Just 6 Steps

Rope baskets are a trendy and practical addition to any home. Whether you’re looking to create a stylish storage solution or a decorative piece, making a rope basket is a fun and creative DIY project. However, beginners often run into common mistakes that can affect the final result. In this guide, we’ll walk you through 6 easy steps to craft a rope basket while highlighting 5 common mistakes to avoid for a perfect finish..

6 Easy Steps to Make a Rope Basket

source:pixabay

Step 1: Gather Your Materials

Before starting, ensure you have the right materials:

  • Cotton, jute, or synthetic rope
  • Hot glue gun or strong fabric glue
  • Scissors
  • A sturdy base (optional: cardboard, fabric, or a plastic container)
  • A needle and thread (for sewn baskets)
  • Paint, beads, or fabric (for decoration)

Step 2: Choose Your Basket Shape and Size

Decide whether you want a round, oval, or square basket. Use a mold, like a bowl or box, to guide the shape if needed.

Step 3: Start the Coiling Process

Begin by coiling the rope tightly and securing it with hot glue or stitches. This will form the base of your basket. Ensure each coil is firmly attached to avoid gaps.

Step 4: Build the Basket Walls

Gradually continue wrapping the rope upwards, securing it in place as you go. If sewing, use a zigzag stitch to connect the coils.

Step 5: Add Handles or Decorative Elements

For extra functionality, attach rope handles or fabric grips. You can also dye the rope or add beads for a personalized look.

Step 6: Finish and Secure

Once your basket reaches the desired height, cut the rope neatly and secure the end with glue or stitches. Let it dry completely before use.

5 Common Mistakes to Avoid

source:pixabay

1. Using the Wrong Type of Rope

  • Mistake: Choosing a stiff or slippery rope can make coiling and gluing difficult.
  • Solution: Opt for cotton or jute rope, which is easier to handle and adheres well.

2. Not Securing the Coils Properly

  • Mistake: Loose coils can cause the basket to unravel or lose its shape.
  • Solution: Use strong adhesive or stitching to keep the coils tightly bonded.

3. Skipping the Base Support

  • Mistake: Without a sturdy base, the basket may collapse or become misshapen.
  • Solution: Use a solid base like cardboard, fabric, or a plastic mold for added structure.

4. Applying Too Much or Too Little Glue

  • Mistake: Excess glue can create a messy look, while too little may not hold the basket together.
  • Solution: Apply a moderate amount and smooth it out to avoid clumps.

5. Rushing the Drying Process

  • Mistake: Using the basket before the glue has fully dried can lead to weak bonding.
  • Solution: Allow at least 24 hours for the adhesive to set completely.

Tips for a Professional-Looking Rope Basket

A rope basket is a stylish and functional home accessory, and making it look professional requires careful craftsmanship and attention to detail. Here are some tips to achieve a polished, high-quality finish:

1. Choose High-Quality Materials

  • Use sturdy cotton, jute, or synthetic rope for a durable and structured basket.
  • Opt for a strong thread that matches the rope color for seamless stitching.
  • If using glue, go for high-temperature hot glue or fabric glue for a secure hold.

2. Use a Consistent Wrapping or Stitching Technique

  • Keep your stitches or glue lines evenly spaced and uniform for a clean look.
  • If sewing, use a zigzag stitch to securely bind the layers together.
  • If wrapping with fabric or yarn, ensure tight and smooth coverage without gaps.

3. Maintain Shape and Structure

  • Use a mold or bowl as a guide when forming the basket.
  • Apply light steam from an iron to help shape the basket and remove creases.
  • Reinforce the base with extra layers of rope for added stability.

4. Finish the Edges Neatly

  • Tuck in the rope’s raw ends and secure them well with glue or stitching.
  • For an elegant touch, wrap the rim with a decorative trim, fabric, or leather strip.

5. Add Decorative Touches

  • Incorporate handles using leather straps, wooden rings, or rope loops.
  • Personalize with paint, dye, or embellishments like beads, tassels, or labels.
  • Keep the design simple for a modern and sophisticated aesthetic.

6. Ensure a Smooth Interior

  • Trim excess threads and glue strands to prevent a messy look.
  • Consider lining the basket with fabric for a more finished appearance.

How long does it take to make a rope basket?


The time it takes to make a rope basket depends on factors like size, method, and skill level. Here’s a general estimate:

source:pixabay

1. Small Basket (4-6 inches wide)

  • Sewing Method: 1-2 hours
  • Hot Glue Method: 30 minutes to 1 hour

2. Medium Basket (8-12 inches wide)

  • Sewing Method: 2-4 hours
  • Hot Glue Method: 1.5-3 hours

3. Large Basket (12+ inches wide)

  • Sewing Method: 4-6 hours or more
  • Hot Glue Method: 3-5 hours

Factors Affecting Time

  • Experience Level: Beginners may take longer.
  • Complexity: Adding handles, lining, or decorations increases time.
  • Drying Time: If using glue, allow extra time for setting.

Conclusion

Creating a rope basket is a rewarding DIY project, but small mistakes can impact the final result. By following these 6 easy steps and avoiding these 5 common pitfalls, you’ll craft a beautiful and durable basket for your home. Whether for storage, decoration, or gifting, a handmade rope basket is a stylish and functional addition to any space.

FAQs

1. What is the best rope to use for a handmade basket?
Cotton and jute ropes are ideal because they are flexible and easy to work with.

2. Can I make a rope basket without glue?
Yes! You can sew the coils together using a zigzag stitch for a stronger, more durable basket.

3. How do I make my basket more rigid?
Use a sturdy base and reinforce the coils with extra glue or stitching.

4. Can I wash a handmade rope basket?
It depends on the material. Cotton baskets can be spot-cleaned, while jute baskets should be dry-cleaned.

9 Stunning Antique Furniture Trends for a Classic Home Look

Introduction:-

9 Stunning Antique Furniture Trends for a Classic Home Look

Antique furniture has an undeniable charm that adds character and elegance to any home. Whether you are a vintage enthusiast or simply want to create a timeless ambiance, incorporating antique furniture can transform your space. Here are nine stunning antique furniture trends that will give your home a classic and sophisticated look..

9 Stunning Antique Furniture Trends for a Classic Home Look

source:pixabay

1. Ornate Carved Wood Pieces

Intricately carved wooden furniture, such as Victorian-era chairs and cabinets, is making a comeback. These pieces showcase exquisite craftsmanship and add a regal touch to any room.

2. Vintage Upholstered Seating

Chairs and sofas with luxurious upholstery, such as velvet and floral fabrics, are trending. Styles like tufted Chesterfield sofas and wingback chairs bring old-world charm to modern interiors.

3. Distressed and Aged Finishes

Weathered wood and chipped paint finishes provide an authentic vintage look. Whether it’s a French country-style dresser or a rustic farmhouse table, these pieces add warmth and nostalgia to your home.

4. Mid-Century Modern Classics

Furniture from the 1950s and 1960s, characterized by clean lines and tapered legs, is a favorite among antique lovers. Iconic mid-century pieces blend effortlessly with contemporary decor.

5. Gilded Mirrors and Frames

Gold-framed mirrors, ornate picture frames, and gilded accents add a touch of opulence. These pieces create a luxurious and classic aesthetic when paired with antique furniture.

6. Antique Storage Solutions

Vintage cabinets, trunks, and apothecary chests are both stylish and functional. These storage pieces provide a unique way to keep your home organized while enhancing the decor.

7. Reclaimed Wood Furniture

Eco-friendly and full of character, reclaimed wood furniture brings history into your home. Whether it’s a dining table, headboard, or bookshelf, these sustainable pieces add rustic charm.

8. Grand Chandeliers and Light Fixtures

Classic crystal chandeliers and vintage pendant lights instantly elevate any space. These timeless lighting options make a striking statement in living rooms, dining areas, and entryways.

9. Antique Writing Desks and Vanities

Ornate wooden desks and vanities with intricate details are highly sought after. These pieces add sophistication to home offices and bedrooms, making them both stylish and practical.

Tips for Buying Antique Furniture

Buying antique furniture can be a rewarding experience, adding character and history to your home. However, it requires careful consideration to ensure you get authentic, high-quality pieces. Here are some essential tips:

source:pixabay

1. Research Before You Buy

  • Learn about different antique styles and periods (e.g., Victorian, Georgian, Art Deco).
  • Familiarize yourself with common materials and construction techniques.
  • Check market prices to avoid overpaying.

2. Verify Authenticity

  • Look for signs of aging like natural wear, patina, and oxidation on metal parts.
  • Examine joints—dovetail and mortise-and-tenon joints indicate quality craftsmanship.
  • Avoid pieces with excessive modern hardware, which may signal repairs or reproductions.

3. Inspect for Damage and Repairs

  • Minor scratches and wear are normal, but check for deep cracks, woodworm holes, or unstable legs.
  • Ensure that repairs (if any) were done professionally and do not affect the piece’s integrity.
  • Smell the furniture—musty or moldy odors could indicate moisture damage.

4. Consider Functionality and Space

  • Measure the furniture and your available space to ensure it fits well.
  • Check drawers, doors, and hinges to ensure they function properly.
  • If you plan to use it daily, ensure it can withstand regular use.

5. Buy from Reputable Sellers

  • Shop at trusted antique dealers, auctions, or estate sales.
  • Request provenance (history of ownership) when possible.
  • Be cautious with online purchases—ask for detailed photos and return policies.

6. Know the Value and Negotiate Smartly

  • Antique furniture value depends on rarity, condition, and demand.
  • Compare similar pieces before settling on a price.
  • Don’t be afraid to negotiate; many dealers expect it.

7. Understand Restoration and Maintenance

  • Some restoration can enhance value, while over-restoration can reduce authenticity.
  • Learn how to clean and maintain the piece properly (avoid harsh chemicals).
  • Consider professional refinishing if needed but ensure it doesn’t erase the antique value.

By following these tips, you can find timeless antique furniture that enhances your home’s charm and character. Happy hunting!

Suggestions for Styling Antique Furniture

Antique furniture adds character, warmth, and elegance to any space. The key to styling it effectively is balancing old-world charm with modern sensibilities. Here are some suggestions:

source:pixabay

1. Mix Old with New

  • Pair antique furniture with modern décor to create a balanced contrast.
  • For example, place a vintage wooden table in a contemporary dining room.
  • Use sleek, minimalist accessories to prevent an overly cluttered look.

2. Create a Focal Point

  • Highlight a statement antique piece, such as a Victorian dresser or a rustic farmhouse table.
  • Avoid crowding the space—let the antique furniture stand out.
  • Use lighting, like a chandelier or wall sconces, to draw attention to the piece.

3. Play with Textures and Fabrics

  • Complement antique wooden furniture with plush fabrics like velvet or linen.
  • Layer different textures—mix a distressed antique table with a smooth marble vase.
  • Use patterned rugs or tapestry to enhance the vintage aesthetic.

4. Choose a Neutral Backdrop

  • Soft, neutral wall colors (cream, beige, or soft gray) let antique pieces shine.
  • If you want a bold look, deep jewel tones like emerald or navy work well with dark wood antiques.

5. Repurpose and Upcycle

  • Give antique pieces new life—turn an old dresser into a bathroom vanity.
  • Use an antique trunk as a coffee table for both function and style.
  • Reupholster antique chairs with modern fabrics to blend old and new.

6. Mix Styles for Eclectic Charm

  • Don’t be afraid to mix different eras—French Provincial with Mid-Century Modern, for example.
  • Incorporate vintage artwork or mirrors to enhance the aesthetic.
  • Use contemporary lighting fixtures to modernize the space.

7. Add Greenery and Natural Elements

  • Potted plants and fresh flowers soften the look of heavy antique furniture.
  • Place a fiddle-leaf fig beside a vintage cabinet or a small succulent on an antique desk.
  • Woven baskets or ceramic planters add warmth and texture.

8. Balance Formality with Casual Elements

  • Antique furniture can feel formal—soften it with cozy throws, casual seating, or informal arrangements.
  • Use distressed or farmhouse-style antiques for a more relaxed, lived-in feel.

9. Use Statement Lighting

  • A crystal chandelier pairs beautifully with antique furniture for a classic look.
  • Industrial or modern lighting can create an appealing contrast with ornate antiques.
  • Vintage lamps with unique shades enhance authenticity.

10. Keep It Clutter-Free

  • Avoid overcrowding—let each antique piece have breathing room.
  • Stick to a cohesive color palette to create harmony.
  • Use minimal but well-chosen accessories like vintage books, candlesticks, or ceramics.

With the right styling, antique furniture can seamlessly blend into any home, offering timeless elegance and a sense of history. Would you like suggestions for a specific type of antique furniture or room?

Conclusion

Antique furniture trends continue to captivate homeowners and interior designers. By incorporating these timeless pieces, you can create a home that exudes classic beauty and elegance. Whether you opt for a single statement piece or an entire vintage-inspired setup, antique furniture never goes out of style.

References

  1. Smith, J. (2023). The Art of Antique Furniture Selection. Vintage Press.
  2. Brown, L. (2022). Timeless Decor: Mixing Antique and Modern Pieces. HomeStyle Magazine.
  3. Antique Furniture Association. (2021). A Guide to Authentic Antique Furniture.

FAQs

1. How do I know if my antique furniture is valuable?

Check for manufacturer markings, craftsmanship quality, and historical relevance. Consulting an antique expert can also help.

2. Can antique furniture be mixed with modern decor?

Yes! Blending antique and contemporary pieces creates a stylish, eclectic look that is both unique and elegant.

3. How should I care for antique wooden furniture?

Avoid direct sunlight, use gentle wood polish, and regularly dust to maintain its original finish.

4. What’s the best way to restore antique furniture?

Restoration should be done carefully to preserve value. Use mild cleaning solutions and consult professionals for major repairs.

5. Where can I find authentic antique furniture?

Reputable antique stores, estate sales, online auctions, and specialty vintage markets are great places to start