15 Space-Saving Tips for a Tidy Kitchen

Introduction:-

15 Space-Saving Tips for a Tidy Kitchen

A clutter-free, well-organized kitchen isn’t just visually appealing—it boosts efficiency, saves time, and makes cooking enjoyable. If your kitchen is bursting at the seams with gadgets, utensils, and pantry items, it’s time to adopt some smart space-saving strategies. Here are 15 innovative tips to maximize your kitchen space while maintaining a tidy and functional environment..

15 Space-Saving Tips for a Tidy Kitchen

source:pixabay

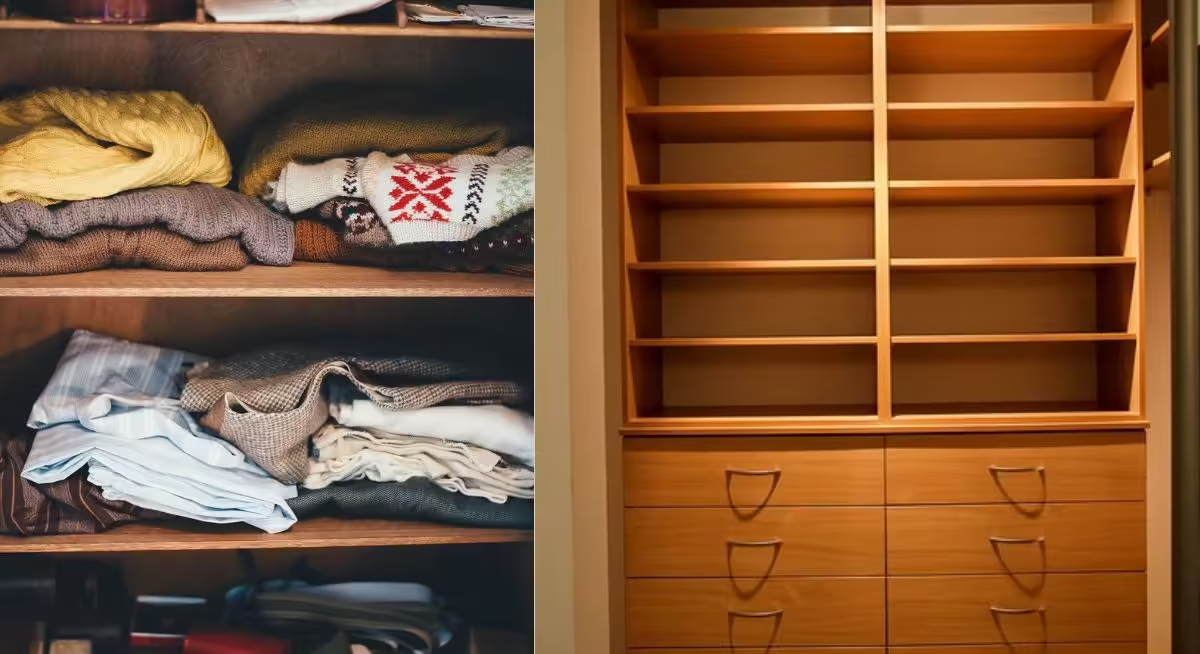
1. Use Vertical Storage

Install shelves or wall-mounted racks to utilize the vertical space on your walls. Hooks can be added to hang utensils, mugs, or pots, freeing up counter and drawer space.

2. Install Under-Cabinet Storage

Under-cabinet racks or baskets can hold spice jars, mugs, or even small plates. It’s an efficient way to make use of often-overlooked spaces.

3. Optimize Cabinet Doors

Attach adhesive hooks or narrow shelves to the inside of cabinet doors. Use them to store lids, measuring cups, or cleaning supplies.

4. Invest in Stackable Containers

Uniform, stackable containers can make pantry organization effortless. Opt for clear ones to quickly identify contents, saving you time while cooking.

5. Add Pull-Out Drawers

Transform deep cabinets into accessible pull-out drawers. This makes it easier to find and organize items without wasting space at the back.

6. Utilize Corner Cabinets

Install lazy Susans or corner shelving systems in hard-to-reach corner cabinets. These make the most of awkward spaces and provide easy access to items.

7. Install a Pegboard

A pegboard on the wall can store pots, pans, and utensils in an organized and accessible way. It’s both functional and stylish!

8. Hang a Magnetic Strip

Mount a magnetic strip to hold knives, scissors, or metal tools. This not only saves drawer space but also keeps sharp objects out of children’s reach.

9. Foldable Furniture

Incorporate foldable tables or chairs that can be tucked away when not in use. It’s a game-changer for smaller kitchens.

10. Use Tiered Racks

Place tiered racks in cabinets or on countertops to store plates, bowls, or spices efficiently. These racks double the storage space vertically.

11. Slide-Out Trash Bins

A slide-out trash bin under the sink or inside a cabinet keeps your kitchen clean and saves floor space.

12. Get a Rolling Cart

A rolling cart provides extra storage and can be moved around as needed. Use it for frequently used items or as a mobile prep station.

13. Label Everything

Labeling bins, jars, and containers ensures everything has its place and reduces clutter caused by misplaced items.

14. Consolidate Small Appliances

Consider multifunctional appliances, like a toaster oven with an air fryer feature. They save countertop space and reduce the need for multiple devices.

15. Declutter Regularly

Lastly, evaluate your kitchen items frequently. Donate or discard items you no longer use to prevent unnecessary clutter.

How can I organize my pantry to save space?

Organizing your pantry to save space is all about maximizing efficiency, accessibility, and creating a system that works for your household. Here’s a step-by-step guide:

source:pixabay

1. Declutter First

  • Remove everything: Take all items out of the pantry to see what you have.
  • Discard expired items: Check expiration dates and throw away anything that’s expired or no longer needed.
  • Group similar items: Sort by category (e.g., snacks, canned goods, spices, baking supplies).

2. Use Containers and Labels

  • Clear containers: Transfer items like pasta, rice, cereals, and flour into clear, airtight containers. This saves space and keeps food fresh.
  • Labels: Use labels to identify contents easily. Consider erasable labels for versatility.

3. Optimize Shelf Space

  • Use risers or tiered shelves: These allow you to see and access items at the back without wasting vertical space.
  • Install pull-out drawers: For deep shelves, pull-out drawers make it easier to reach items.
  • Add shelf dividers: These help stack items vertically without toppling over.

4. Utilize Doors and Walls

  • Over-the-door organizers: Hang racks or pockets for spices, sauces, or small snacks.
  • Hooks or magnetic strips: Attach small tools, measuring spoons, or spice tins to maximize wall space.

5. Rotate and Maintain

  • First in, first out (FIFO): Place older items at the front and newer ones at the back.
  • Regular inventory checks: Periodically reassess and tidy up to maintain organization.

6. Invest in Space-Saving Tools

  • Lazy Susans: Perfect for round or corner spaces for small bottles and jars.
  • Stackable bins: Great for fruits, vegetables, or snack bags.
  • Under-shelf baskets: Utilize the space below shelves for additional storage.

7. Customize for Your Needs

  • Create zones: Assign each shelf or section to specific categories (e.g., breakfast items, baking supplies).
  • Adjust shelves: If possible, adjust shelf heights to fit the sizes of your containers and items.

The benefits of vertical storage in kitchens

Vertical storage in kitchens is a space-saving and efficient organizational strategy. Here are the key benefits:

source:pixabay

1. Maximizes Space

  • Utilizes height: Vertical storage takes advantage of unused wall or cabinet height, which is often overlooked.
  • Frees up counters: Items stored vertically keep countertops clutter-free, making your kitchen more functional.

2. Enhances Accessibility

  • Easier to find items: Vertically stored items, like pans or cutting boards, are easier to grab without rummaging through stacks.
  • Improves visibility: Everything is upright and within sight, reducing the risk of forgetting items.

3. Improves Organization

  • Creates dedicated zones: Assign specific vertical racks or dividers for items like lids, trays, or baking sheets.
  • Prevents stacking issues: No need to unstack piles to reach something at the bottom.

4. Protects Fragile Items

  • Prevents damage: Vertical dividers for glassware, dishes, or cutting boards reduce the chance of breakage by keeping items separated.

5. Boosts Kitchen Aesthetics

  • Streamlined look: Vertical racks and shelves can make your kitchen appear tidy and modern.
  • Customizable: Stylish vertical storage solutions can complement your kitchen decor.

6. Encourages Multi-Functionality

  • Dual-purpose spaces: Walls or cabinet doors can double as storage areas with hooks, racks, or magnetic strips.
  • Flexible tools: Adjustable vertical storage solutions can adapt to different kitchen needs.

7. Simplifies Cleaning

  • Reduces clutter zones: Less clutter on flat surfaces means easier and faster cleaning.
  • Minimizes dirt traps: Upright storage leaves fewer areas for dust and crumbs to accumulate.

Final Thoughts

A tidy kitchen isn’t about having the largest space—it’s about making the best use of the space you have. Implementing these 15 space-saving tips can transform your kitchen into an organized haven that inspires creativity and efficiency.

References

  1. “Maximizing Kitchen Space: Organization Ideas,” Better Homes & Gardens.
  2. “Space-Saving Tips for Small Kitchens,” The Spruce.
  3. “How to Organize a Kitchen for Maximum Efficiency,” HGTV.
  4. read more

10 Economical Herbs for Small-Scale Gardening Businesses

Introduction:-

10 Economical Herbs for Small-Scale Gardening Businesses

source:pixabay

Herb gardening is an excellent way to combine your love for plants with an opportunity to earn extra income. Many herbs are low-maintenance, grow well in small spaces, and fetch good prices in markets due to their culinary, medicinal, and aromatic uses. Here are 10 economical herbs that are perfect for small-scale gardening businesses.

10 Economical Herbs for Small-Scale Gardening Businesses

1. Basil

source:pixabay

Why It’s Profitable: Basil is a staple in culinary dishes, especially Italian and Mediterranean cuisines. Its quick growth cycle ensures multiple harvests per season.
Market Uses: Fresh leaves, dried herbs, and basil oil.
Growing Tip: Grow in well-drained soil with plenty of sunlight.

2. Mint

Why It’s Profitable: Mint is highly versatile and in demand for teas, desserts, and beverages. It spreads easily, maximizing yield in small spaces.
Market Uses: Fresh sprigs, dried leaves, and mint essential oil.
Growing Tip: Plant in containers to prevent it from overtaking other plants.

3. Cilantro (Coriander)

Why It’s Profitable: Both the leaves (cilantro) and seeds (coriander) are marketable, making it a dual-purpose herb. It’s widely used in Asian, Mexican, and Indian cuisines.
Market Uses: Fresh herbs, seeds, and spice blends.
Growing Tip: Harvest frequently to encourage continuous growth.

4. Parsley

Why It’s Profitable: Parsley is a garnish favorite and can be grown year-round in mild climates. It has a steady demand in markets and restaurants.
Market Uses: Fresh bunches and dried herbs.
Growing Tip: Choose flat-leaf parsley for culinary markets as it’s preferred over curly varieties.

5. Chives

Why It’s Profitable: Chives are easy to grow, and their mild onion-like flavor makes them popular in soups, salads, and garnishes.
Market Uses: Fresh stalks and edible flowers.
Growing Tip: Regular trimming encourages new growth.

6. Thyme

Why It’s Profitable: Thyme is a hardy perennial with culinary and medicinal uses. It grows well in compact spaces and is drought-resistant.
Market Uses: Fresh sprigs, dried thyme, and essential oils.
Growing Tip: Ensure the soil is well-drained and avoid overwatering.

7. Oregano

Why It’s Profitable: A popular seasoning herb for pizzas and pasta, oregano has a constant demand in the culinary world. It’s hardy and requires minimal care.
Market Uses: Fresh leaves, dried herbs, and oregano oil.
Growing Tip: Prune regularly to maintain compact growth.

8. Rosemary

Why It’s Profitable: This aromatic herb is in high demand for culinary, ornamental, and medicinal purposes. It also grows well in pots and vertical gardens.
Market Uses: Fresh sprigs, dried herbs, and rosemary essential oil.
Growing Tip: Grow in well-drained soil and provide plenty of sunlight.

9. Lavender

Why It’s Profitable: Lavender is highly valued for its fragrance, essential oils, and use in cosmetics and aromatherapy. It thrives in small spaces and can be sold fresh or dried.
Market Uses: Dried flowers, essential oils, and sachets.
Growing Tip: Choose well-drained, sandy soil and ensure full sun exposure.

10. Lemongrass

Why It’s Profitable: Popular in teas, soups, and essential oils, lemongrass is a fast-growing herb with a strong market demand.
Market Uses: Fresh stalks, dried lemongrass, and essential oils.
Growing Tip: Plant in large containers or garden beds with plenty of sunlight.

Tips for a Successful Small-Scale Herb Business

Starting a small-scale herb business can be both rewarding and profitable, but it requires careful planning and execution. Here are some tips to ensure your herb business thrives:

source:pixabay

1. Start Small and Scale Gradually

Begin with a few high-demand herbs that are easy to grow, such as basil, mint, or parsley. Focus on quality and learn the market before expanding your offerings.

2. Understand Your Market

Research your local market to identify the most in-demand herbs. Reach out to potential customers like:

  • Farmers’ markets
  • Grocery stores
  • Restaurants and cafes
  • Wellness centers or spas

3. Choose High-Value Herbs

Focus on herbs that have culinary, medicinal, or aromatic uses and fetch good prices, such as:

  • Culinary herbs (e.g., oregano, thyme)
  • Medicinal herbs (e.g., chamomile, echinacea)
  • Aromatic herbs (e.g., lavender, rosemary)

4. Optimize Your Growing Space

Utilize small spaces effectively by:

  • Growing in containers or vertical gardens.
  • Using companion planting to maximize yield.
  • Selecting compact or dwarf herb varieties.

5. Ensure High-Quality Production

Quality is key to customer satisfaction. Focus on:

  • Organic growing practices.
  • Regular harvesting to keep plants healthy and productive.
  • Proper washing, drying, and storing methods.

6. Diversify Your Products

Expand your business by offering more than fresh herbs. Consider:

  • Dried herbs and teas.
  • Herb-infused oils and vinegars.
  • Essential oils and skincare products.

7. Branding and Packaging

Invest in attractive, eco-friendly packaging that highlights your product’s freshness and quality. Use clear labeling with:

  • Herb name
  • Usage tips
  • Expiration date

8. Leverage Online Platforms

Set up an online store or use platforms like Etsy, Amazon, or social media to reach a wider audience. Showcase your products with high-quality photos and engaging descriptions.

9. Build Relationships with Customers

Customer loyalty is essential for small businesses. Build trust by:

  • Offering samples to potential buyers.
  • Providing excellent customer service.
  • Educating customers about your herbs’ benefits and uses.

10. Keep Learning and Innovating

Stay updated on herb trends and innovations in organic gardening. Explore workshops, webinars, and networking opportunities to expand your knowledge and skills.

11. Maintain Sustainability

Adopt eco-friendly practices, such as:

  • Composting garden waste.
  • Reducing water usage through drip irrigation.
  • Using natural pest control methods.

12. Network with Local Businesses

Partner with local chefs, spas, or wellness centers to showcase your products and create recurring business opportunities.

Conclusion

By combining strategic planning, quality production, and effective marketing, your small-scale herb business can grow into a thriving enterprise. Start small, stay focused, and let your passion for herbs drive your success.

References

  1. National Gardening Association: Growing Herbs for Profit
  2. Healthline: Top Herbs and Their Benefits
  3. Agricultural Marketing Resource Center: Herb Industry Overview
  4. University of Illinois Extension: Herb Gardening Tips
  5. Read more

8 Ways a Faith Community Can Transform Your Life

Introduction:-

8 Ways a Faith Community Can Transform Your Life

Faith communities have been a source of strength, connection, and inspiration for countless individuals. Whether you’re exploring a new spiritual journey or seeking deeper connections, being part of a faith community offers unparalleled opportunities for personal and communal growth. Here are eight ways a faith community can transform your life:

Finding a faith community can be a transformative experience. Whether you’re seeking spiritual growth, emotional support, or a sense of belonging, a faith community can provide numerous benefits that enrich your life. Here are eight ways a faith community can positively impact your life:

8 Ways a Faith Community Can Transform Your Life

source:pixabay

1. Spiritual Growth and Development

Being part of a faith community offers opportunities for spiritual growth. Through worship services, study groups, and spiritual discussions, you can deepen your understanding of your faith, explore new perspectives, and strengthen your personal beliefs.

2. Sense of Belonging

A faith community offers a sense of belonging and connection. Sharing your beliefs and values with others can create a strong bond, fostering a supportive network where you feel understood and accepted.

3. Emotional Support

Life’s challenges are easier to face with a supportive community around you. Faith communities often provide emotional support through prayer groups, counseling services, and simply being there for one another during tough times.

4. Opportunities for Service and Giving Back

Many faith communities emphasize service and giving back to the community. Engaging in volunteer work and charitable activities allows you to make a positive impact and find fulfillment in helping others.

5. Cultural and Social Enrichment

Faith communities often celebrate diverse cultural and social traditions. Participating in these events can enrich your understanding of different cultures and provide opportunities to meet people from various backgrounds.

6. Guidance and Mentorship

Within a faith community, you can find mentors who provide guidance and wisdom. Whether through formal programs or informal relationships, these mentors can help you navigate life’s challenges and grow in your faith journey.

7. Opportunities for Lifelong Learning

Many faith communities offer educational programs and workshops that promote lifelong learning. From theological studies to practical life skills, these opportunities can enhance your knowledge and personal development.

8. Inspiration and Motivation

A faith community can inspire and motivate you to live your life with purpose and intention. Through sermons, teachings, and shared experiences, you can find encouragement to pursue your goals and live according to your values.

Can a faith community improve mental health?

A faith community can play a significant role in improving mental health. By fostering connection, providing support, and promoting healthy coping mechanisms, these communities offer a range of benefits for emotional well-being. Here’s how:

source:pixabay

1. Reduces Feelings of Isolation

Loneliness can be a major contributor to poor mental health. Faith communities provide a sense of belonging and connection, offering regular opportunities to engage with others who share your values and beliefs.

2. Offers Emotional Support

In times of stress or hardship, a faith community can serve as a network of care. Members are often quick to provide encouragement, understanding, and practical help, which can ease feelings of overwhelm and anxiety.

3. Promotes Positive Thinking

Faith-based teachings often emphasize hope, gratitude, and resilience. These perspectives can help reframe negative thoughts and foster a more optimistic outlook, reducing the impact of stress and depression.

4. Encourages Mindfulness Practices

Many faith traditions include practices like prayer, meditation, or worship that promote mindfulness and calmness. These activities are known to reduce stress, lower blood pressure, and improve overall mental clarity.

5. Builds a Supportive Routine

Regularly attending faith-related gatherings provides structure and routine, which can be grounding for individuals struggling with mental health challenges. A steady schedule of positive activities can improve mood and create a sense of stability.

6. Provides Purpose and Meaning

Having a sense of purpose is a key factor in mental well-being. Faith communities encourage members to find meaning in their lives through spiritual growth, acts of service, and connection with a higher power.

7. Offers Access to Counseling Resources

Many faith communities provide access to pastoral counseling or mental health services. Faith leaders often serve as trusted guides, offering both spiritual and practical advice to help members navigate their challenges.

8. Combats Stigma Around Mental Health

Faith communities are increasingly engaging in conversations about mental health, creating safe spaces to address struggles without judgment. This can empower individuals to seek help and share their experiences.

A faith community can be a powerful ally in improving mental health. By fostering connection, encouraging positive practices, and offering support, these communities can help individuals find hope and resilience in their journey toward well-being.

If you’re seeking a holistic approach to mental health, consider exploring the benefits of joining a faith-based group.

How can we connect with the faith community?

Engaging with a faith community can be a rewarding experience that fosters a sense of belonging, support, and shared values. Whether you’re looking to deepen your spiritual journey, volunteer, or simply make new friends, there are several ways to connect effectively. Here are some strategies to help you engage with the faith community:

source:pixabay

1. Attend Services or Events

Most faith communities hold regular services or events that are open to the public. Attending these gatherings can be a great way to meet members and experience the community’s traditions and values firsthand.

  • Worship Services: Participate in weekly services to understand the core beliefs and practices.
  • Special Events: Attend community events, festivals, or religious holidays to engage in cultural and religious traditions.

2. Volunteer

Volunteering is a meaningful way to contribute to the faith community while meeting new people. Many communities have outreach programs that welcome assistance.

  • Community Service Projects: Join initiatives such as food drives, shelter support, or environmental clean-ups.
  • Event Organization: Help organize community events, workshops, or educational programs.

3. Join a Group or Class

Faith communities often offer groups and classes that cater to various interests and age groups. These settings provide opportunities for deeper connection and learning.

  • Study Groups: Participate in study sessions or discussion groups focused on religious texts or topics.
  • Interest-Based Groups: Join groups that align with your hobbies, such as music, art, or sports.

4. Engage with Leadership

Connecting with community leaders can provide valuable insights and guidance on how to become more involved. Leaders often have a wealth of knowledge and can introduce you to others in the community.

  • Schedule Meetings: Arrange a meeting with a pastor, rabbi, imam, or other leaders to discuss your interests and ways to get involved.
  • Attend Leadership Talks: Participate in sessions or lectures led by community leaders.

5. Use Online Platforms

In today’s digital age, many faith communities have an online presence. Engaging with these platforms can be a convenient way to stay informed and connected.

  • Social Media: Follow the community’s social media pages for updates and virtual events.
  • Websites and Newsletters: Subscribe to newsletters or visit the community’s website for the latest news and opportunities.

6. Build Personal Relationships

Personal relationships are at the heart of any community. Take the time to build meaningful connections with individuals and families within the faith community.

  • Invite for a Meal: Host a meal or coffee meeting to get to know others personally.
  • Share Experiences: Be open about your own spiritual journey and listen to others’ stories.

By following these strategies, you can create strong, lasting connections within the faith community. Remember to approach each interaction with openness, respect, and a genuine desire to contribute positively to the community.

Conclusion

Joining a faith community offers more than just spiritual benefits; it enriches emotional, social, and mental well-being. From fostering meaningful relationships to encouraging a sense of purpose, a faith community can truly transform your life in profound ways.

References

  1. Pew Research Center. “Religion’s Relationship to Happiness, Mental Health, and Civic Engagement.”
  2. Psychology Today. “The Health Benefits of Spirituality.”
  3. National Alliance on Mental Illness. “The Role of Faith Communities in Mental Health.”
  4. Harvard Divinity School. “The Power of Belonging in Faith Communities.”
  5. Read more

11 Benefits and Risks of Non-Stick Cookware Every Cook Must Know

Introduction:-

11 Benefits and Risks of Non-Stick Cookware Every Cook Must Know

Non-stick cookware has become a staple in kitchens worldwide due to its convenience and ease of use. However, there’s more to consider than just its non-stick properties. In this article, we’ll explore 11 benefits and risks of non-stick cookware that every cook must know before making an informed decision.

11 Benefits and Risks of Non-Stick Cookware

source:pixabay

Benefits of Non-Stick Cookware

1. Effortless Food Release 

The non-stick coating guarantees that food won’t adhere to the surface, making it easy to cook delicate items such as eggs, pancakes, or fish.

2. Reduced Oil Consumption 

Owing to its smooth surface, non-stick cookware requires minimal to no oil, promoting healthier cooking practices and lowering calorie intake.

3. Easy Cleanup 

Cleaning non-stick cookware is a breeze since food residue easily slides off. Most pieces can be hand-washed in just a few minutes.

4. Lightweight Design 

Non-stick pans are typically lighter than stainless steel or cast-iron options, making them easier to handle, especially for individuals with limited strength.

5. Budget-Friendly 

Non-stick cookware is affordable and readily available, appealing to both novice and seasoned cooks.

6. Versatile Cooking Methods 

Non-stick pans are adaptable tools for a variety of cooking techniques, including frying, sautéing, and even baking.

7. Consistent Heat Distribution 

High-quality non-stick cookware often guarantees even heat distribution, minimizing the risk of food burning or cooking unevenly.

8. Wide Range of Options 

Non-stick cookware is available in various sizes, shapes, and designs, catering to different cooking styles and preferences.

9. Time-Efficient 

Quick cleanup and the requirement for less oil or butter make non-stick cookware a time-saver for busy chefs.

10. Minimizes Food Waste 

With food not sticking, there’s less waste generated, making it an environmentally friendly choice that reduces discarded food scraps.

11. Ideal for Beginners 

Non-stick cookware is excellent for novice cooks due to its forgiving nature and user-friendly design.

Risks of Non-Stick Cookware

1. Risks of Overheating

Non-stick coatings can break down and emit harmful fumes if heated beyond 500°F (260°C). To avoid this danger, always cook on low to medium heat.

2. Limited Durability

Non-stick surfaces can wear out over time, especially with frequent use or improper maintenance, necessitating regular replacements.

3. Possible Chemical Exposure

Older non-stick pans may contain perfluorooctanoic acid (PFOA), which can be harmful. While most modern non-stick cookware is PFOA-free, it’s important to confirm this.

4. Scratching and Peeling Issues

Using metal utensils and abrasive cleaners can scratch or peel the coating, exposing the underlying material and rendering the pan unusable.

5. Not Always Dishwasher Safe

Although some non-stick cookware is labeled as dishwasher safe, frequent washing in the dishwasher can damage the coating and shorten its lifespan.

6. Health Risks from Coating Damage

If non-stick coatings are damaged, they may flake into food, raising concerns about ingesting particles from the material.

7. Environmental Concerns

The production and disposal of non-stick cookware can negatively impact the environment due to the chemicals involved. Choosing eco-friendly brands can help alleviate this issue.

8. Requires Careful Handling

Non-stick cookware needs gentle handling, which includes avoiding high heat and using silicone or wooden utensils.

9. Limited Browning Ability

Non-stick pans are not the best choice for achieving a perfect sear or browning, as they don’t reach the high temperatures of stainless steel or cast iron cookware.

10. Compatibility Issues with Certain Stoves

Some non-stick cookware may not work with induction stoves, which may require additional investment in compatible cookware.

11. Higher Price for Premium Quality

While there are budget-friendly options, high-quality non-stick cookware with advanced coatings can be quite expensive.

Tips for Safe Use of Non-Stick Cookware

To maximize the lifespan of your non-stick cookware and ensure safe use, follow these essential tips:

source:pixabay

1. Avoid Overheating

  • Non-stick coatings can degrade at high temperatures (above 500°F or 260°C).
  • Always cook on low to medium heat to prevent releasing harmful fumes.

2. Use the Right Utensils

  • Avoid metal utensils that can scratch the non-stick surface.
  • Opt for silicone, wooden, or plastic utensils for stirring and flipping.

3. Hand Wash Only

  • Avoid using the dishwasher unless the manufacturer explicitly states it’s safe.
  • Clean with mild detergent, warm water, and a soft sponge to protect the coating.

4. Preheat Safely

  • Do not preheat an empty non-stick pan, as it can overheat quickly.
  • Add oil or food to the pan before turning on the heat.

5. Avoid Abrasive Cleaners

  • Do not use steel wool or abrasive scrubbers to clean non-stick cookware.
  • If food is stuck, soak the pan in warm water before cleaning.

6. Store Carefully

  • Avoid stacking non-stick pans to prevent scratching.
  • If stacking is necessary, place a soft cloth or paper towel between each piece.

7. Replace Damaged Cookware

  • Replace your pan if the non-stick surface is scratched, peeling, or flaking, as it could compromise safety.

8. Follow Manufacturer’s Instructions

  • Read the user manual for specific care tips unique to your non-stick cookware brand.

9. Use Oil Sparingly

  • Although non-stick pans require less oil, adding a small amount can improve the longevity of the coating.

10. Check for PFOA-Free Labels

  • Modern non-stick cookware is often free of harmful chemicals like PFOA. Verify this before purchasing.

11. Don’t Use for High-Temperature Cooking

  • Non-stick cookware is not ideal for browning, searing, or broiling at high heat. Use stainless steel or cast iron pans for such tasks.

By following these tips, you can enjoy the benefits of non-stick cookware while minimizing risks and prolonging its usability.

Is Long-Term Use of Non-Stick Cookware Harmful for Cooking Food?

The long-term use of non-stick cookware can be potentially harmful under specific conditions, largely dependent on the quality and upkeep of the cookware. Here are some important points to keep in mind:

source:pixabay

1. Materials Used in Non-Stick Cookware

   – Traditional Non-Stick Coating (PTFE/Teflon): Many non-stick pans feature a coating of polytetrafluoroethylene (PTFE), commonly referred to as Teflon. This material is generally safe when used at normal cooking temperatures (below 500°F or 260°C). However, overheating can lead to its breakdown, releasing toxic fumes that may pose health risks.

   – PFOA Concerns: Previous non-stick cookware was made with perfluorooctanoic acid (PFOA), which has been associated with health issues, including cancer and hormone disruption. Fortunately, most modern non-stick cookware is now free from PFOA.

2. Health Risks

   – Overheating Hazards: When a non-stick pan is heated beyond its recommended temperature, it can emit fumes that may cause flu-like symptoms in humans (known as “polymer fume fever”) and can be lethal to birds due to their sensitive respiratory systems.

   – Scratched or Damaged Coating: If the non-stick surface becomes scratched or chipped, fragments of the coating can mix with food. While PTFE is generally inert, consuming these particles is not advisable for long-term health.

3. Environmental Impact

   – The manufacturing and disposal of non-stick cookware can lead to environmental pollution, particularly if produced with older, more harmful chemicals like PFOA.

4. Alternatives to Consider

   – Ceramic Cookware: Provides a non-stick surface free from PTFE or PFOA, although its coating may wear off more quickly.

   – Cast Iron or Carbon Steel: Naturally non-stick when properly seasoned and devoid of chemical coatings.

   – Stainless Steel: While not non-stick, it is highly durable and free from chemical coatings.

Conclusion

Non-stick cookware offers undeniable convenience and health benefits, but it comes with risks that should not be ignored. By understanding the benefits and drawbacks, you can make an informed choice about whether non-stick cookware is right for you. Opt for high-quality products, practice proper maintenance, and use them responsibly to enjoy the best of both worlds.

References

  1. Healthline: Non-Stick Cookware Safety
  2. Environmental Working Group: Teflon Dangers
  3. Consumer Reports: Non-Stick Cookware Guide
  4. The Spruce Eats: Care for Non-Stick Pans
  5. read more

12 Safe and Non-Toxic Tips to Remove Mice from Your Property

Introduction:-

12 Safe and Non-Toxic Tips to Remove Mice from Your Property

Dealing with mice in your home can be challenging, but it’s essential to do so in a safe and non-toxic manner to protect your family, pets, and the environment. Here are 12 effective strategies:

12 Safe and Non-Toxic Tips to Remove Mice

source:pixabay

1. Seal Entry Points

  • Inspect your home for gaps and cracks, especially around doors, windows, vents, and pipes. Seal holes larger than ¼ inch with steel wool or caulk, as mice can squeeze through very small spaces.

2. Maintain a Clean Environment

  • Eliminate food crumbs and store pantry items in airtight containers. Regularly clean areas where food is prepared or consumed to discourage mice from seeking shelter.

3. Declutter Indoors and Outdoors

  • Reduce hiding spots by organizing storage areas. Outside, clear clutter such as woodpiles and keep vegetation trimmed to reduce nesting opportunities.

4. Use Essential Oils

  • Natural deterrents like peppermint or clove oil can repel mice. Soak cotton balls in the oils and place them near potential entry points or areas of activity.

5. Adopt a Cat

  • Having a pet cat can naturally deter mice. Even the scent of a feline can discourage rodents from entering your home.

6. Install Ultrasonic Repellers

  • Ultrasonic devices emit sound frequencies that are unpleasant for mice, effectively deterring them without harming other animals or humans.

7. Use Humane Traps

  • Catch-and-release traps are a cruelty-free option. Place bait such as peanut butter inside the traps and release the captured mice far from your home.

8. Eliminate Food Sources

  • Mice are attracted to accessible food. Store pet food, bird seed, and trash in sealed containers, and avoid leaving food or crumbs out overnight.

9. Dryer Sheets and Camphor

  • Placing dryer sheets or sachets of camphor in mouse-prone areas can act as a deterrent, as mice dislike these strong scents.

10. Clear Moisture Sources

  • Fix leaky faucets and pipes. Mice need water, and removing moisture sources makes your home less attractive to them.

11. Compost Management

  • Keep compost bins sealed and well-maintained to prevent mice from accessing food scraps.

12. Professional Help

  • For persistent issues, consider consulting a pest control service specializing in humane and eco-friendly methods.

What scents do mice hate the most?

Mice are highly sensitive to strong smells, which can be used to deter them. Here are some scents that mice reportedly hate the most:

source:pixabay

1. Peppermint Oil

The strong aroma of peppermint oil is overwhelming for mice and acts as a natural repellent. Soak cotton balls in the oil and place them near entry points and areas with mouse activity​

2. Clove Oil

Clove oil has a potent smell that irritates rodents. Like peppermint, it can be applied to cotton balls or -sachets and placed in strategic locations​

3. Ammonia

Ammonia mimics the smell of predator urine, which scares mice. However, use it cautiously indoors due to its strong and potentially harmful odor for humans​

4. Cayenne Pepper

Sprinkling cayenne pepper in areas prone to mouse activity creates an irritant barrier that deters mice​

5. Lavender and Camphor

Mice dislike the scent of lavender and camphor. Using sachets or essential oils in storage areas can help keep them away​

6. Vinegar

The pungent smell of vinegar can repel mice when used as a cleaning agent around entry points and nesting areas​

7. Used Kitty Litter

The scent of a cat’s used litter box can act as a deterrent, as it signals the presence of a predator​

Each of these scents can be used as part of a broader strategy to keep mice at bay. Combining scent deterrents with sealing entry points and maintaining cleanliness will increase effectiveness.

What are the best humane traps for catching mice?

Humane traps are an excellent way to catch mice without harming them, allowing you to release them safely away from your property. Here are some of the best options:

source:pixabay

1. Live Catch Traps

These reusable traps are designed to safely capture mice without injuring them.

  • Features: Baited chambers that close once a mouse enters.
  • Recommended Brands: Tomcat Live Catch Trap, Havahart Two-Door Mouse Trap.
  • How to Use: Place bait (e.g., peanut butter) inside, set the trap near mouse activity, and release captured mice at least 100 yards from your home​

2. Bucket Traps

DIY or store-bought bucket traps involve a bucket and a mechanism to safely trap mice inside.

  • How to Use: A baited ramp leads the mouse into the bucket, where it’s contained without harm.
  • Advantages: Affordable and easy to use​

3. No-Kill Rolling Traps

Rolling traps work by using a rolling mechanism to drop the mouse gently into a holding container.

  • Features: Simple design and effective for catching multiple mice at once.
  • Popular Choice: RinneTraps Rolling Mouse Trap​

4. Electronic Live Traps

Battery-powered traps attract mice into a chamber that closes automatically once they enter.

  • Recommended Brands: Victor Electronic Humane Trap.
  • Advantages: Ensures mice are unharmed while being easy to monitor​

5. DIY Humane Traps

Homemade solutions like a tilted wastebasket or soda bottle trap can catch mice safely.

  • How to Use: Bait the trap with food, and the design ensures the mouse cannot escape once inside​

Tips for Humane Use

When using humane traps for mice, it’s essential to follow these tips to ensure the process remains stress-free for the animal:

1. Check Regularly

Humane traps should be inspected frequently, ideally every few hours. Mice can become dehydrated or stressed if left in a trap for too long, potentially causing harm. Regular monitoring ensures their well-being until release​

2. Safe Release

Relocate captured mice at least 100 yards from your home to prevent them from finding their way back. Choose a natural area with access to food and water sources, such as wooded areas, fields, or near streams. Avoid releasing them in heavily populated urban areas where they might struggle to survive​

3. Handle Traps with Care

When transporting the trap, keep it steady to avoid scaring the mouse. Handle traps gently to reduce stress​

4. Wear Gloves

Wearing gloves prevents transferring human scent to the trap, making it more appealing to mice, and protects you from potential germs during handling​

5. Prevent Reentry

After releasing the mouse, ensure that your home is sealed against reentry by addressing potential entry points and maintaining a clean, clutter-free environment​.

By following these humane practices, you can effectively manage a mouse problem while ensuring minimal harm to the animal and the ecosystem.

Conclusion

By combining these strategies, you can address your mouse problem effectively without resorting to harmful chemicals or inhumane traps. These methods not only protect your home but also the local environment and ecosystem.

References:

  • Bob Vila on natural and humane mouse removal methods【8】.
  • The Old Farmer’s Almanac on eco-friendly pest control tips【9】.
  • Mice Gone Guide on safe and effective trapping techniques【10】.
  • Common Sense Home’s comprehensive guide to mouse prevention and control【11】.
  • read more

Top 7 Tile Cleaning Tips for a Fresh and Hygienic Home

Introduction:-

Top 7 Tile Cleaning Tips for a Fresh and Hygienic Home

Keeping your tiles clean is essential for maintaining a fresh, inviting, and hygienic home. Dirty tiles not only dull the appearance of your space but can also harbor germs and bacteria. Here are seven expert tips to help you restore the sparkle to your tiles and grout.

Top 7 Tile Cleaning Tips

source:pixabay

1. Sweep and Vacuum Regularly

Dirt, dust, and debris can scratch the surface of tiles over time. Start by sweeping or vacuuming your tiles regularly to prevent buildup. Use a soft-bristled broom or a vacuum cleaner with a hard-floor attachment to avoid damage.

2. Use a Homemade Vinegar Solution

For a cost-effective and eco-friendly cleaning solution, mix equal parts of white vinegar and warm water. Spray the mixture onto the tiles, let it sit for 5-10 minutes, and scrub with a soft brush or mop. Vinegar is especially effective for cutting through grease and grime but avoid using it on natural stone tiles like marble or granite.

3. Apply Baking Soda for Stubborn Stains

Create a paste with baking soda and water to tackle stubborn stains. Apply the paste to the stained area, scrub gently with a soft brush, and rinse with warm water. Baking soda is a mild abrasive that works wonders without damaging your tiles.

4. Invest in a Steam Cleaner

Steam cleaning is a powerful and chemical-free way to deep clean tiles and grout. A steam cleaner can remove tough stains, kill bacteria, and refresh your floors without the need for harsh chemicals. It’s particularly useful for bathroom and kitchen tiles.

5. Seal Grout Lines Regularly

Grout is porous and tends to absorb dirt and stains over time. Applying a grout sealer once or twice a year helps protect it from discoloration and makes cleaning easier. Clean the grout thoroughly before sealing to achieve the best results.

6. Use Hydrogen Peroxide for Deep Cleaning

Mix hydrogen peroxide with baking soda for a deep-cleaning paste that works well on grout. Apply it to the grout lines, scrub gently, and rinse. Hydrogen peroxide is a safe bleaching agent that brightens grout and kills mold and mildew.

7. Avoid Harsh Chemicals

While chemical cleaners may seem effective, they can damage tiles and grout over time. Stick to pH-neutral cleaners or natural solutions to preserve the longevity and shine of your tiles. Always test any new cleaner on a small, inconspicuous area before applying it to the entire surface.

Bonus Tip: Regular Maintenance is Key

The best way to keep your tiles looking fresh and hygienic is through regular maintenance. Instead of waiting for dirt and stains to accumulate, incorporate tile cleaning into your routine.

  • Daily Wipe-Down: Use a microfiber cloth or mop to quickly wipe down tiles, especially in high-traffic areas like the kitchen and bathroom.
  • Weekly Deep Clean: Dedicate some time each week to mop or scrub your tiles with a gentle cleaning solution.
  • Check for Damage: Inspect grout lines and tiles for cracks or wear. Addressing minor issues promptly can prevent larger problems down the line.

Consistent care not only keeps your tiles looking their best but also extends their lifespan, saving you time and money in the long run.

Benefits of using baking soda for stubborn stains on tiles

Using baking soda to clean stubborn stains on tiles is effective, eco-friendly, and budget-friendly. Here are some key benefits:

source:pixabay

1. Powerful Stain Removal

  • Baking soda’s mildly abrasive texture helps scrub away tough stains without damaging the tile surface.
  • It works well on grout lines, grease stains, and soap scum.

2. Eco-Friendly Alternative

  • Unlike chemical cleaners, baking soda is natural and safe for the environment.
  • It eliminates the need for harsh chemical products in your home.

3. Safe for Household Use

  • Non-toxic, making it safe to use around children and pets.

4. Deodorizing Properties

  • Helps neutralize odors while cleaning, leaving your tiles smelling fresh.

5. Gentle on Surfaces

  • While abrasive enough to remove stains, it is gentle enough to avoid scratches on tiles or grout.

6. Cost-Effective

  • Baking soda is inexpensive compared to commercial tile cleaners.

7. Versatile

  • Can be mixed with water to create a paste or combined with vinegar or lemon juice for added cleaning power.

How to Use Baking Soda on Tiles

Here’s a step-by-step guide on how to use baking soda effectively to clean tiles and remove stubborn stains:

source:pixabay

1. Gather Your Materials

  • Baking soda
  • Water
  • Soft-bristle brush or sponge
  • Cleaning cloth or mop
  • Vinegar (optional for tough stains)

2. Prepare the Baking Soda Paste

  • In a small bowl, mix 3 parts baking soda with 1 part water to create a thick paste.
  • For extra cleaning power, you can add a few drops of dish soap.

3. Apply the Paste

  • Spread the paste over the stained area using your fingers, sponge, or a brush.
  • Ensure the paste covers grout lines and any tough stains.

4. Let It Sit

  • Allow the paste to sit for 5–15 minutes to break down dirt, grease, or soap scum.

5. Scrub Gently

  • Use a soft-bristle brush, sponge, or an old toothbrush to scrub the area in a circular motion.
  • Pay extra attention to grout lines and heavily stained spots.

6. Rinse with Water

  • Wipe the area clean with a damp cloth or sponge to remove the paste.
  • Rinse thoroughly with clean water to ensure no residue is left.

7. For Stubborn Stains

  • Sprinkle baking soda directly on the stain.
  • Spray white vinegar over the baking soda until it bubbles.
  • Let it sit for 5–10 minutes, then scrub and rinse.

8. Final Touch

  • Dry the tiles with a clean cloth or allow them to air dry.

Tips for Best Results

  • Grout Cleaning: Use a toothbrush to scrub grout lines with the baking soda paste.
  • For Shine: Add a few drops of lemon juice to the paste for added shine and a fresh scent.
  • Regular Maintenance: Clean with baking soda weekly to prevent stubborn stains.

This method is safe, natural, and keeps your tiles looking fresh and clean!

References

  • “How to Clean Tile Floors.” Better Homes & Gardens. Link
  • “7 Homemade Tile Cleaners That Actually Work.” Apartment Therapy. Link
  • “The Ultimate Guide to Grout Cleaning.” The Spruce. Link
  • read more

8 Bible-Based Tips for Connecting More Deeply with Jesus

Introduction:-

8 Bible-Based Tips for Connecting More Deeply with Jesus

A deeper relationship with Jesus brings peace, purpose, and direction to our lives. Strengthening this connection requires intentional effort, grounded in Scripture and guided by faith. Here are 8 Bible-based tips to help you grow closer to Jesus and experience His love more profoundly.

8 Bible-Based Tips for Connecting More Deeply with Jesus

source:pixabay

1. Spend Time in Prayer Daily

Prayer is the cornerstone of a close relationship with Jesus. It’s a time to share your thoughts, seek His guidance, and listen to His voice. Jesus Himself demonstrated the importance of prayer, often retreating to quiet places to commune with the Father (Luke 5:16). Start your day with prayer, and maintain a dialogue with Him throughout.

2. Study and Meditate on Scripture

The Bible is God’s Word, offering wisdom and revealing His character. Meditating on Scripture allows you to understand Jesus’ teachings and grow in faith. Psalm 119:105 reminds us, “Your word is a lamp to my feet and a light to my path.” Dedicate time each day to study the Bible and reflect on its application to your life.

3. Follow Jesus’ Example

One of the best ways to connect with Jesus is by living as He did—loving others, serving selflessly, and walking in obedience to God. John 13:15 says, “I have set you an example that you should do as I have done for you.” By imitating Christ’s actions, you align yourself with His will and deepen your relationship with Him.

4. Worship Regularly

Worship is an act of gratitude and devotion. Whether through singing, praying, or reflecting, worship allows us to honor Jesus and draw nearer to Him. John 4:24 emphasizes that we should worship “in spirit and truth.” Join a church community or create a personal space for worship at home to connect with Jesus meaningfully.

5. Serve Others with Love

Serving others is a tangible way to live out your faith and experience Jesus’ presence. Matthew 25:40 teaches us, “Whatever you did for one of the least of these brothers and sisters of mine, you did for me.” Look for opportunities to help those in need, whether through volunteering, mentoring, or simple acts of kindness.

6. Confess and Repent Regularly

Sin can create distance between us and Jesus, but confession and repentance restore our relationship with Him. 1 John 1:9 assures us, “If we confess our sins, he is faithful and just and will forgive us our sins and purify us from all unrighteousness.” Be honest with Jesus about your shortcomings and seek His forgiveness.

7. Join a Faith Community

Fellowship with other believers helps strengthen your faith and provides accountability. Hebrews 10:24-25 encourages us to “spur one another on toward love and good deeds” and “not give up meeting together.” Join a church or Bible study group where you can grow spiritually and encourage others in their walk with Christ.

8. Trust Jesus Fully

Trust is at the heart of any strong relationship. Proverbs 3:5-6 reminds us to “trust in the Lord with all your heart and lean not on your own understanding.” Surrender your worries, plans, and fears to Jesus, and trust that He will guide you on the right path.

How can serving others help deepen your connection with Jesus?

Serving others can profoundly deepen your connection with Jesus because it mirrors His character, teachings, and mission. Here’s how:

source:pixabay

1. Imitating Christ’s Example

Jesus lived a life of selfless service, saying, “The Son of Man did not come to be served, but to serve” (Matthew 20:28). When we serve others, we follow His example and grow in understanding His heart and humility.

2. Living Out His Commandments

Jesus emphasized loving our neighbors as ourselves (Mark 12:31) and serving the least among us (Matthew 25:40). Serving others allows us to practice obedience to these teachings, bringing us closer to His will.

3. Encountering Jesus in Others

Jesus taught that when we serve others, especially those in need, we are serving Him (Matthew 25:35-40). This perspective transforms service into a sacred act, helping us see Christ in the people we help.

4. Developing Christlike Qualities

Service challenges us to grow in compassion, patience, humility, and selflessness—qualities Jesus exemplified. As we develop these traits, our lives align more closely with His.

5. Deepening Dependence on God

Serving others often pushes us out of our comfort zones, requiring strength, wisdom, and love that can only come from God. This deepens our reliance on Him and strengthens our faith.

6. Strengthening Community and Unity

By serving others, we build relationships and foster unity, reflecting the body of Christ’s interconnectedness (1 Corinthians 12:12-27). This shared purpose helps us experience the love of Christ in community.

7. Experiencing Joy and Fulfillment

Acts of service often bring joy and a sense of purpose, echoing Jesus’ teaching that it is more blessed to give than to receive (Acts 20:35). This joy affirms the abundant life Jesus promised.

Serving others is not just an act of kindness; it’s a spiritual discipline that draws us nearer to Jesus, aligning our hearts with His and transforming our lives.

How does confessing sins and repentance improve your relationship with Jesus?

Confessing sins and repenting are vital for improving your relationship with Jesus because they restore fellowship, demonstrate humility, and open the way for spiritual growth. Here’s how:

source:pixabay

1. Restoring Fellowship with Jesus

Sin creates a barrier between us and God (Isaiah 59:2), but confession removes that barrier. When we acknowledge our sins, we experience God’s forgiveness and cleansing (1 John 1:9), which restores intimacy with Jesus and brings peace to our hearts.

2. Acknowledging Our Need for Him

Confessing sins shows humility and our recognition of needing Jesus’ grace. This act aligns us with His teaching in Matthew 5:3, “Blessed are the poor in spirit, for theirs is the kingdom of heaven.” It deepens our dependence on Him and strengthens our relationship.

3. Receiving His Forgiveness

Jesus promises complete forgiveness to those who repent (Acts 3:19). Experiencing His mercy reminds us of His unconditional love, helping us trust Him more and grow in gratitude.

4. Breaking the Power of Sin

Repentance involves turning away from sin and aligning ourselves with God’s will. This frees us from sin’s hold and allows the Holy Spirit to work in our lives, transforming us into the likeness of Christ (Romans 8:29).

5. Building Spiritual Intimacy

When we repent, we open our hearts to Jesus, fostering honesty and vulnerability. This deepens our spiritual intimacy and allows His truth and love to take root in our lives (Psalm 32:5).

6. Living in Joy and Freedom

Repentance brings spiritual renewal and joy. Psalm 51:12 says, “Restore to me the joy of your salvation.” A clean heart allows us to live in freedom and joy, strengthening our relationship with Jesus.

7. Obeying His Teachings

Jesus calls us to repentance as part of His Gospel message (Mark 1:15). Obedience to this command honors Him and demonstrates our love for Him (John 14:15), further solidifying our connection.

Confession and repentance aren’t just acts of humility; they are acts of trust and love that bring us closer to Jesus and allow His grace to transform our lives.

Final Thoughts

Connecting more deeply with Jesus requires intentionality, commitment, and faith. By incorporating these 8 Bible-based tips into your daily life, you can cultivate a closer relationship with Him and experience His peace and guidance. Remember, Jesus desires a relationship with you—seek Him wholeheartedly, and He will draw near to you (James 4:8).

References

  • The Holy Bible, New International Version (NIV).
  • BibleGateway.com – Verses on prayer, worship, and faith.
  • Crosswalk.com – Articles on growing spiritually and strengthening faith.
  • GotQuestions.org – Insights on living a Christ-centered life.
  • Read more

9 Reasons Poisonous Wasps Are in Your Home and How to Get Rid of Them

Introduction:-

9 Reasons Poisonous Wasps Are in Your Home and How to Get Rid of Them

Wasps, while beneficial in nature, can become a nuisance or a threat when they invade your home. Here are nine common reasons they enter and actionable tips to get rid of them safely.

9 Reasons Poisonous Wasps

source:pixabay

Why Poisonous Wasps Are in Your Home

  1. Food Sources
    Wasps are attracted to sugary substances (like fruit, soda, or syrup) and protein-rich foods, which they need to sustain their colonies. Any uncovered food indoors or leftovers in your trash can lure them in.
  2. Shelter for Nesting
    Cracks in walls, attic spaces, or hollow ceilings provide excellent shelter for wasps to build nests. They seek out warm, enclosed areas, especially during colder months.
  3. Entry Points
    Open doors, windows without screens, or unsealed cracks around vents and utility lines can serve as easy entryways.
  4. Overripe or Fallen Fruits
    If you have fruit trees near your home, unharvested or rotting fruits may attract wasps to your yard and subsequently inside.
  5. Bright Lights
    Wasps are drawn to artificial lighting at night. If your home is lit and doors or windows are left open, they may find their way indoors.
  6. Standing Water
    Wasps need water to survive. Leaky pipes, pet bowls, or birdbaths near your home can encourage their presence.
  7. Sweet Scents
    Floral or sugary-scented perfumes, soaps, or candles can attract wasps looking for nectar-like aromas.
  8. Warmth During Winter
    During cooler months, queen wasps often seek warm places to hibernate, making homes an ideal spot.
  9. Nesting Sites Nearby
    Gardens, dense shrubs, or wooden decks near your home can house nests. Wasps exploring nearby might wander inside.

How to Get Rid of Poisonous Wasps

  1. Seal Entry Points
    Inspect and seal cracks around windows, doors, vents, and utility lines with caulk or weatherstripping to keep wasps out.
  2. Remove Food and Water Sources
    Keep trash cans tightly sealed, clean up spills promptly, and remove any standing water around your home.
  3. Eliminate Attractants
    Avoid using floral or sweet-smelling scents indoors, and ensure fruit or sugary items are stored properly.
  4. Install Traps
    Use commercially available wasp traps or DIY versions using fruit juice and dish soap to lure and trap wasps.
  5. Use Essential Oils
    Natural repellents like peppermint, clove, or lemongrass oils mixed with water can be sprayed in areas where wasps are active.
  6. Apply Wasp Sprays
    Commercial insecticide sprays are effective but should be used cautiously, ideally at night when wasps are less active.
  7. Call a Professional
    For large infestations or hard-to-reach nests, it’s best to contact pest control experts to ensure safety and efficiency.
  8. Regular Yard Maintenance
    Trim overhanging branches and bushes, remove old wood piles, and harvest ripe fruits promptly to reduce nesting opportunities.
  9. Remove Nests Safely
    If you spot a nest, ensure it’s inactive before attempting removal. Wear protective clothing and follow safe disposal procedures or hire professionals.

How do I safely remove a wasp nest near my home?

To safely remove a wasp nest near your home, follow these essential steps:

source:pixabay
  1. Wear Protective Gear
    Always wear protective clothing, such as long sleeves, pants, gloves, and a face shield. Wasps can be aggressive, and their stings can cause severe reactions.
  2. Choose the Right Time
    Remove the nest early in the morning or late in the evening when wasps are less active. At night, most wasps are inside the nest, reducing the risk of stings.
  3. Use Wasp Spray
    Purchase a wasp-specific insecticide spray that can reach the nest from a safe distance (usually 15-20 feet). Spray the nest thoroughly, focusing on the entrance to ensure the wasps are neutralized​
  4. Avoid Disturbing the Nest
    If you decide not to use insecticide, it’s critical not to disturb the nest before you remove it. Directly poking or shaking the nest can provoke the wasps and make them more aggressive.
  5. Remove the Nest
    Once the wasps are dead or inactive, use a long pole or stick to remove the nest carefully. Avoid getting too close and always proceed with caution​.
  6. Dispose of the Nest
    Place the nest in a sealed trash bag and dispose of it far from your home. If the nest is on your property, ensure you dispose of it in an area where other wasps cannot re-establish it.
  7. Hire a Professional
    If the nest is large, difficult to reach, or in a risky location (like under your roof or high in a tree), it’s safest to hire a pest control professional​.

Are there natural ways to repel poisonous wasps?

Yes, there are several natural ways to repel poisonous wasps from your home without using harmful chemicals. Here are some effective methods:

  1. Peppermint Oil
    Wasps dislike the strong smell of peppermint oil. Mix about 10-15 drops of peppermint essential oil with water in a spray bottle and spray it around areas where wasps frequent, such as windows, doors, or near the nest. This creates an unpleasant environment for them​
  2. Cucumber
    Wasps are repelled by cucumber due to its bitter taste. Placing fresh cucumber slices or peels around areas where wasps are a problem can help keep them away. This method works especially well in outdoor spaces​
  3. Clove, Geranium, and Lemongrass Oils
    A mixture of clove, geranium, and lemongrass oils can create a powerful natural repellent. Combine these oils with water and spray them around your home to deter wasps​
  4. Vinegar Spray
    Apple cider vinegar, mixed with water, acts as a natural deterrent. Spray it around areas where wasps are active. Additionally, placing a bowl of vinegar near your home can attract wasps and cause them to leave your area​
  5. Nectar-Like Smells
    Wasps are naturally drawn to sweet and floral smells. By using essential oils like eucalyptus or citronella, which mimic natural deterrents, you can reduce the appeal of your home to these pests

Conclusion

Keeping your home wasp-free involves a mix of prevention and prompt action. By understanding what attracts wasps and addressing these factors, you can reduce the likelihood of an infestation and protect your home from these stinging pests.

References

  1. The Spruce – Offers practical tips for preventing and addressing wasp infestations, such as sealing cracks and eliminating food attractants.
    Read more here​

The Spruce

  1. House Digest – Provides insights into common entry points for wasps and how to seal them effectively, along with other preventative measures.
    Read more here

House Digest

  1. Pointe Pest Control – Explains why wasps are attracted to homes and discusses strategies for removing nests and preventing future infestations.
    Read more here​

Pointe Pest Control

5 Pet Nutrition Trends You Need to Know in 2024

Introduction:-

5 Pet Nutrition Trends You Need to Know in 2024

Pet owners are increasingly prioritizing their furry friends’ health, driving a surge in innovative nutrition trends. As we step into 2024, understanding these trends will help you make informed choices for your pets. Here are the top five pet nutrition trends to watch.

5 Pet Nutrition Trends

source:pixabay

1. The Rise of Organic Pet Food

Organic pet food is gaining immense popularity among pet owners. Made without synthetic pesticides, antibiotics, or artificial additives, organic options provide clean, high-quality nutrition.

  • Why it matters: Organic food reduces the risk of allergies and long-term health issues.
  • Pro Tip: Look for USDA-certified organic labels to ensure authenticity.

2. The Popularity of Raw Diets

Raw diets, also known as BARF (Biologically Appropriate Raw Food), are designed to mimic pets’ ancestral diets. These meals often include raw meat, bones, and fresh vegetables.

  • Benefits: Improved coat health, higher energy levels, and better digestion.
  • Caution: Consult a vet to ensure the diet is balanced and safe for your pet.

3. Grain-Free Diets for Sensitive Pets

Grain-free pet diets continue to be a top choice for pets with allergies or sensitive stomachs. These diets replace grains with alternative carbs like sweet potatoes or peas.

  • Why it’s trending: Many pet owners believe it promotes better digestion and reduces the risk of obesity.
  • What to watch out for: Not all pets require grain-free diets; check with your vet before switching.

4. All-Natural Ingredients Take the Lead

Pet parents are increasingly drawn to foods with simple, natural ingredients. These diets avoid artificial preservatives, colors, and flavors, focusing on wholesome nutrition.

  • Key ingredients: Free-range chicken, wild-caught fish, and farm-fresh vegetables.
  • Label tip: Look for brands emphasizing “real food” ingredients without fillers.

5. Functional Foods for Holistic Health

Functional pet foods are enriched with nutrients targeting specific health issues like joint health, weight management, or coat shine.

  • Examples:
    • Glucosamine for joint support.
    • Omega-3 fatty acids for a shiny coat.
    • Probiotics for improved gut health.

How to Choose the Best Food for Your Pet

Choosing the right food for your pet is crucial for their health, happiness, and overall well-being. With countless options on the market, making the right choice can feel overwhelming. Follow these steps to select the best food tailored to your pet’s unique needs.

source:pixabay

1. Understand Your Pet’s Nutritional Needs

Every pet is different, and their diet should reflect their specific requirements. Factors like age, breed, activity level, and health conditions play a significant role in determining their ideal nutrition.

  • Puppies and kittens: Require higher protein and fat for growth.
  • Senior pets: Benefit from joint-supporting ingredients like glucosamine.
  • Active pets: Need calorie-dense food to match their energy expenditure.

2. Read the Ingredients List Carefully

The ingredients list tells you everything about the quality of the food. Look for:

  • High-quality proteins: Real meat like chicken, beef, or fish should be the first ingredient.
  • Whole grains or alternatives: Brown rice, quinoa, or sweet potatoes for energy.
  • Natural preservatives: Vitamin E and C are better than artificial additives.

Avoid: By-products, artificial flavors, colors, and fillers like corn and soy.

3. Look for Certifications and Standards

Choose pet food brands that meet industry standards for safety and quality.

  • Labels to trust:
    • AAFCO (Association of American Feed Control Officials) compliance.
    • USDA Organic certification for organic products.
    • Non-GMO or grain-free labels, depending on your pet’s needs.

4. Consider Your Pet’s Special Needs

Some pets require specific diets due to allergies, medical conditions, or sensitivities.

  • For allergies: Grain-free or limited-ingredient diets can help.
  • For weight management: Opt for foods labeled “light” or “low-calorie.”
  • For coat health: Foods with omega-3 and omega-6 fatty acids improve skin and fur.

5. Choose Between Wet and Dry Food

Both wet and dry foods have their pros and cons, and the choice depends on your pet’s preferences and health.

  • Dry food: Convenient, helps maintain dental health, and is often more affordable.
  • Wet food: Higher in moisture, beneficial for pets prone to dehydration or kidney issues.

Tip: A combination of both can provide variety and balance.

6. Consult Your Veterinarian

Your veterinarian is the best resource for personalized recommendations based on your pet’s health and lifestyle. Regular check-ups can also ensure that their current diet is meeting their needs.

7. Transition Slowly to New Food

When introducing a new diet, do so gradually over 7–10 days to avoid upsetting your pet’s stomach. Mix increasing amounts of the new food with their current food until the transition is complete.

Choosing the best food for your pet requires attention to their unique needs, careful label reading, and vet guidance. Prioritize quality over price to ensure your furry friend gets the nutrition they deserve.

What type of food should you not give to your pet?

Feeding your pet may seem straightforward, but some foods that are safe for humans can be harmful or even toxic to pets. Knowing which foods to avoid is essential to keeping your furry friends healthy and safe. Here’s a guide to the types of food you should never give to your pets.

source:pixabay

1. Chocolate and Caffeine

Both chocolate and caffeine contain methylxanthines, which are highly toxic to pets.

  • Why it’s harmful: Can cause vomiting, diarrhea, rapid heart rate, seizures, or even death.
  • Safe alternatives: Pet-friendly treats specially designed for dogs or cats.

2. Grapes and Raisins

Grapes and raisins are extremely toxic to dogs and can lead to kidney failure.

  • Symptoms of poisoning: Vomiting, lethargy, and decreased appetite.
  • Better options: Apples (without seeds), bananas, or blueberries.

3. Onions, Garlic, and Chives

These common cooking ingredients can damage red blood cells in pets, leading to anemia.

  • Forms to avoid: Raw, cooked, powdered, or dehydrated versions.
  • Signs of anemia: Weakness, pale gums, or lethargy.

4. Xylitol (Artificial Sweetener)

Xylitol is commonly found in sugar-free gum, candy, and some baked goods. It’s extremely dangerous to pets, especially dogs.

  • Why it’s harmful: Can cause a rapid drop in blood sugar (hypoglycemia) and liver failure.
  • Look out for: Products labeled “sugar-free.”

5. Alcohol and Raw Dough

Even small amounts of alcohol or fermented raw dough can be fatal for pets.

  • Effects of alcohol: Vomiting, difficulty breathing, and central nervous system depression.
  • Raw dough risks: Expands in the stomach, causing severe bloating and discomfort.

6. Cooked Bones

Cooked bones can splinter and cause choking or internal injuries.

  • Safe alternative: Raw, meaty bones that are less likely to splinter (with vet approval).

7. Fatty Foods and Fried Items

Foods high in fat, such as bacon or fried items, can lead to pancreatitis in pets.

  • Symptoms of pancreatitis: Vomiting, abdominal pain, and lethargy.
  • Healthier choices: Lean meats like boiled chicken or turkey.

8. Raw Meat, Fish, or Eggs

While some pets thrive on raw diets, feeding raw foods without proper preparation can expose them to harmful bacteria like Salmonella or E. coli.

  • Risk: Foodborne illness and nutritional imbalances.
  • Ensure safety: Use high-quality, vet-approved raw diets if you choose this route.

9. Dairy Products

Many pets are lactose intolerant, and consuming milk, cheese, or ice cream can lead to digestive upset.

  • Symptoms: Diarrhea, gas, and bloating.
  • Safer options: Lactose-free pet treats.

10. Avocado

Avocado contains persin, which is toxic to birds, rabbits, and some other pets. Dogs and cats are less affected but may still experience stomach upset.

  • Avoid feeding: The flesh, skin, seed, and leaves.

General Tips for Safe Feeding

  1. Read labels: Check for harmful ingredients like xylitol or excessive salt.
  2. Avoid table scraps: Human food often contains seasonings or ingredients harmful to pets.
  3. Provide pet-safe treats: Many commercial options are designed specifically for pets’ dietary needs.

Keeping harmful foods out of your pet’s reach is a critical part of responsible pet care. Stick to a well-balanced diet of pet-safe options and consult your veterinarian with any questions about feeding your pet.

Conclusion

As pet nutrition evolves in 2024, focusing on high-quality, organic, and natural foods can enhance your pet’s health and happiness. Stay informed and prioritize their well-being with these trends.

References

Here are some references that can be cited for an article titled “5 Pet Nutrition Trends You Need to Know in 2024”:

  1. American Veterinary Medical Association (AVMA)
    • Website: https://www.avma.org
    • The AVMA provides insights into the latest veterinary research and trends in pet nutrition, including raw diets and grain-free options.
  2. Pet Food Institute (PFI)
  3. Association of American Feed Control Officials (AAFCO)
    • Website: https://www.aafco.org
    • AAFCO sets nutritional guidelines and standards for pet food labeling, ensuring quality and safety.
  4. American Society for the Prevention of Cruelty to Animals (ASPCA)
    • Website: https://www.aspca.org
    • The ASPCA offers educational resources on pet nutrition and the dangers of feeding harmful foods to pets.

9 Steps to Boost Local Farms and Reduce Environmental Impact

Introduction:-

9 Steps to Boost Local Farms and Reduce Environmental Impact

Supporting local farms is an impactful method to lower your carbon footprint and encourage sustainable farming practices. Here are nine actions you can take to assist local farmers while reducing your environmental impact.

9 Steps to Boost Local Farms

source:pixabay

1. Explore Farmers’ Markets 

Shopping at farmers’ markets guarantees that your produce is fresh and sourced locally. This practice diminishes carbon emissions tied to long-distance food transportation and bolsters the local economy.

2. Enroll in a Community Supported Agriculture (CSA) Program 

By subscribing to a CSA, you can enjoy regular deliveries of fresh produce straight from local farms. This not only secures farmers a reliable income but also provides you with seasonal, fresh food.

3. Select Seasonal Produce 

Choosing fruits and vegetables that are in season cuts down on energy-intensive farming and long-distance transport. Seasonal produce tends to be fresher and richer in nutrients.

4. Minimize Food Waste 

To reduce waste, plan your meals and store food correctly. Composting food scraps can also help replenish soil nutrients, thereby supporting sustainable farming practices.

5. Support Local Food Initiatives 

Engage with local food cooperatives, community gardens, and urban farming initiatives. These efforts often collaborate directly with local farmers and advocate for sustainable food systems.

6. Choose Organic and Non-GMO Products 

Organic farming techniques limit the use of harmful pesticides and fertilizers, fostering healthier soil and ecosystems. When shopping, look for organic and non-GMO labels to back sustainable farming methods.

7. Advocate for Sustainable Policies 

Support legislation and policies that encourage sustainable agriculture and safeguard local farms. Get involved in local governance or join organizations that champion environmental and agricultural initiatives.

8. Educate Yourself and Others 

Familiarize yourself with the advantages of supporting local farms, and share this information with friends and family. Organizing farm tours, attending agricultural workshops, and participating in food education programs can increase awareness.

9. Embrace Sustainable Eating Habits 

Adopt dietary practices that emphasize plant-based meals and lessen meat consumption. Plant-based diets have a lower environmental footprint and support farmers who cultivate fruits, vegetables, and grains.

What are the benefits of supporting local farms?

Supporting local farms offers numerous benefits for both the community and the environment. Here are some key advantages:

source:pixabay

1. Fresh Produce 

Local farms offer fresh, seasonal produce that is typically harvested at its peak ripeness, ensuring superior taste and nutritional value compared to products that have traveled long distances. 

2. Lower Carbon Footprint 

Purchasing locally decreases the need for long-distance transportation, which consequently reduces greenhouse gas emissions. This practice aids in combating climate change and lowers overall environmental impact. 

3. Strengthens Local Economy 

Buying from local farmers keeps money circulating within the community, supporting local jobs and businesses. This economic boost enhances the local economy and encourages community development. 

4. Sustainable Farming Practices 

Many local farmers engage in sustainable farming techniques, such as crop rotation and organic methods, which help maintain soil health, diminish pollution, and encourage biodiversity

5. Decreased Food Waste 

Local farms usually cultivate a diverse range of crops, leading to reduced food waste. Excess produce can be easily shared within the community, minimizing the amount of food that is wasted. 

6. Improved Animal Welfare 

Local farms are more inclined to implement humane animal husbandry practices, providing better living conditions for livestock. This results in healthier animals and higher-quality animal products. 

7. Community Engagement 

Purchasing from local farms nurtures a sense of community. Consumers can interact directly with farmers, learn about their practices, and develop a deeper understanding of the origins of their food. 

8. Preservation of Agricultural Land 

Supporting local farms aids in the preservation of agricultural land and open spaces, preventing urban sprawl and maintaining the rural essence of the community. 

9. Learning Opportunities 

Local farms frequently offer educational experiences through farm tours, workshops, and events, raising awareness about sustainable agriculture and the importance of local food systems. 

10. Resilience and Food Security 

Local food systems tend to be more resilient against disruptions in the global food supply chain. By supporting local farms, communities enhance their food security and lessen their reliance on imported goods. 

How can I reduce my carbon footprint through food choices?

Reducing your carbon footprint through mindful food choices is an impactful way to support environmental sustainability. Here are some practical suggestions to help you make eco-friendly culinary decisions:

source:pixabay

1. Embrace More Plant-Based Foods

   – Transitioning to a plant-based diet can greatly lessen your carbon footprint. Generally, plant-based foods require fewer resources and produce lower greenhouse gas emissions than their animal-based counterparts.

2. Purchase Local and Seasonal Produce

   – Buying fruits and vegetables that are locally grown and in season minimizes the energy needed for transportation and storage. Local produce is usually fresher and has a reduced carbon footprint.

3. Minimize Food Waste

   – Plan your meals, store food correctly, and creatively use leftovers to cut down on food waste. Composting organic waste also helps lower methane emissions from landfills.

4. Select Sustainable Seafood

   – Choose seafood that is certified by sustainable fishing organizations, like the Marine Stewardship Council (MSC). Sustainable seafood options help protect ocean ecosystems and combat overfishing.

5. Prefer Organic and Regeneratively Farmed Foods

   – Organic and regeneratively farmed foods are produced without synthetic pesticides and fertilizers, reducing soil and water pollution. These practices also enhance soil health and biodiversity.

6. Limit Processed and Packaged Foods

   – Processed and packaged foods typically demand more energy for production and create more waste. Opt for whole, minimally processed foods to lessen your environmental impact.

7. Support Fair Trade Products

   – Fair Trade certified items ensure that farmers receive fair compensation and engage in sustainable farming. Supporting these products fosters both environmental and social sustainability.

8. Grow Your Own Food

   – If you can, start a garden to cultivate your own fruits, vegetables, and herbs. Home gardening decreases the need for transportation and packaging while allowing you to manage pesticide and fertilizer use.

9. Cut Back on Red Meat and Dairy

   – The production of red meat and dairy is resource-heavy and emits considerable greenhouse gases. Reducing your intake of these products can significantly decrease your carbon footprint.

10. Educate Yourself and Others

   – Gain knowledge about sustainable food practices and share this insight with friends and family. Encouraging others to adopt eco-friendly food choices can amplify your positive environmental impact.

Making conscious food choices helps reduce your carbon footprint and supports a sustainable food system.

– Supporting local farms benefits both the environment and the community.

– Buying locally provides fresher food and strengthens resilience in food systems.

– Actions like shopping at farmers’ markets or joining a CSA can have a significant impact.

Conclusion

Supporting local farms benefits not just the environment, but also your community. By making these mindful choices, you can lower your carbon footprint, encourage sustainable farming practices, and savor fresh, nutritious food. Even small adjustments in your purchasing and eating habits can create a meaningful positive effect on local farmers and the planet as a whole.

References

  1. U.S. Department of Agriculture (USDA): Farmers Markets
  2. Community Supported Agriculture (CSA) Programs: LocalHarvest
  3. Environmental Protection Agency (EPA): Reducing Wasted Food At Home
  4. Organic Farming Research Foundation: Organic and Non-GMO Products