About Kristan Vihaan

Passionate about sharing knowledge and insights on a variety of topics. As the founder of Daily New Tips, I aim to provide valuable information and practical advice to help you learn and grow.

12 Proven Strategies for a Happier and Smarter You

Introduction

12 Proven Strategies for a Happier and Smarter You

Happiness and intelligence are closely linked—when you feel happy, your brain functions better, and when you engage in learning, you develop a more positive outlook. The good news is that you can train your mind and body to be both happier and smarter by following simple, science-backed habits.

12 Proven Strategies for a Happier and Smarter You

source:pixabay

1. Prioritize Quality Sleep

A well-rested brain performs better in learning, memory retention, and problem-solving. Aim for 7–9 hours of sleep each night.

Tips:
✔ Maintain a consistent sleep schedule.
✔ Avoid screens at least one hour before bed.
✔ Create a relaxing bedtime routine.

Benefits:
✅ Improves mood and reduces stress.
✅ Enhances memory and cognitive functions.
✅ Boosts overall health and energy levels.

2. Practice Gratitude Daily

Expressing gratitude rewires the brain for positivity and emotional resilience.

Tips:
✔ Keep a gratitude journal and write three things you’re thankful for daily.
✔ Express appreciation to others through words or small gestures.

Benefits:
✅ Increases feelings of happiness.
✅ Lowers stress and anxiety.
✅ Improves relationships and emotional intelligence.

3. Read Regularly

Reading stimulates the brain, enhances vocabulary, and improves cognitive skills.

Tips:
✔ Read at least 15–30 minutes per day.
✔ Choose a mix of fiction, non-fiction, and self-improvement books.

Benefits:
✅ Expands knowledge and creativity.
✅ Enhances focus and critical thinking.
✅ Reduces stress and promotes relaxation.

4. Engage in Lifelong Learning

Never stop learning—your brain thrives on new knowledge and challenges.

Tips:
✔ Take online courses or attend workshops.
✔ Try learning a new language or musical instrument.

Benefits:
✅ Strengthens cognitive functions.
✅ Keeps the brain active and prevents memory loss.
✅ Boosts self-confidence and adaptability.

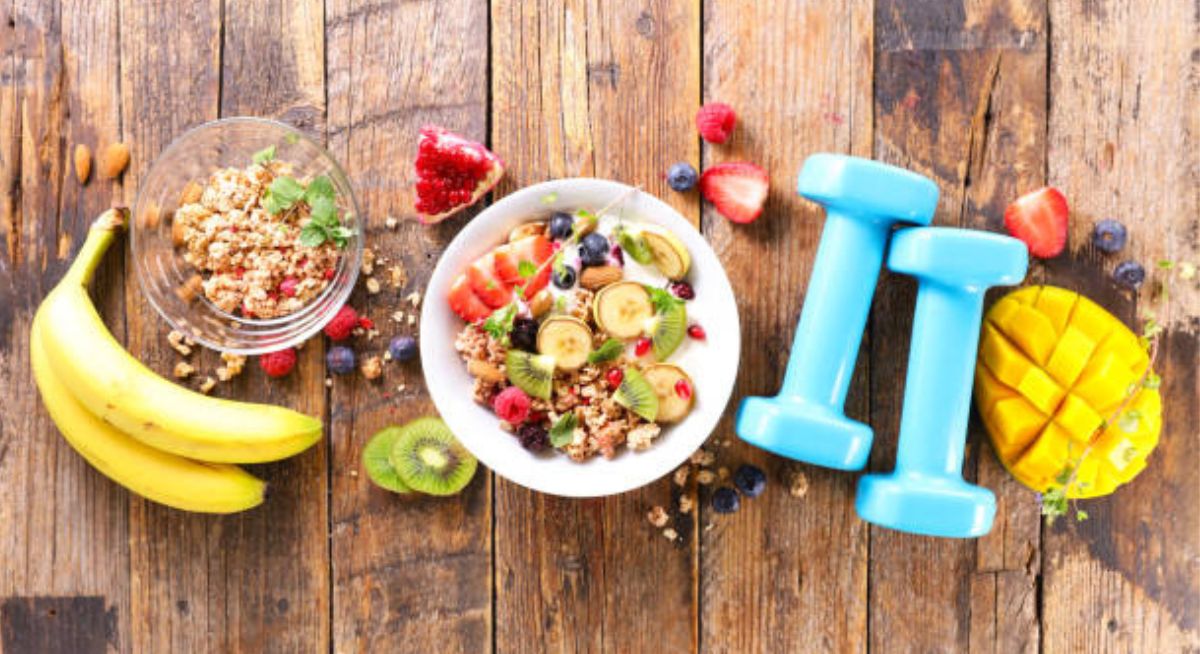
5. Stay Physically Active

Exercise releases endorphins that reduce stress and enhance brain function.

Tips:
✔ Aim for 30 minutes of exercise at least 5 days a week.
✔ Mix cardio, strength training, and yoga.

Benefits:
✅ Improves mental clarity and energy levels.
✅ Reduces the risk of depression and anxiety.
✅ Enhances overall brain function and creativity.

6. Meditate and Practice Mindfulness

Mindfulness improves focus, emotional control, and mental clarity.

Tips:
✔ Start with 5–10 minutes of meditation daily.
✔ Use mindfulness apps like Headspace or Calm.

Benefits:
✅ Reduces stress and anxiety.
✅ Enhances concentration and self-awareness.
✅ Improves emotional well-being.

7. Foster Strong Social Connections

Positive relationships are essential for happiness and mental sharpness.

Tips:
✔ Spend quality time with friends and family.
✔ Join social groups or clubs to meet new people.

Benefits:
✅ Boosts mood and reduces loneliness.
✅ Strengthens emotional intelligence.
✅ Provides emotional support and motivation.

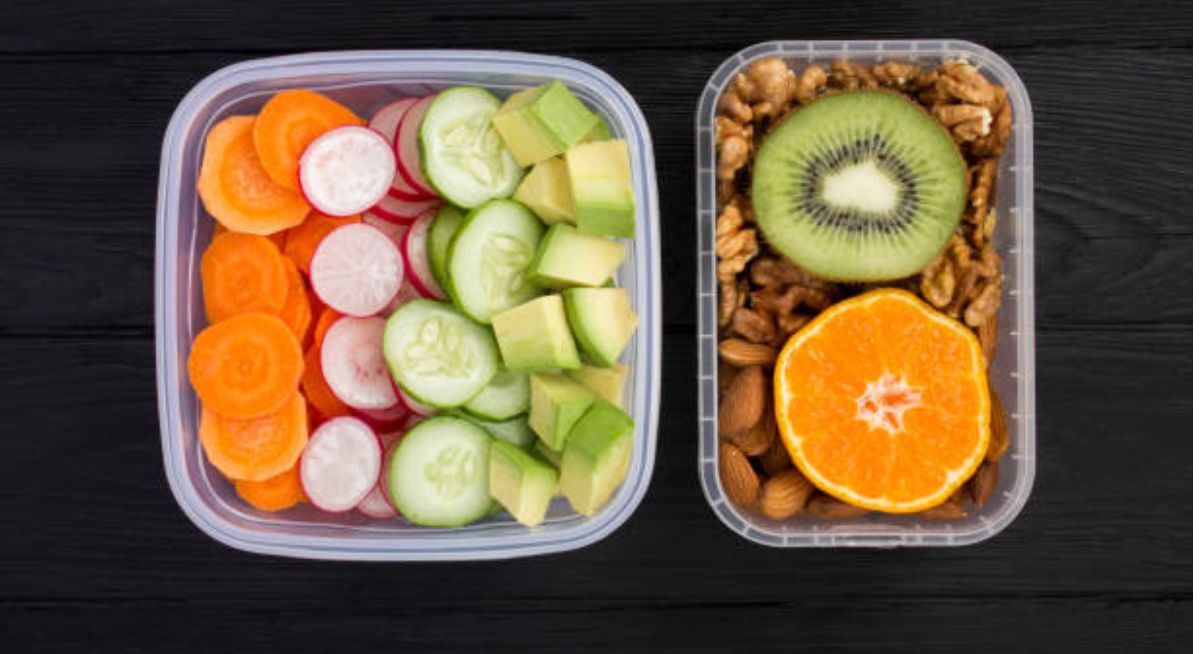
8. Eat Brain-Boosting Foods

Your diet significantly impacts brain health and overall well-being.

Tips:
✔ Eat more omega-3-rich foods (fish, nuts, flaxseeds).
✔ Avoid processed foods and excess sugar.

Benefits:
✅ Enhances memory and cognitive functions.
✅ Reduces brain fog and improves focus.
✅ Supports emotional stability.

9. Limit Screen Time and Social Media

Excessive screen time can lead to stress, anxiety, and reduced attention span.

Tips:
✔ Set daily screen-time limits.
✔ Take digital detox breaks.

Benefits:
✅ Reduces stress and mental fatigue.
✅ Improves real-life interactions and productivity.
✅ Enhances sleep quality.

10. Challenge Your Mind

Mental exercises keep your brain sharp and active.

Tips:
✔ Try puzzles like Sudoku, chess, or crosswords.
✔ Engage in problem-solving activities.

Benefits:
✅ Improves memory and concentration.
✅ Strengthens problem-solving skills.
✅ Delays cognitive decline.

11. Set Goals and Celebrate Progress

Achieving goals boosts self-confidence and motivation.

Tips:
✔ Break large goals into smaller, manageable tasks.
✔ Celebrate even small achievements.

Benefits:
✅ Increases motivation and self-worth.
✅ Enhances productivity and focus.
✅ Provides a sense of purpose.

12. Give Back to Others

Helping others releases dopamine, the happiness hormone.

Tips:
✔ Volunteer for a cause you care about.
✔ Perform random acts of kindness.

Benefits:
✅ Boosts happiness and fulfillment.
✅ Strengthens community and social bonds.
✅ Creates a sense of purpose.

Suggestions for a Happier and Smarter Life

Here are some practical suggestions for living a happier and smarter life:

source:pixabay

For a Happier Life

  1. Practice Gratitude – Keep a gratitude journal and focus on the positives in your life.
  2. Build Strong RelationshipsSurround yourself with supportive and positive people.
  3. Live in the Present – Avoid dwelling on the past or worrying too much about the future.
  4. Prioritize Health – Eat well, exercise, and get enough sleep.
  5. Engage in Activities You Love – Make time for hobbies, creativity, and passions.
  6. Give to Others – Acts of kindness boost happiness and strengthen social bonds.
  7. Simplify Your Life – Declutter your space and focus on what truly matters.
  8. Spend Time in Nature – Being outdoors helps reduce stress and improves mood.
  9. Limit Screen Time – Take breaks from social media and digital distractions.
  10. Pray or Meditate – Spirituality and mindfulness contribute to inner peace.

For a Smarter Life

  1. Read Daily – Books, articles, and research expand your knowledge and perspective.
  2. Stay Curious – Ask questions, explore new topics, and seek continuous learning.
  3. Challenge Yourself – Solve puzzles, play strategy games, or learn a new skill.
  4. Manage Time Wisely – Prioritize tasks, set goals, and avoid procrastination.
  5. Develop Critical Thinking – Analyze situations, think independently, and avoid misinformation.
  6. Surround Yourself with Smart PeopleEngage in meaningful conversations with intelligent and insightful individuals.
  7. Write Down Your Thoughts – Journaling helps organize ideas and enhances creativity.
  8. Embrace Failure as a Learning Opportunity – View mistakes as stepping stones to success.
  9. Take Care of Your Brain – Eat brain-boosting foods, stay hydrated, and exercise regularly.
  10. Teach What You Learn – Explaining concepts to others deepens understanding.

Conclusion

By incorporating these 12 proven strategies, you can improve both your happiness and intelligence. Small daily habits create long-lasting positive changes. Start today, stay consistent, and watch your life transform!

Frequently Asked Questions (FAQs)

1. Can happiness really make me smarter?

Yes! Studies show that a positive mindset enhances cognitive function, creativity, and problem-solving skills.

2. How can I boost my brainpower naturally?

You can boost brainpower by reading, learning new skills, eating healthy, and exercising.

3. What is the best way to develop a lifelong learning habit?

Start with small steps like reading daily, enrolling in online courses, or engaging in stimulating discussions.

4. How much sleep do I need for better brain function?

Adults should aim for 7–9 hours of sleep per night for optimal cognitive function.

5. Can exercise really make me happier?

Yes! Exercise releases endorphins, which reduce stress and boost happiness.

References

  1. Harvard Medical School. “The Benefits of Gratitude for Mental Health.”
  2. National Sleep Foundation. “How Sleep Affects Learning and Memory.”
  3. American Psychological Association. “The Link Between Physical Activity and Brain Health.”
  4. Journal of Neuroscience. “How Meditation Improves Cognitive Function.”

The Top 5 Benefits of Decorating Your Home with Antique Furniture

Introduction

The Top 5 Benefits of Decorating Your Home with Antique Furniture

Antique furniture brings timeless elegance and unique character to any home. Unlike mass-produced modern pieces, antiques offer a rich history, intricate craftsmanship, and lasting durability. Whether you are a vintage enthusiast or simply want to add a touch of classic charm to your home, decorating with antique furniture provides several advantages. Here are the top five benefits of incorporating antique furniture into your home decor.

The Top 5 Benefits of Decorating Your Home with Antique Furniture

source:pixabay

1. Timeless Aesthetic Appeal

Antique furniture never goes out of style. Whether you prefer Victorian, Art Deco, or Mid-Century Modern, these pieces add an element of sophistication and history to your home. Their distinctive designs make them stand out as statement pieces that enhance any interior style.

2. Superior Craftsmanship and Durability

Many antique furniture pieces were handcrafted with high-quality materials, such as solid wood, brass, and iron. Unlike modern, mass-produced furniture, antiques are built to last. Investing in antique pieces means you are bringing home furniture that has already stood the test of time and will continue to do so.

3. Eco-Friendly and Sustainable Choice

Decorating with antique furniture is an environmentally friendly choice. By reusing and repurposing old furniture, you help reduce waste and the demand for new resources. Choosing antiques over newly manufactured furniture also reduces carbon emissions associated with production and transportation.

4. Unique and One-of-a-Kind Pieces

Unlike mass-produced furniture that lacks individuality, antiques have their own stories and character. Each piece is unique, with intricate carvings, hand-painted details, or distinct craftsmanship that cannot be replicated. Adding antique furniture to your home ensures that your decor is truly one of a kind.

5. Great Investment Value

Antique furniture often retains or even increases in value over time. While modern furniture depreciates quickly, well-maintained antiques can become valuable collector’s items. Investing in antiques is not just about style; it’s also a smart financial decision.

Suggestions for Decorating with Antique Furniture

Decorating with antique furniture can add character, charm, and a sense of history to your home. Here are some suggestions to help you incorporate antique pieces seamlessly into your décor:

source:pixabay

1. Blend Old with New

  • Mix antique furniture with modern or contemporary pieces to create a balanced, eclectic look.
  • Use neutral colors to help antique pieces stand out without overwhelming the space.

2. Highlight Statement Pieces

  • Make an antique piece the focal point of a room, such as a vintage dining table, an ornate dresser, or an antique armoire.
  • Use accent lighting to draw attention to the details and craftsmanship.

3. Refurbish and Repurpose

  • Restore old furniture with a fresh coat of paint or new upholstery to match your decor while maintaining its charm.
  • Repurpose antiques, like turning an old wooden trunk into a coffee table or a vintage ladder into a bookshelf.

4. Incorporate Textures and Layers

  • Pair antique wood furniture with soft textiles like linen or velvet for contrast.
  • Use vintage rugs, lace curtains, or embroidered cushions to enhance the antique aesthetic.

5. Use Antiques in Unexpected Places

  • Consider using a vintage vanity in the bathroom or an old writing desk as an entryway table.
  • Antique mirrors can add elegance and make smaller spaces appear larger.

6. Mix Antique Styles

  • Combine different periods and styles, such as a Victorian chair with a rustic farmhouse table.
  • A well-curated mix prevents the space from feeling like a museum.

7. Preserve Natural Patina

  • Let the age and imperfections of antiques shine through rather than over-restoring them.
  • The patina and wear on wood and metal add authenticity and warmth.

8. Accessorize Thoughtfully

  • Pair antique furniture with vintage accessories like old clocks, porcelain vases, or brass candlesticks.
  • Layer framed vintage prints or paintings for an authentic antique look.

9. Consider Functionality

  • Use antique furniture in practical ways, such as a vintage sideboard for extra storage.
  • Ensure pieces are sturdy and comfortable for daily use.

10. Curate a Timeless Look

  • Stick to classic colors and materials like wood, iron, and stone to ensure the space remains timeless.
  • Avoid overly trendy additions that clash with the antique charm.

Final Advice

1. Research History, Authenticity, and Condition

Before purchasing antique furniture, take the time to research its background. Look for details like:

  • Provenance: Where the piece came from and its historical significance.
  • Materials and Craftsmanship: Older furniture is often handcrafted with high-quality materials like solid wood, brass, and hand-cut joinery.
  • Markings and Labels: Some pieces have maker’s marks, serial numbers, or labels that help verify their authenticity.
  • Condition: Check for damages like woodworm, cracks, or missing parts. Minor wear is expected, but extensive damage may require costly restoration.

2. Avoid Overloading Your Space

Too many antiques in one room can make the space feel cluttered and outdated rather than stylish. Instead:

  • Use antiques as statement pieces, such as a grand dining table, a vintage dresser, or an ornate mirror.
  • Balance the look by mixing modern and antique elements for an eclectic but cohesive feel.
  • Keep the layout open and breathable, allowing each antique to stand out rather than compete for attention.

3. Consult an Expert or Antique Dealer

If you’re investing in high-value antiques, an expert opinion can be valuable. They can help you:

  • Identify authentic pieces and avoid reproductions.
  • Determine the fair market value of an item.
  • Offer guidance on preserving and restoring antiques without diminishing their value.
  • Suggest trending antiques or rare finds that could appreciate in value over time.

4. Shop at Estate Sales, Auctions, and Vintage Shops

The best antique finds often come from places like:

  • Estate Sales: Families selling heirlooms and vintage furniture—great for unique, well-kept items.
  • Auctions: Can offer rare and high-quality antiques, but bidding requires careful budgeting.
  • Vintage Shops and Flea Markets: Great for discovering hidden gems at more affordable prices.
  • Online Marketplaces: Websites like eBay, 1stDibs, or Ruby Lane can have good deals, but always verify authenticity before purchasing.

Conclusion

Decorating your home with antique furniture offers more than just aesthetic appeal—it provides durability, uniqueness, sustainability, and investment value. Whether you choose a single statement piece or fully embrace vintage decor, antiques can transform your home into a timeless and elegant space. By incorporating these classic furnishings, you not only enhance your interior design but also contribute to environmental conservation and smart financial investment.

References

  1. Smith, J. (2023). The Art of Antique Furniture Selection. Vintage Press.
  2. Brown, L. (2022). Timeless Decor: Mixing Antique and Modern Pieces. HomeStyle Magazine.
  3. Antique Furniture Association. (2021). A Guide to Authentic Antique Furniture.

FAQs

1. How do I know if my antique furniture is valuable?

Look for manufacturer markings, quality craftsmanship, and historical significance. Consulting an antique expert can also help determine value.

2. Can antique furniture be mixed with modern decor?

Yes! Blending antique and contemporary pieces creates a stylish and unique look that enhances both styles.

3. How should I care for antique wooden furniture?

Avoid direct sunlight, use a gentle wood polish, and regularly dust to maintain its original finish.

4. What’s the best way to restore antique furniture?

Restoration should be done carefully to preserve its value. Use mild cleaning solutions and seek professional restoration for major repairs.

5. Where can I find authentic antique furniture?

Reputable antique stores, estate sales, online auctions, and specialty vintage markets are great places to start.

Avoid These 5 Mistakes While Making a Rope Basket in Just 6 Steps

Introduction

Avoid These 5 Mistakes While Making a Rope Basket in Just 6 Steps

Rope baskets are a trendy and practical addition to any home. Whether you’re looking to create a stylish storage solution or a decorative piece, making a rope basket is a fun and creative DIY project. However, beginners often run into common mistakes that can affect the final result. In this guide, we’ll walk you through 6 easy steps to craft a rope basket while highlighting 5 common mistakes to avoid for a perfect finish..

6 Easy Steps to Make a Rope Basket

source:pixabay

Step 1: Gather Your Materials

Before starting, ensure you have the right materials:

  • Cotton, jute, or synthetic rope
  • Hot glue gun or strong fabric glue
  • Scissors
  • A sturdy base (optional: cardboard, fabric, or a plastic container)
  • A needle and thread (for sewn baskets)
  • Paint, beads, or fabric (for decoration)

Step 2: Choose Your Basket Shape and Size

Decide whether you want a round, oval, or square basket. Use a mold, like a bowl or box, to guide the shape if needed.

Step 3: Start the Coiling Process

Begin by coiling the rope tightly and securing it with hot glue or stitches. This will form the base of your basket. Ensure each coil is firmly attached to avoid gaps.

Step 4: Build the Basket Walls

Gradually continue wrapping the rope upwards, securing it in place as you go. If sewing, use a zigzag stitch to connect the coils.

Step 5: Add Handles or Decorative Elements

For extra functionality, attach rope handles or fabric grips. You can also dye the rope or add beads for a personalized look.

Step 6: Finish and Secure

Once your basket reaches the desired height, cut the rope neatly and secure the end with glue or stitches. Let it dry completely before use.

5 Common Mistakes to Avoid

source:pixabay

1. Using the Wrong Type of Rope

  • Mistake: Choosing a stiff or slippery rope can make coiling and gluing difficult.
  • Solution: Opt for cotton or jute rope, which is easier to handle and adheres well.

2. Not Securing the Coils Properly

  • Mistake: Loose coils can cause the basket to unravel or lose its shape.
  • Solution: Use strong adhesive or stitching to keep the coils tightly bonded.

3. Skipping the Base Support

  • Mistake: Without a sturdy base, the basket may collapse or become misshapen.
  • Solution: Use a solid base like cardboard, fabric, or a plastic mold for added structure.

4. Applying Too Much or Too Little Glue

  • Mistake: Excess glue can create a messy look, while too little may not hold the basket together.
  • Solution: Apply a moderate amount and smooth it out to avoid clumps.

5. Rushing the Drying Process

  • Mistake: Using the basket before the glue has fully dried can lead to weak bonding.
  • Solution: Allow at least 24 hours for the adhesive to set completely.

Tips for a Professional-Looking Rope Basket

A rope basket is a stylish and functional home accessory, and making it look professional requires careful craftsmanship and attention to detail. Here are some tips to achieve a polished, high-quality finish:

1. Choose High-Quality Materials

  • Use sturdy cotton, jute, or synthetic rope for a durable and structured basket.
  • Opt for a strong thread that matches the rope color for seamless stitching.
  • If using glue, go for high-temperature hot glue or fabric glue for a secure hold.

2. Use a Consistent Wrapping or Stitching Technique

  • Keep your stitches or glue lines evenly spaced and uniform for a clean look.
  • If sewing, use a zigzag stitch to securely bind the layers together.
  • If wrapping with fabric or yarn, ensure tight and smooth coverage without gaps.

3. Maintain Shape and Structure

  • Use a mold or bowl as a guide when forming the basket.
  • Apply light steam from an iron to help shape the basket and remove creases.
  • Reinforce the base with extra layers of rope for added stability.

4. Finish the Edges Neatly

  • Tuck in the rope’s raw ends and secure them well with glue or stitching.
  • For an elegant touch, wrap the rim with a decorative trim, fabric, or leather strip.

5. Add Decorative Touches

  • Incorporate handles using leather straps, wooden rings, or rope loops.
  • Personalize with paint, dye, or embellishments like beads, tassels, or labels.
  • Keep the design simple for a modern and sophisticated aesthetic.

6. Ensure a Smooth Interior

  • Trim excess threads and glue strands to prevent a messy look.
  • Consider lining the basket with fabric for a more finished appearance.

How long does it take to make a rope basket?


The time it takes to make a rope basket depends on factors like size, method, and skill level. Here’s a general estimate:

source:pixabay

1. Small Basket (4-6 inches wide)

  • Sewing Method: 1-2 hours
  • Hot Glue Method: 30 minutes to 1 hour

2. Medium Basket (8-12 inches wide)

  • Sewing Method: 2-4 hours
  • Hot Glue Method: 1.5-3 hours

3. Large Basket (12+ inches wide)

  • Sewing Method: 4-6 hours or more
  • Hot Glue Method: 3-5 hours

Factors Affecting Time

  • Experience Level: Beginners may take longer.
  • Complexity: Adding handles, lining, or decorations increases time.
  • Drying Time: If using glue, allow extra time for setting.

Conclusion

Creating a rope basket is a rewarding DIY project, but small mistakes can impact the final result. By following these 6 easy steps and avoiding these 5 common pitfalls, you’ll craft a beautiful and durable basket for your home. Whether for storage, decoration, or gifting, a handmade rope basket is a stylish and functional addition to any space.

FAQs

1. What is the best rope to use for a handmade basket?
Cotton and jute ropes are ideal because they are flexible and easy to work with.

2. Can I make a rope basket without glue?
Yes! You can sew the coils together using a zigzag stitch for a stronger, more durable basket.

3. How do I make my basket more rigid?
Use a sturdy base and reinforce the coils with extra glue or stitching.

4. Can I wash a handmade rope basket?
It depends on the material. Cotton baskets can be spot-cleaned, while jute baskets should be dry-cleaned.

How to Modify Your Pet’s Diet in 7 Days Without Stress

Introduction

How to Modify Your Pet’s Diet in 7 Days Without Stress

Ensuring your pet has a balanced and nutritious diet is crucial for their overall well-being. However, changing your pet’s diet can sometimes be challenging, leading to digestive issues or resistance. If you need to transition your furry friend to a new diet, follow this 7-day plan to make the process smooth and stress-free..

Why Modify Your Pet’s Diet?

Modifying your pet’s diet can greatly improve their health, longevity, and overall well-being. Here are some key reasons why you might need to change their food:

source:pixabay

1. Nutritional Needs Change with Age

  • Puppies and kittens require high-protein, calorie-dense food for growth.
  • Adult pets need a balanced diet for maintenance.
  • Senior pets often require lower-calorie, joint-supporting, or easily digestible diets.

2. Health Conditions and Allergies

  • Food allergies or intolerances (e.g., itching, digestive issues) may require a hypoallergenic or limited-ingredient diet.
  • Pets with diabetes, kidney disease, or obesity benefit from specialized diets to manage their conditions.

3. Weight Management

  • Overweight pets may need portion control and a high-protein, low-carb diet.
  • Underweight pets might need calorie-dense or nutrient-rich food to support their health.

4. Improved Digestion

  • Switching to high-quality ingredients (whole proteins, fiber-rich sources) can improve digestion and reduce bloating, diarrhea, or constipation.

5. Enhanced Coat and Skin Health

  • Omega-3 and omega-6 fatty acids from fish or flaxseed can improve skin condition and make coats shinier.

6. Increased Energy and Vitality

  • Pets fed with nutrient-dense, high-quality ingredients often show more energy and overall better well-being.

7. Preventive Care and Longevity

  • A well-balanced diet can reduce the risk of chronic diseases, keeping your pet healthier for longer.

8. Ethical and Dietary Preferences

  • Some pet owners choose grain-free, organic, or raw diets based on ethical or personal beliefs.

7-Day Pet Diet Transition Plan

The key to modifying your pet’s diet successfully is a gradual transition. Sudden changes can cause stomach upset, diarrhea, or refusal to eat. Here’s a step-by-step guide to transitioning your pet’s food:

source:pixabay

Day 1-2: Introduce Small Amounts of New Food

  • Mix 75% of the old food with 25% of the new food.
  • Observe your pet’s reaction, including stool consistency and appetite.
  • Ensure they drink plenty of water to aid digestion.

Day 3-4: Increase the Ratio

  • Adjust the mix to 50% old food and 50% new food.
  • Monitor for any signs of discomfort, bloating, or decreased appetite.
  • Maintain a consistent feeding schedule.

Day 5-6: Majority New Food

  • Increase the ratio to 75% new food and 25% old food.
  • Your pet should start adjusting to the new diet without issues.
  • Look for improvements in energy levels and coat health.

Day 7: Full Transition to New Food

  • Serve 100% of the new food.
  • Ensure your pet is eating well and maintaining normal digestion.
  • Continue monitoring their behavior and well-being.

Tips for a Stress-Free Diet Modification

Making changes to your diet can feel overwhelming, but with the right approach, it can be a smooth and stress-free experience. Here are some practical tips to help you modify your diet without unnecessary stress:

1. Set Realistic Goals

Start with small, achievable changes instead of drastic overhauls. For example, swap soda for water or add one more serving of vegetables to your meals each day.

2. Plan Your Meals

Meal planning prevents last-minute unhealthy choices. Prepare a weekly meal plan and grocery list to ensure you have nutritious options readily available.

3. Make Gradual Changes

Instead of cutting out unhealthy foods all at once, try reducing portion sizes or replacing them with healthier alternatives over time. This makes the transition easier to maintain.

4. Focus on Nutrient-Dense Foods

Prioritize whole foods like fruits, vegetables, lean proteins, and whole grains to nourish your body while feeling satisfied.

5. Keep Healthy Snacks on Hand

Having healthy snacks such as nuts, yogurt, or fruit can help curb cravings and prevent impulsive junk food choices.

6. Stay Hydrated

Drinking plenty of water helps with digestion, reduces cravings, and keeps you feeling energized throughout the day.

7. Listen to Your Body

Eat when you’re hungry and stop when you’re full. Avoid restrictive diets that make you feel                                       

8. Find Healthy Substitutes

Enjoy your favorite meals in a healthier way. For example, use Greek yogurt instead of sour cream or opt for whole-grain pasta instead of white pasta.

9. Don’t Aim for Perfection

Allow yourself occasional treats without guilt. A balanced diet includes room for flexibility, making it easier to maintain in the long run.

10. Manage Stress and Stay Active

Exercise, meditation, or deep breathing can help reduce stress, making it easier to stick to healthy eating habits.

11. Seek Support

Having a friend, family member, or nutritionist for guidance and motivation can make the transition much smoother.

How long does it take for a pet to adjust to new food?

The time it takes for a pet to adjust to new food depends on the pet’s species, individual sensitivity, and the transition process. Generally:

source:pixabay

Dogs and Cats

  • Gradual Transition (7–10 Days): Most pets adjust well if you slowly introduce the new food over a week. Start with 25% new food mixed with 75% old food, then gradually increase the new food percentage every few days.
  • Digestive Adjustment: Some pets may experience mild digestive upset (loose stools or gas) during the transition, but it should subside as their system adapts.

Small Animals (Rabbits, Guinea Pigs, etc.)

  • Longer Transition (10–14 Days): Their digestive systems are sensitive, so changes should be gradual to avoid issues like bloating or diarrhea.
  • Monitor Eating Habits: Some small animals may refuse new food at first, so patience is key.

Birds

  • Varied Transition Time: Some birds accept new food within days, while others take weeks. Mix the new food with their old diet and offer it alongside familiar foods to encourage acceptance.

Signs of a Smooth Transition

  • Normal stools
  • Steady appetite
  • No vomiting or excessive gas
  • Healthy energy levels

If your pet refuses the new food or has prolonged digestive issues (more than a few days), consult a vet.

Conclusion

Modifying your pet’s diet doesn’t have to be stressful. By gradually transitioning their food over seven days and monitoring their health, you can ensure a smooth and successful change. Always choose high-quality pet food and consult with a veterinarian for the best dietary recommendations.

By following this step-by-step guide, you can help your furry friend enjoy a healthier and happier life!

FAQs

1. How do I know if my pet needs a diet change?
Signs such as digestive issues, allergies, excessive weight gain or loss, and dull coat condition indicate that a diet modification may be necessary.

2. What should I do if my pet refuses to eat the new food?
Try mixing in a small amount of the new food with their favorite treats or warming the food slightly to enhance its aroma. Gradual transition is key.

3. How long does it take for a pet to adjust to new food?
Most pets adjust within 7–10 days, but some may take longer. Monitor their digestion and overall behavior closely.

4. Can I change my pet’s diet suddenly if necessary?
Sudden diet changes may cause digestive upset. However, in cases of allergies or health concerns, consult your veterinarian for the best approach.

5. Are there specific foods I should avoid when modifying my pet’s diet?
Yes, avoid foods that are toxic to pets, such as onions, garlic, chocolate, and high-fat or heavily processed foods.

References

9 Stunning Antique Furniture Trends for a Classic Home Look

Introduction:-

9 Stunning Antique Furniture Trends for a Classic Home Look

Antique furniture has an undeniable charm that adds character and elegance to any home. Whether you are a vintage enthusiast or simply want to create a timeless ambiance, incorporating antique furniture can transform your space. Here are nine stunning antique furniture trends that will give your home a classic and sophisticated look..

9 Stunning Antique Furniture Trends for a Classic Home Look

source:pixabay

1. Ornate Carved Wood Pieces

Intricately carved wooden furniture, such as Victorian-era chairs and cabinets, is making a comeback. These pieces showcase exquisite craftsmanship and add a regal touch to any room.

2. Vintage Upholstered Seating

Chairs and sofas with luxurious upholstery, such as velvet and floral fabrics, are trending. Styles like tufted Chesterfield sofas and wingback chairs bring old-world charm to modern interiors.

3. Distressed and Aged Finishes

Weathered wood and chipped paint finishes provide an authentic vintage look. Whether it’s a French country-style dresser or a rustic farmhouse table, these pieces add warmth and nostalgia to your home.

4. Mid-Century Modern Classics

Furniture from the 1950s and 1960s, characterized by clean lines and tapered legs, is a favorite among antique lovers. Iconic mid-century pieces blend effortlessly with contemporary decor.

5. Gilded Mirrors and Frames

Gold-framed mirrors, ornate picture frames, and gilded accents add a touch of opulence. These pieces create a luxurious and classic aesthetic when paired with antique furniture.

6. Antique Storage Solutions

Vintage cabinets, trunks, and apothecary chests are both stylish and functional. These storage pieces provide a unique way to keep your home organized while enhancing the decor.

7. Reclaimed Wood Furniture

Eco-friendly and full of character, reclaimed wood furniture brings history into your home. Whether it’s a dining table, headboard, or bookshelf, these sustainable pieces add rustic charm.

8. Grand Chandeliers and Light Fixtures

Classic crystal chandeliers and vintage pendant lights instantly elevate any space. These timeless lighting options make a striking statement in living rooms, dining areas, and entryways.

9. Antique Writing Desks and Vanities

Ornate wooden desks and vanities with intricate details are highly sought after. These pieces add sophistication to home offices and bedrooms, making them both stylish and practical.

Tips for Buying Antique Furniture

Buying antique furniture can be a rewarding experience, adding character and history to your home. However, it requires careful consideration to ensure you get authentic, high-quality pieces. Here are some essential tips:

source:pixabay

1. Research Before You Buy

  • Learn about different antique styles and periods (e.g., Victorian, Georgian, Art Deco).
  • Familiarize yourself with common materials and construction techniques.
  • Check market prices to avoid overpaying.

2. Verify Authenticity

  • Look for signs of aging like natural wear, patina, and oxidation on metal parts.
  • Examine joints—dovetail and mortise-and-tenon joints indicate quality craftsmanship.
  • Avoid pieces with excessive modern hardware, which may signal repairs or reproductions.

3. Inspect for Damage and Repairs

  • Minor scratches and wear are normal, but check for deep cracks, woodworm holes, or unstable legs.
  • Ensure that repairs (if any) were done professionally and do not affect the piece’s integrity.
  • Smell the furniture—musty or moldy odors could indicate moisture damage.

4. Consider Functionality and Space

  • Measure the furniture and your available space to ensure it fits well.
  • Check drawers, doors, and hinges to ensure they function properly.
  • If you plan to use it daily, ensure it can withstand regular use.

5. Buy from Reputable Sellers

  • Shop at trusted antique dealers, auctions, or estate sales.
  • Request provenance (history of ownership) when possible.
  • Be cautious with online purchases—ask for detailed photos and return policies.

6. Know the Value and Negotiate Smartly

  • Antique furniture value depends on rarity, condition, and demand.
  • Compare similar pieces before settling on a price.
  • Don’t be afraid to negotiate; many dealers expect it.

7. Understand Restoration and Maintenance

  • Some restoration can enhance value, while over-restoration can reduce authenticity.
  • Learn how to clean and maintain the piece properly (avoid harsh chemicals).
  • Consider professional refinishing if needed but ensure it doesn’t erase the antique value.

By following these tips, you can find timeless antique furniture that enhances your home’s charm and character. Happy hunting!

Suggestions for Styling Antique Furniture

Antique furniture adds character, warmth, and elegance to any space. The key to styling it effectively is balancing old-world charm with modern sensibilities. Here are some suggestions:

source:pixabay

1. Mix Old with New

  • Pair antique furniture with modern décor to create a balanced contrast.
  • For example, place a vintage wooden table in a contemporary dining room.
  • Use sleek, minimalist accessories to prevent an overly cluttered look.

2. Create a Focal Point

  • Highlight a statement antique piece, such as a Victorian dresser or a rustic farmhouse table.
  • Avoid crowding the space—let the antique furniture stand out.
  • Use lighting, like a chandelier or wall sconces, to draw attention to the piece.

3. Play with Textures and Fabrics

  • Complement antique wooden furniture with plush fabrics like velvet or linen.
  • Layer different textures—mix a distressed antique table with a smooth marble vase.
  • Use patterned rugs or tapestry to enhance the vintage aesthetic.

4. Choose a Neutral Backdrop

  • Soft, neutral wall colors (cream, beige, or soft gray) let antique pieces shine.
  • If you want a bold look, deep jewel tones like emerald or navy work well with dark wood antiques.

5. Repurpose and Upcycle

  • Give antique pieces new life—turn an old dresser into a bathroom vanity.
  • Use an antique trunk as a coffee table for both function and style.
  • Reupholster antique chairs with modern fabrics to blend old and new.

6. Mix Styles for Eclectic Charm

  • Don’t be afraid to mix different eras—French Provincial with Mid-Century Modern, for example.
  • Incorporate vintage artwork or mirrors to enhance the aesthetic.
  • Use contemporary lighting fixtures to modernize the space.

7. Add Greenery and Natural Elements

  • Potted plants and fresh flowers soften the look of heavy antique furniture.
  • Place a fiddle-leaf fig beside a vintage cabinet or a small succulent on an antique desk.
  • Woven baskets or ceramic planters add warmth and texture.

8. Balance Formality with Casual Elements

  • Antique furniture can feel formal—soften it with cozy throws, casual seating, or informal arrangements.
  • Use distressed or farmhouse-style antiques for a more relaxed, lived-in feel.

9. Use Statement Lighting

  • A crystal chandelier pairs beautifully with antique furniture for a classic look.
  • Industrial or modern lighting can create an appealing contrast with ornate antiques.
  • Vintage lamps with unique shades enhance authenticity.

10. Keep It Clutter-Free

  • Avoid overcrowding—let each antique piece have breathing room.
  • Stick to a cohesive color palette to create harmony.
  • Use minimal but well-chosen accessories like vintage books, candlesticks, or ceramics.

With the right styling, antique furniture can seamlessly blend into any home, offering timeless elegance and a sense of history. Would you like suggestions for a specific type of antique furniture or room?

Conclusion

Antique furniture trends continue to captivate homeowners and interior designers. By incorporating these timeless pieces, you can create a home that exudes classic beauty and elegance. Whether you opt for a single statement piece or an entire vintage-inspired setup, antique furniture never goes out of style.

References

  1. Smith, J. (2023). The Art of Antique Furniture Selection. Vintage Press.
  2. Brown, L. (2022). Timeless Decor: Mixing Antique and Modern Pieces. HomeStyle Magazine.
  3. Antique Furniture Association. (2021). A Guide to Authentic Antique Furniture.

FAQs

1. How do I know if my antique furniture is valuable?

Check for manufacturer markings, craftsmanship quality, and historical relevance. Consulting an antique expert can also help.

2. Can antique furniture be mixed with modern decor?

Yes! Blending antique and contemporary pieces creates a stylish, eclectic look that is both unique and elegant.

3. How should I care for antique wooden furniture?

Avoid direct sunlight, use gentle wood polish, and regularly dust to maintain its original finish.

4. What’s the best way to restore antique furniture?

Restoration should be done carefully to preserve value. Use mild cleaning solutions and consult professionals for major repairs.

5. Where can I find authentic antique furniture?

Reputable antique stores, estate sales, online auctions, and specialty vintage markets are great places to start

10 Creative Ways to Make a Handmade Rope Basket

Introduction

10 Creative Ways to Make a Handmade Rope Basket

Handmade rope baskets are a stylish and budget-friendly way to enhance home decor while providing practical storage solutions. Whether you’re repurposing old materials or starting from scratch, rope baskets can add a rustic, bohemian, or modern touch to any space. In this guide, we’ll explore 10 creative ways to make a handmade rope basket, along with useful tips, trends, and expert suggestions.

10 Creative Ways to Make a Handmade Rope Basket

source:pixabay

1. Classic Wrapped Rope Basket

One of the simplest ways to create a rope basket is by wrapping an old storage bin or cardboard box with rope and securing it with a hot glue gun. This method is great for beginners and provides a sturdy base for the basket.

2. Braided Rope Basket

For a unique textured look, braid strands of rope before coiling and gluing them together. This method creates a visually appealing and durable basket ideal for home organization.

3. Macramé Rope Basket

If you love intricate designs, try incorporating macramé techniques. Knot the rope in decorative patterns and attach it to a wireframe or woven base for an elegant and artistic touch.

4. Sewn Rope Basket

Using a sewing machine, you can stitch coils of rope together with a zigzag stitch to form a sturdy and flexible basket. This method allows for creative color variations using different thread shades.

5. Dyed Rope Basket

Customize your basket by dyeing the rope in vibrant colors or ombre shades before assembling. Natural cotton rope absorbs dye well and adds a personalized aesthetic to your basket.

6. Fabric-Wrapped Rope Basket

For a cozy look, wrap fabric strips around the rope before coiling and stitching or gluing. This technique adds softness and a pop of color to your handmade basket.

7. Beaded Rope Basket

Incorporate beads by threading them onto the rope before coiling. This detail adds a decorative flair and is perfect for bohemian or eclectic home decor styles.

8. Hanging Rope Basket

Turn your rope basket into a hanging planter or wall storage by attaching leather straps or macramé cords. This is a great way to save space and enhance vertical storage.

9. Jute Rope Basket

For a more rustic look, use jute rope instead of cotton. Jute has a natural, earthy feel that blends beautifully with farmhouse and vintage decor.

10. Embroidered Rope Basket

Add embroidery or appliqué designs onto your rope basket for a unique, personalized touch. This technique works well for gifting or adding a special element to your home decor.

Tips for Making a Perfect Rope Basket

Making a rope basket is a fun and creative DIY project that can add a rustic and handmade touch to your home décor. Whether you’re a beginner or experienced in crafting, these tips will help you create a perfect rope basket:

source:pixabay

1. Choose the Right Rope

  • Cotton, jute, sisal, or synthetic rope works well.
  • Thicker rope (¼ to ½ inch) provides sturdiness, while thinner rope gives flexibility.

2. Select a Strong Base

  • Use a sturdy material like cardboard, wood, or a pre-made basket as a base.
  • If making a fabric-based basket, start with a coiled rope base.

3. Use the Right Adhesive

  • Hot glue is ideal for quick projects but may not be very durable.
  • Fabric glue or E6000 provides a stronger hold.
  • Sewing the coils together with a zigzag stitch on a sewing machine ensures durability.

4. Shape the Basket Gradually

  • Start flat and build the walls slowly by adjusting the angle of the rope.
  • Use clips or pins to hold the shape before securing.

5. Keep the Coils Tight

  • Ensure that each round of rope is tightly pressed against the previous one.
  • For added strength, reinforce with glue, stitches, or both.

6. Add Handles for Functionality

  • Integrate rope loops or attach leather or fabric handles.
  • Sew or glue them securely for durability.

7. Decorate Creatively

  • Dye the rope for a colorful effect.
  • Wrap sections with fabric or yarn for a stylish touch.
  • Use beads, tassels, or paint for personalization.

8. Finish with a Sealant (Optional)

  • If using a rope like jute or sisal, a fabric stiffener or mod podge can add durability.
  • A matte or glossy spray sealant can protect against dust and moisture.

Trends in Handmade Rope Baskets

Handmade rope baskets are gaining popularity due to their versatility, eco-friendliness, and aesthetic appeal. Here are some current trends in rope basket design:

source:pixabay

1. Natural & Sustainable Materials

  • Eco-conscious consumers prefer baskets made from cotton, jute, or sisal.
  • Upcycled and repurposed materials, such as old fabric or recycled rope, are trending.

2. Two-Tone & Ombre Effects

  • Baskets featuring a gradual color fade (ombre) or contrasting colors in the top and bottom sections are stylish.
  • Neutral tones (beige, white, gray) paired with bold accents are in demand.

3. Boho & Rustic Styles

  • Tassels, macramé details, and woven textures give baskets a bohemian look.
  • Natural, unprocessed rope and earthy tones complement rustic home décor.

4. Functional & Multipurpose Designs

  • Rope baskets with handles, lids, or compartments make them more practical for storage.
  • Foldable or collapsible designs add convenience.

5. Decorative Embellishments

  • Baskets are often personalized with leather handles, wooden beads, or fabric lining.
  • Painted patterns, stitched details, and embroidered initials add uniqueness.

6. Hanging & Wall Baskets

  • Rope baskets designed as wall organizers or hanging planters are trendy for small spaces.
  • Circular and oval-shaped hanging baskets add a modern touch.

7. Mini Rope Baskets for Organizing

  • Small baskets for storing jewelry, keys, or bathroom essentials are popular.
  • Nesting basket sets (multiple sizes in the same design) offer stylish organization.

8. DIY & Handmade Appeal

  • Consumers appreciate the uniqueness of handcrafted baskets.
  • Personalized or custom-made rope baskets are in high demand.

Suggestions for Beginners

If you’re a beginner, making a rope basket can be a fun and rewarding DIY project. Here are some beginner-friendly suggestions to help you get started:

1. Start with a Small Basket

  • Begin with a small or medium-sized basket to practice your technique.
  • A simple round or oval shape is easier than complex designs.

2. Choose a Soft and Flexible Rope

  • Cotton rope is the easiest to work with and provides a clean, soft look.
  • Avoid stiff or rough ropes like sisal or jute for your first project.

3. Use a Hot Glue Gun for Easy Assembly

  • Hot glue dries quickly and helps beginners secure the rope in place.
  • Apply small amounts of glue to avoid mess and burns.

4. Use a Pre-Made Base

  • Start with a plastic bowl, cardboard, or an old basket as a base.
  • This helps you maintain the shape without worrying about structure.

5. Keep the Rope Coils Tight

  • Press each coil firmly against the previous one to prevent gaps.
  • Work in small sections to keep control of the shape.

6. Experiment with Colors and Textures

  • Try using two-toned rope or wrapping sections with yarn for a stylish effect.
  • Decorate with ribbons, fabric strips, or pom-poms to personalize.

7. Practice with a Mini Rope Coaster First

  • If you’re unsure, start by making a simple rope coaster.
  • This helps you get familiar with coiling, gluing, or stitching techniques.

8. Be Patient and Have Fun!

  • Don’t worry if your first basket isn’t perfect.
  • Enjoy the process and try different methods to improve your skills.

Conclusion

Making a handmade rope basket is a rewarding and creative project that enhances home decor while promoting sustainability. Whether you prefer a simple wrapped design or an intricate macramé style, there are endless possibilities to explore. With the right materials and a bit of creativity, you can craft a unique and functional rope basket to suit your needs.

FAQs

1. What type of rope is best for making baskets?
Cotton, jute, and synthetic ropes are commonly used. Cotton is soft and easy to dye, jute offers a rustic look, and synthetic ropes are durable for outdoor use.

2. Can I wash a handmade rope basket?
Yes, but it depends on the material. Cotton rope baskets can be spot-cleaned, while jute baskets should be dry-cleaned to maintain their shape.

3. What’s the best glue for making a rope basket?
Hot glue is the easiest to use, but fabric glue or a strong adhesive like E6000 works better for long-lasting results.

4. How do I make my rope basket sturdier?
Using a solid base, tightly coiling the rope, and stitching instead of gluing can improve durability.

5. Can I add handles to my rope basket?
Yes! You can attach leather, fabric, or rope handles for added functionality.

References

  • DIY Craft Blogs & Tutorials
  • Home Decor & Organization Trends Reports
  • Eco-Friendly Crafting Websites
  • Sewing & Knitting Guides

With these creative ideas, you can design a handmade rope basket that’s both functional and stylish. Happy crafting!

25 Genius DIY Home Ideas You’ll Wish You Knew Sooner

Introduction

25 Genius DIY Home Ideas You’ll Wish You Knew Sooner

If you love DIY projects, you’re in for a treat! Whether you want to add a touch of creativity to your home, save money, or make life easier, these 25 genius DIY home ideas will inspire you to transform your space effortlessly..

25 Genius DIY Home Ideas You’ll Wish You Knew Sooner

source:pixabay

1. Peel-and-Stick Backsplash

Give your kitchen or bathroom a facelift with peel-and-stick tiles. They are easy to install, affordable, and come in various styles.

2. Upcycled Furniture Makeover

Transform old furniture with a fresh coat of paint, new handles, or stylish wallpaper to give it a whole new look.

3. Floating Shelves from Reclaimed Wood

Make stylish floating shelves using reclaimed wood to add storage and rustic charm to any room.

4. DIY Chalkboard Wall

Turn a section of your kitchen or home office into a chalkboard wall for notes, grocery lists, or inspirational quotes.

5. Handmade Rope Basket

Wrap an old storage bin with rope and glue for a budget-friendly, trendy storage solution.

6. Mason Jar Organizers

Attach mason jars to a wooden board to create a wall-mounted organizer for bathroom essentials or kitchen utensils.

7. Pallet Wood Coffee Table

Repurpose wooden pallets to create a unique and sturdy coffee table with a rustic vibe.

8. Customized Doormat

Use stencils and outdoor paint to personalize a plain doormat with a fun greeting or design.

9. Fabric-Covered Storage Boxes

Wrap old cardboard boxes in stylish fabric for chic, homemade storage solutions.

10. DIY Pegboard Wall Organizer

Create a pegboard wall in your garage, office, or craft room to keep tools and supplies neatly arranged.

11. Handmade Wall Art

Paint, stencil, or use fabric scraps to create custom wall art that reflects your personality.

12. Washi Tape Accent Wall

Use colorful washi tape to create temporary patterns or designs on walls without damaging the paint.

13. DIY Under-Bed Storage

Attach wheels to wooden crates to create rolling storage bins that fit neatly under the bed.

14. Corkboard Headboard

Turn a large corkboard into a headboard to pin photos, notes, or fabric swatches.

15. Plant Hanger with Macrame

Create your own macrame plant hanger to add a boho touch to your indoor garden.

16. Repainted Tile Floors

Use tile paint and stencils to update old tiles without the need for expensive replacements.

17. DIY Window Seat

Add a cozy reading nook by building a simple window seat with storage underneath.

18. Reclaimed Wood Headboard

Build a rustic or modern headboard using repurposed wood planks for a budget-friendly bedroom upgrade.

19. Homemade Scented Candles

Melt wax and add essential oils to create custom-scented candles in decorative jars.

20. Painted Brick Fireplace

Give your outdated fireplace a new look with a coat of heat-resistant paint.

21. DIY Hanging Planter

Upcycle an old colander or basket to make a stylish hanging planter for your garden or balcony.

22. Glow-in-the-Dark Pathway Stones

Paint garden stones with glow-in-the-dark paint to create a magical nighttime pathway.

23. Picture Frame Earring Holder

Turn a vintage frame and mesh wire into a chic earring organizer.

24. Ladder Blanket Holder

Repurpose an old wooden ladder into a stylish holder for blankets or towels.

25. Hidden Charging Station

Drill a hole in a decorative box to create a concealed charging station for your electronics.

Tips for Successful DIY Projects

source:pixabay
  1. Start Small – Begin with simple projects to gain experience before moving on to more complex tasks.
  2. Plan Ahead – Outline your steps, gather materials, and understand the process before starting.
  3. Use Quality Materials – Investing in good materials ensures durability and a professional finish.
  4. Measure Twice, Cut Once – Double-check measurements to avoid costly mistakes.
  5. Stay Organized – Keep tools and materials neatly arranged to work more efficiently.
  6. Follow Safety Guidelines – Wear protective gear and use tools properly to prevent accidents.
  7. Be Patient – Rushing can lead to errors; take your time for the best results.
  8. Learn from Mistakes – Every mistake is a learning opportunity, so don’t get discouraged.
  9. Be Creative – Add your personal touch to make the project unique and tailored to your style.
  10. Have Fun – Enjoy the process and take pride in your DIY accomplishments!

Suggestions for Beginners

DIY Tips for Beginners
  1. Start with Simple Projects – Choose easy projects to build confidence and skills.
  2. Gather the Right Tools – Invest in basic tools like a hammer, screwdriver set, measuring tape, and utility knife.
  3. Follow Instructions – Read guides, watch tutorials, and follow step-by-step instructions carefully.
  4. Practice Safety First – Wear protective gear and handle tools properly to avoid injuries.
  5. Take Your Time – Rushing can lead to mistakes; work patiently for better results.
  6. Learn from Mistakes – Errors are part of the learning process—analyze them and improve next time.
  7. Stay Organized – Keep your workspace tidy to work more efficiently.
  8. Use Quality Materials – Good materials lead to a more durable and polished final product.
  9. Ask for Help if Needed – Don’t hesitate to seek advice from experienced DIYers or professionals.
  10. Enjoy the Process – Have fun and take pride in creating something with your own hands!

Conclusion

With these genius DIY ideas, you can enhance your home without spending a fortune. Whether you’re looking for storage solutions, home decor, or clever upcycling tricks, these projects will make your home more stylish and functional.

References

  • Home Improvement Blogs
  • DIY YouTube Tutorials
  • Interior Design Magazines

FAQs

1. What are the easiest DIY home projects for beginners?

Simple projects like mason jar organizers, customized doormats, and fabric-covered storage boxes are great for beginners.

2. How can I make my home look stylish on a budget?

Use affordable DIY tricks like repainting furniture, making homemade wall art, and using peel-and-stick wallpaper.

3. What tools do I need for most DIY home projects?

Basic tools include a hammer, screwdriver set, measuring tape, glue gun, and paintbrushes.

4. Are DIY projects really cost-effective?

Yes! Many DIY projects repurpose old materials, saving you money compared to buying new items.

5. Where can I find more DIY inspiration?

Follow home decor blogs, Pinterest, and YouTube channels dedicated to DIY projects.

Which DIY idea are you excited to try first? Let us know in the comments!

10 Easy Ways to Reduce Dirt and Dust in Your Home

Introduction

10 Easy Ways to Reduce Dirt and Dust in Your Home

Dust and dirt are constant battles in every household. Not only do they make your living space look messy, but they also contribute to allergies, respiratory issues, and overall discomfort. The good news is that keeping your home dust-free doesn’t have to be difficult. With the right strategies, you can minimize dirt and dust and create a cleaner, healthier living environment.

In this article, we’ll explore 10 easy ways to reduce dirt and dust in your home, so you can breathe easier and enjoy a spotless space.

10 Easy Ways to Reduce Dirt and Dust in Your home

source:pixabay

1. Keep Shoes at the Door

Shoes track in dirt, bacteria, and dust from outside. Create a designated spot at your entryway for shoes, and encourage family and guests to remove their footwear before entering the house.

2. Use Doormats Inside and Out

Place sturdy doormats on both sides of every entrance. Mats help trap dirt before it spreads inside, reducing the amount of dust that accumulates in your home.

3. Vacuum Regularly with a HEPA Filter

Dust and allergens settle deep into carpets and rugs. Vacuum at least twice a week using a vacuum with a HEPA filter, which effectively traps small particles instead of releasing them back into the air.

4. Dust from Top to Bottom

When dusting, always start from the highest surfaces (like shelves and ceiling fans) and work your way down. This ensures dust doesn’t fall onto already-cleaned areas.

5. Change HVAC Filters Frequently

Dirty air filters can circulate dust throughout your home. Replace your HVAC filters every 2-3 months to improve air quality and reduce airborne particles.

6. Mop Hard Floors Weekly

Sweeping alone often stirs up dust. After vacuuming, use a damp mop on hardwood, tile, and vinyl floors to capture lingering dust and dirt.

7. Keep Pets Groomed

Pets contribute to dirt and dander. Regularly brushing and bathing your pets helps reduce the amount of hair, skin flakes, and dirt that end up on your floors and furniture.

8. Declutter Your Home

The more items you have, the more surfaces there are for dust to settle on. Keep your home simple and organized by minimizing knick-knacks and other dust-collecting objects.

9. Wash Bedding and Curtains Often

Dust mites thrive in fabrics. Wash sheets, pillowcases, and blankets at least once a week, and clean curtains and drapes every few months to eliminate hidden dust.

10. Use an Air Purifier

Air purifiers with HEPA filters help remove dust particles from the air. Place them in high-traffic areas or bedrooms to improve indoor air quality and reduce airborne dust.

Extra Tips to Reduce Dust in Your Home

Here are some extra practical tips to reduce dust in your home that go beyond the usual vacuuming and wiping:

source:pixabay

1. Upgrade Your Air Filters

  • Use HEPA filters in your HVAC system to trap tiny particles.
  • Change filters regularly (every 2-3 months).

️ 2. Cover Bedding and Mattresses

  • Use dust mite-proof covers on pillows, mattresses, and box springs.
  • Wash bedding weekly in hot water to kill dust mites.

3. Make a No-Shoes Policy

  • Shoes track in dirt and dust. Keep a shoe rack by the door and offer slippers.

4. Use an Air Purifier

  • Place HEPA air purifiers in commonly used rooms like bedrooms and living areas to continuously reduce airborne dust.

5. Ditch Fabric Soft Surfaces

  • Swap out heavy curtains for washable blinds.
  • Choose leather or vinyl furniture over fabric when possible.

6. Clean from Top to Bottom

  • Dust high surfaces like ceiling fans and shelves first so the dust falls and you can vacuum it last.

7. Seal Cracks and Gaps

  • Dust sneaks in through small gaps in windows and doors. Apply weather stripping or caulking where needed.

8. Groom Pets Regularly

  • Brush your pets outside to reduce dander and loose fur.
  • Wash pet bedding often.

9. Reduce Clutter

  • Less stuff means fewer surfaces for dust to collect.
  • Organize shelves and clear off counters.

10. Keep Humidity Levels in Check

  • Use a humidifier if your air is too dry. Aim for around 40-50% humidity to keep dust from becoming airborne.

Suggestions for Maintaining a Dust-Free Home

Here are some practical suggestions for maintaining a dust-free home:

source:pixabay

1. Adopt a Regular Cleaning Routine

  • Dust surfaces at least twice a week using a microfiber cloth to trap dust instead of spreading it.
  • Vacuum carpets, rugs, and upholstery with a HEPA-filter vacuum to capture fine dust particles.

2. Improve Indoor Air Quality

  • Use HEPA air purifiers in frequently used rooms.
  • Keep air vents and filters clean and change them every 2-3 months.

3. Control Dust Entry

  • Place doormats at all entry points to trap dirt and dust from shoes.
  • Create a no-shoes policy indoors.

4. Keep Bedding Fresh

  • Wash pillowcases, sheets, and blankets weekly in hot water.
  • Use dust mite-proof covers on pillows and mattresses.

5. Choose the Right Cleaning Tools

  • Use microfiber cloths instead of feather dusters, which spread dust.
  • Opt for damp mopping on hard floors instead of sweeping.

6. Manage Pet Dander

  • Bathe and brush pets regularly to reduce shedding.
  • Keep pet bedding clean and vacuum areas where they rest.

7. Reduce Clutter

  • Store items in sealed containers instead of open shelves.
  • Minimize decorative fabric items like throw pillows and stuffed animals.

8. Maintain Floors and Furniture

  • Vacuum carpets and rugs at least twice a week.
  • Use washable slipcovers on furniture for easy cleaning.

9. Control Indoor Humidity

  • Keep humidity levels around 40-50% to prevent dust from becoming airborne.
  • Use a humidifier or dehumidifier as needed.

10. Deep Clean Periodically

  • Wash curtains and blinds every few months.
  • Dust hard-to-reach areas like ceiling fans, vents, and baseboards.

Conclusion

Reducing dirt and dust in your home doesn’t have to be complicated. By following these 10 easy steps, you can maintain a cleaner, healthier, and more comfortable living space. A consistent cleaning routine, combined with smart habits like removing shoes at the door and using an air purifier, will keep dust and dirt under control.

Remember, a dust-free home isn’t just about appearances—it’s about creating a healthier environment for you and your family to thrive. Start small, stay consistent, and enjoy the benefits of a cleaner home today!

📚 References

💬 FAQs About Reducing Dirt and Dust

Q1: How often should I dust my home?

A: For the best results, aim to dust surfaces at least once a week, with high-traffic areas needing more frequent attention.

Q2: Why does my home get so dusty so fast?

A: Common reasons include poor air circulation, old carpets, outdoor dust entering through windows and doors, and pet dander.

Q3: Do air purifiers really help with dust?

A: Yes! Air purifiers with HEPA filters capture fine dust particles and can significantly reduce airborne allergens.

Q4: What are the health effects of dust in the home?

A: Excess dust can trigger allergies, asthma, and other respiratory issues. Keeping your home clean reduces these health risks.

Q5: Can houseplants help reduce dust?

A: While they don’t eliminate dust, some plants improve air quality, which can indirectly support a cleaner home environment.

10 practical tips How to Save Money on Kitchen Gadgets

Introduction

10 practical tips How to Save Money on Kitchen Gadgets

Kitchen gadgets can make cooking more efficient and enjoyable, but they can also be expensive. However, with the right strategies, you can equip your kitchen with essential tools without overspending. Here are some practical tips to help you save money on kitchen gadgets.

10 practical tips How to Save Money on Kitchen Gadgets

source:pixabay

1. Prioritize Your Needs

Before buying any kitchen gadget, evaluate whether you truly need it. Many trendy gadgets seem useful but often end up collecting dust in the cupboard. Focus on essential tools that you use regularly, such as knives, cutting boards, and mixing bowls.

2. Opt for Multi-Purpose Gadgets

Instead of buying separate gadgets for different tasks, invest in multi-functional tools. For example, a food processor can chop, slice, and puree, eliminating the need for multiple appliances. A blender with different attachments can serve as both a smoothie maker and a food chopper.

3. Look for Sales and Discounts

Keep an eye on seasonal sales, holiday discounts, and clearance events to score great deals on kitchen gadgets. Black Friday, Cyber Monday, and end-of-season sales are excellent times to buy appliances at reduced prices. Signing up for store newsletters can also give you access to exclusive discounts.

4. Consider Buying Second-Hand or Refurbished Gadgets

Many high-quality kitchen gadgets, such as stand mixers or air fryers, are available as refurbished models at a fraction of the original price. Check reputable online marketplaces, thrift stores, and certified refurbished sections on manufacturer websites to find great deals.

5. Compare Prices Online

Before purchasing any gadget, compare prices across multiple online retailers. Websites like Amazon, Walmart, and Best Buy often have competitive pricing and customer reviews to help you make an informed decision. Use price comparison tools and browser extensions to track the best deals.

6. Buy in Sets or Bundles

Many kitchen gadgets come in sets or bundles at a lower price than buying individual items. For example, purchasing a cookware set instead of individual pots and pans can help you save money. Look for value packs that include multiple tools you need.

7. Choose Energy-Efficient Appliances

Investing in energy-efficient kitchen gadgets can save money in the long run by reducing electricity consumption. Look for gadgets with an ENERGY STAR rating or low-power consumption features.

8. Take Advantage of Cashback and Rewards Programs

Use credit cards that offer cashback on purchases or sign up for store loyalty programs that provide discounts and points on kitchen gadgets. Apps like Rakuten or Honey can also help you earn cashback and find promo codes.

9. DIY Instead of Buying Specialized Gadgets

Some kitchen gadgets are designed for specific tasks that can be done manually. Instead of purchasing a dedicated avocado slicer, use a knife. A rolling pin can often replace a tortilla press. Simplifying your kitchen tools can save both money and storage space.

10. Read Reviews Before Buying

A cheap kitchen gadget isn’t a bargain if it breaks after a few uses. Read customer reviews and product ratings to ensure you’re getting a durable, high-quality gadget. Investing in a well-made product once is better than replacing a poor-quality item multiple times.

Additional Tips for Saving Money on Kitchen Gadgets

Here are some additional tips for saving money on kitchen gadgets:

source:pixabay

1. Prioritize Multi-Use Gadgets

Instead of buying single-purpose items, opt for multi-functional tools like a food processor that can chop, blend, and shred or an Instant Pot that works as a pressure cooker, slow cooker, and more.

2. Shop Secondhand

Look for gently used kitchen gadgets on platforms like Facebook Marketplace, eBay, or thrift stores. Many people sell high-quality appliances at a fraction of the original cost.

3. Wait for Sales and Discounts

Keep an eye out for major sales events like Black Friday, Cyber Monday, or holiday promotions at retailers like Amazon, Walmart, and Target.

4. Use Coupons and Cashback Offers

Check manufacturer websites, apps like Honey, or credit card cashback programs to get extra savings when purchasing kitchen gadgets.

5. Read Reviews Before Buying

Avoid wasting money on poor-quality gadgets by checking online reviews and customer ratings. Websites like Wirecutter, Consumer Reports, and Amazon reviews can help you make an informed decision.

6. Consider Manual Gadgets Over Electric Ones

Manual tools, such as a hand-powered chopper or a French press, are often more affordable, last longer, and don’t consume electricity.

7. Buy in Sets When Possible

If you’re planning to buy multiple gadgets, consider purchasing a set, such as a knife set or a cookware bundle, which is usually cheaper than buying individual pieces.

8. Stick to Essential Gadgets

Avoid unnecessary gadgets that take up space and money. Focus on must-have kitchen tools like a chef’s knife, cutting board, measuring cups, and mixing bowls.

9. Sign Up for Store Newsletters

Many retailers offer discounts to first-time subscribers. Signing up for email alerts can also keep you updated on upcoming sales and exclusive promotions.

10. Compare Prices Across Retailers

Before purchasing, use price-comparison websites or tools like Google Shopping to find the best deal on a specific gadget.

Final Thoughts

Saving money on kitchen gadgets is all about being smart with your purchases. Prioritize essentials, buy multi-purpose tools, look for discounts, and invest in durable products. By following these tips, you can enjoy a well-equipped kitchen without breaking the bank.

Do you have any budget-friendly kitchen gadget recommendations? Share them in the comments below!

Common FAQs About Saving Money on Kitchen Gadgets

1. Are expensive kitchen gadgets worth the price?

Not always. While some high-end brands offer durability and advanced features, many affordable options perform just as well. Read reviews and compare specifications before making a decision.

2. Where can I find the best deals on kitchen gadgets?

You can find great deals online at Amazon, Walmart, and Best Buy. Check for discounts during major sales events like Black Friday and Prime Day.

3. Is it safe to buy refurbished kitchen gadgets?

Yes, if you buy from reputable sellers or certified refurbished programs. These products are tested and often come with a warranty.

4. What are the must-have kitchen gadgets for a budget-conscious home cook?

Some essential budget-friendly gadgets include a sharp chef’s knife, cutting board, mixing bowls, measuring cups, and a hand blender.

5. How can I tell if a kitchen gadget is good quality?

Look for durable materials like stainless steel, read customer reviews, and check the warranty. Avoid gadgets with flimsy plastic parts.

References

  1. Consumer Reports – “Best Budget Kitchen Gadgets for Home Cooks”
  2. The Spruce Eats – “Top Multi-Purpose Kitchen Tools to Save Money and Space”
  3. Good Housekeeping – “How to Buy Kitchen Appliances on a Budget”
  4. Wirecutter – “The Best Affordable Kitchen Gadgets and Tools”
  5. Energy Star – “Energy-Efficient Kitchen Appliances Guide

14 Innovative Kitchen Gadgets That Simplify Meal Prep

Introduction

14 Innovative Kitchen Gadgets That Simplify Meal Prep

Cooking at home can be both enjoyable and time-consuming. With the right kitchen gadgets, meal prep becomes faster, easier, and more efficient. Whether you’re an experienced chef or a busy home cook, these 14 innovative kitchen gadgets will help you save time, reduce effort, and enhance your cooking experience.

14 Innovative Kitchen Gadgets

source:pixabay

1. Electric Vegetable Chopper

Tired of chopping onions and other veggies by hand? An electric vegetable chopper quickly dices and slices your ingredients, making meal prep a breeze.

2. Adjustable Measuring Spoon

Instead of cluttering your kitchen with multiple measuring spoons, an adjustable measuring spoon lets you measure different quantities with one tool.

3. Multi-Function Peeler

A peeler that not only removes skins but also juliennes vegetables can save time and space in your kitchen.

4. Garlic Press with Scraper

Mincing garlic can be a hassle, but a garlic press with a built-in scraper ensures you get every bit of flavour into your dish without the mess.

5. Silicone Food Storage Bags

Reduce plastic waste and keep your ingredients fresh with reusable silicone food storage bags. They are freezer-friendly and easy to clean.

6. Smart Meat Thermometer

Achieve perfectly cooked meat every time with a smart thermometer that connects to your phone and alerts you when your food reaches the ideal temperature.

7. One-Click Butter Cutter

source:pixabay

Evenly slice butter with one simple press—perfect for baking and spreading on toast.

8. Avocado Slicer and Patter

Easily cut, pit, and slice avocados with a multi-functional avocado slicer, saving time and reducing mess.

9. Automatic Pan Stirrer

If your recipe requires constant stirring, an automatic pan stirrer does the work for you, freeing up your hands for other tasks.

10. Collapsible Cutting Board with Strainer

This space-saving cutting board includes a built-in strainer, making it easy to wash and drain vegetables while cutting.

11. Magnetic Spice Jars

Keep your spices organized and within reach with magnetic spice jars that attach to your fridge or a magnetic board.

12. Oil Spray Bottle

Control the amount of oil you use while cooking with a refillable oil spray bottle, reducing waste and making meals healthier.

13. Egg Separator Tool

Quickly separate egg yolks from whites with a simple tool, perfect for baking and healthy cooking.

14. Instant Pot or Multi-Cooker

A must-have for busy home cooks, an Instant Pot or multi-cooker combines multiple cooking functions into one appliance, saving time and effort.

Tips for Choosing the Right Kitchen Gadgets

Choosing the right kitchen gadgets can make cooking more enjoyable and efficient. Here are some useful tips to help you select the best kitchen tools:

1. Identify Your Needs

  • Consider the type of cooking you do most often.
  • Avoid buying gadgets that you will rarely use.

2. Check Quality and Durability

  • Look for stainless steel, BPA-free plastic, or silicone materials.
  • Choose reputable brands known for long-lasting products.

3. Consider Multi-Functionality

  • Opt for gadgets that serve multiple purposes, like a food processor with different attachments.
  • Saves space and money.

4. Easy to Clean and Maintain

  • Dishwasher-safe gadgets save time and effort.
  • Avoid tools with too many small parts that are difficult to clean.

5. Storage and Space Consideration

  • If you have a small kitchen, choose compact or foldable gadgets.
  • Wall-mounted or stackable storage options help keep your kitchen organized.

6. Energy Efficiency

  • If buying electrical gadgets, look for energy-efficient options.
  • Saves electricity and reduces your utility bills.

7. Read Reviews and Recommendations

  • Check customer reviews before making a purchase.
  • Watch video demonstrations to see the gadget in action.

8. Set a Budget

  • Don’t overspend on trendy gadgets that might not be useful.
  • Invest in essentials first, like a good knife set, cutting board, and mixing bowls.

Conclusion

Upgrading your kitchen with these innovative gadgets can make meal prep faster, easier, and more enjoyable. Whether you’re chopping, slicing, or cooking, these tools help you save time and effort while enhancing your cooking experience. Invest in the right kitchen gadgets and transform your culinary routine today!

FAQs

1. Are these gadgets suitable for beginners?
Yes, most of these gadgets are designed to make cooking easier for both beginners and experienced cooks.

2. Where can I buy these kitchen gadgets?
You can find them on online marketplaces like Amazon, Walmart, or in local kitchen supply stores.

3. Do these gadgets require a lot of maintenance?
The level of maintenance depends on the type of kitchen gadget. Here’s a breakdown:

Low-Maintenance Gadgets (Easy to clean and care for)

Silicone and Stainless-Steel Utensils – Dishwasher-safe and resistant to rust.
Manual Tools (Peelers, Graters, Whisks) – Quick rinse or dishwasher cleaning.
Non-Electric Cutting Boards – Just wash with soap and water, occasionally oil wooden boards.

Moderate-Maintenance Gadgets (Require some care)

🔹 Blenders & Food Processors – Need regular cleaning, especially blades and seals.
🔹 Cast Iron Cookware – Requires seasoning and proper drying to prevent rust.
🔹 Coffee Makers – Need descaling every few weeks to prevent buildup.

High-Maintenance Gadgets (Need frequent or special care)

Air Fryers & Toasters – Must be cleaned often to prevent grease buildup.
Stand Mixers & Juicers – Have multiple small parts that need thorough washing.
Knives – Require regular sharpening and proper storage to maintain quality.

4. Are these kitchen gadgets budget-friendly?
Kitchen gadgets come in a wide price range, so whether they are budget-friendly depends on your needs and choices. Here’s a breakdown:

Budget-Friendly Gadgets ($10 – $50)

Manual Tools – Peelers, graters, whisks, measuring cups, and spatulas.
Basic Utensils – Wooden spoons, tongs, and silicone baking mats.
Affordable Appliances – Hand mixers, immersion blenders, and electric kettles.

Mid-Range Gadgets ($50 – $150)

🔹 Multi-Functional Tools – Air fryers, slow cookers, food processors.
🔹 Quality Knife Sets – Good stainless steel knives last longer.
🔹 Specialty Cookware – Cast iron skillets, non-stick pans, or Dutch ovens.

High-End Gadgets ($150 and above)

Premium Blenders & Stand Mixers – Like Vitamix or KitchenAid.
Smart Kitchen Appliances – Instant Pot, high-tech coffee makers, or sous vide machines.
Professional Cookware – Copper pans, induction cookware, or high-end knife sets.

How to Save Money on Kitchen Gadgets

Look for Sales & Discounts – Shop during Black Friday, holiday sales, or clearance events.
Buy Multi-Purpose Gadgets – A food processor can replace multiple tools.
Invest in Essentials First – Start with quality knives, a cutting board, and cookware before adding specialty gadgets.

References

  1. Smith, J. (2023). The Modern Home Chef’s Guide to Essential Kitchen Tools. Food Press.
  2. Kitchen Tech Reviews. (2024). “Top 10 Kitchen Gadgets to Speed Up Meal Prep.” Retrieved from www.kitchentechreviews.com
  3. Home Cooking Magazine. (2023). “The Best Kitchen Gadgets for Busy Cooks.”
  4. read more