About Kristan Vihaan

Passionate about sharing knowledge and insights on a variety of topics. As the founder of Daily New Tips, I aim to provide valuable information and practical advice to help you learn and grow.

4 Budget-Friendly Tips for Hosting a Chic May 2025 Brunch

Introduction

4 Budget-Friendly Tips for Hosting a Chic May 2025 Brunch

Hosting a stylish brunch doesn’t have to mean overspending. With a few smart strategies and creative flair, you can throw a chic and memorable May 2025 brunch without draining your wallet. Whether you’re celebrating Mother’s Day, a spring birthday, or just soaking up the sunny Sunday vibes, these four budget-friendly tips will help you entertain with elegance and ease.

📝 4 Budget-Friendly Tips for Hosting a Chic May 2025 Brunch

source:pixabay

1. Create a Stylish DIY Decor Setup

Skip store-bought decorations and opt for budget-friendly DIY touches that elevate your space:

  • Use mason jars or repurposed glass bottles as vases.
  • Craft simple paper garlands or handwritten menu cards.
  • Style with seasonal flowers or greenery from your backyard or local farmers market.

Bonus Tip: Soft pastel napkins, white plates, and a simple table runner can go a long way in achieving a minimalist chic look.

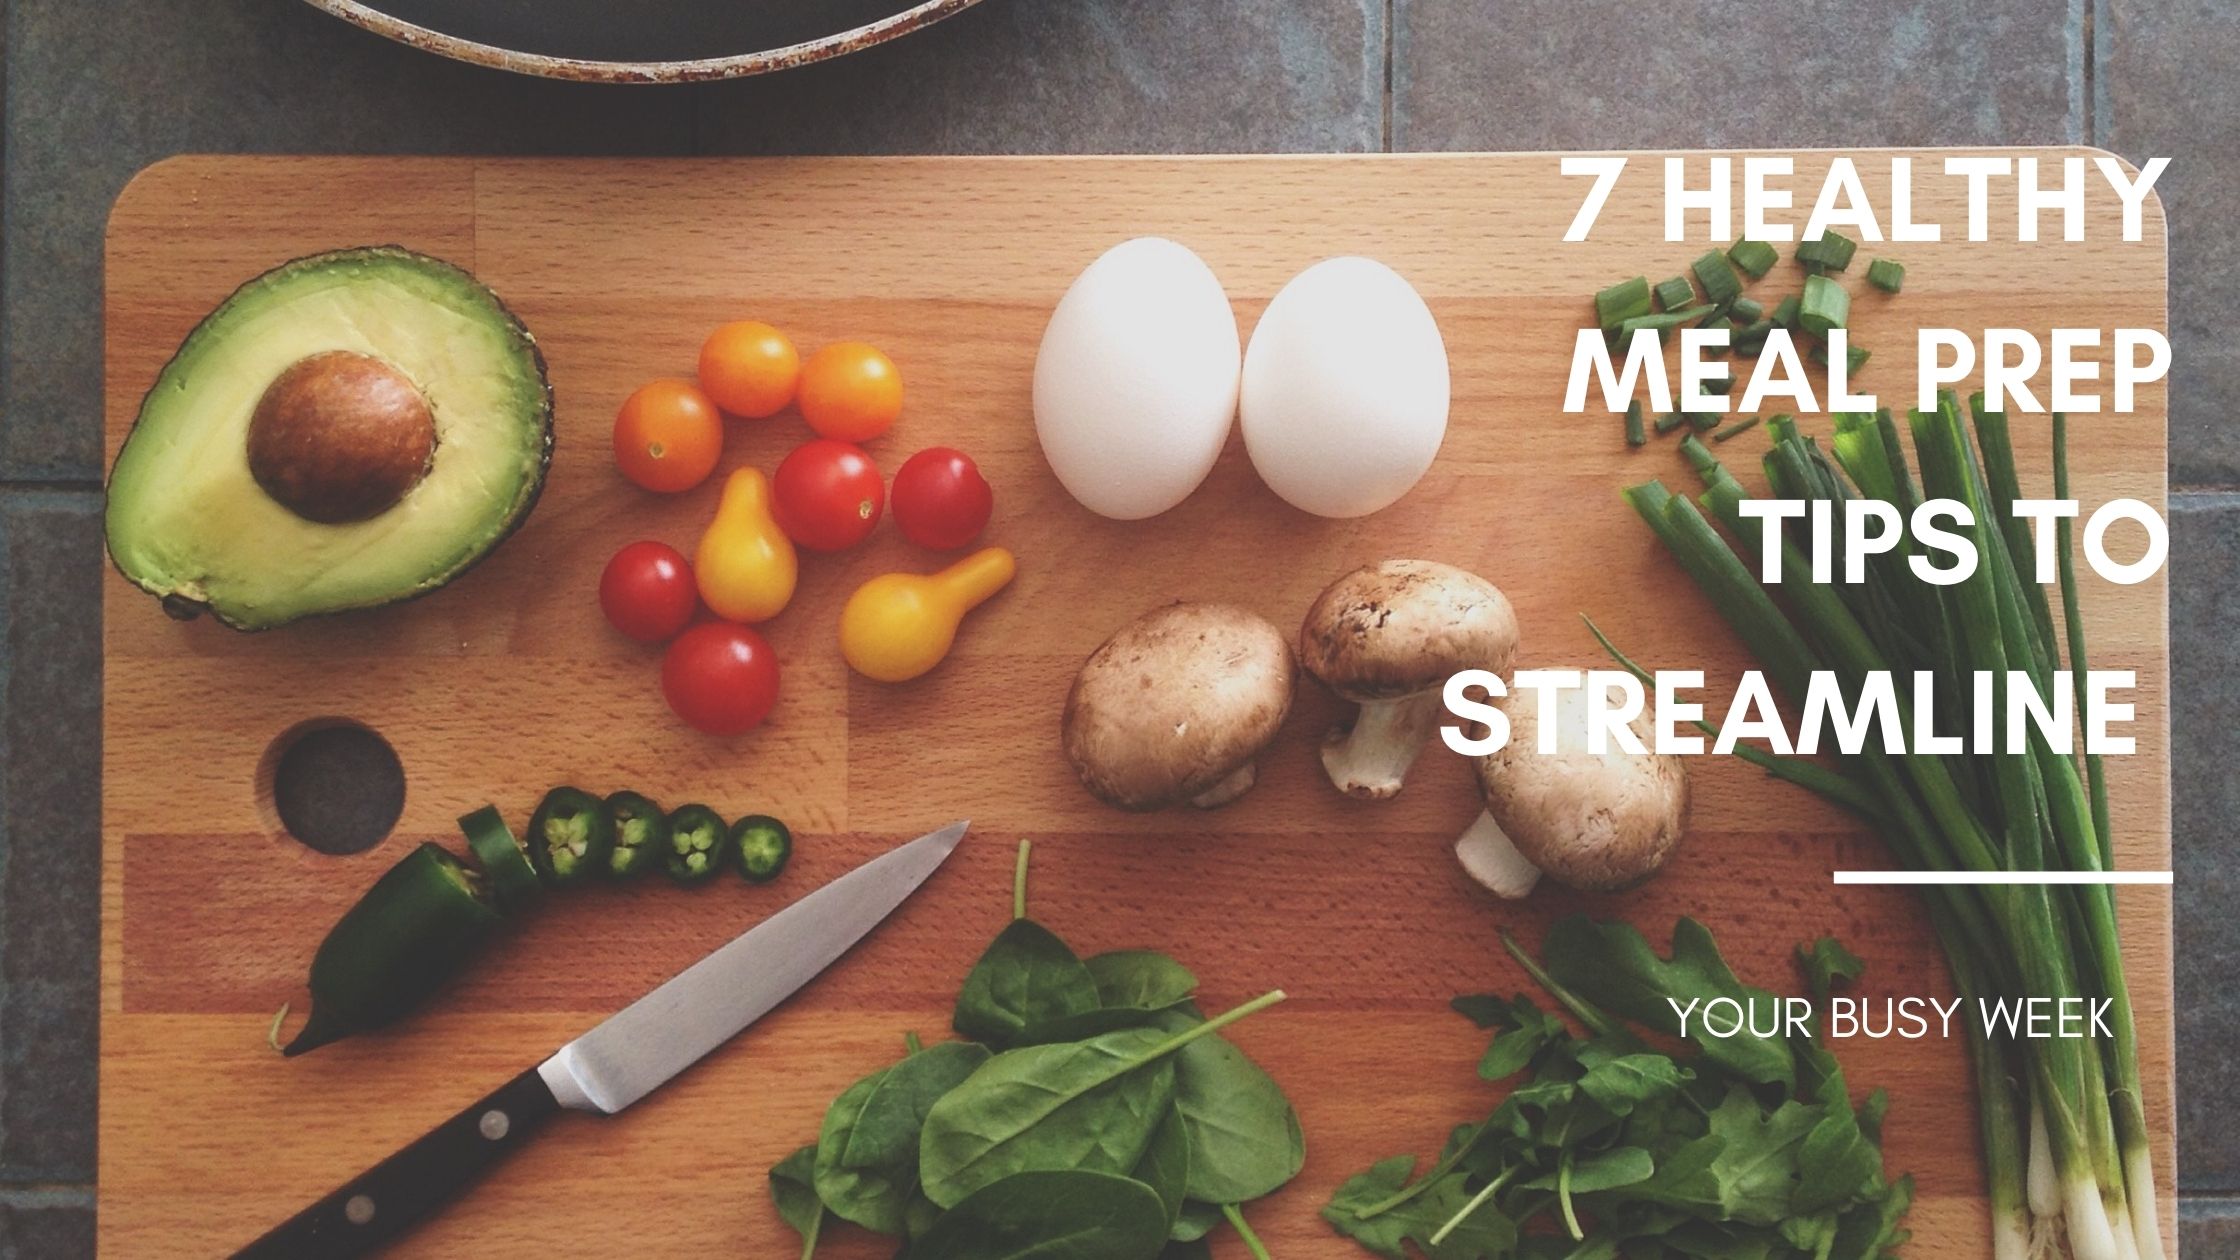
2. Cook Smart with Make-Ahead Dishes

Focus on affordable, make-ahead recipes that serve a crowd:

  • Vegetable frittata or mini quiches are inexpensive and filling.
  • Bake a French toast casserole the night before.
  • Offer a simple fruit salad with a honey-lime drizzle.

Cooking at home saves significantly compared to catering or ordering out, and you control the ingredients and flavor.

3. Build Your Own Brunch Bar

Interactive stations are trendy and cost-effective:

  • Set up a DIY bagel bar with cream cheese, cucumbers, and boiled eggs.
  • Try a pancake or waffle bar with affordable toppings like fruits, syrups, and whipped cream.
  • A coffee and tea station with flavored syrups and reusable mugs adds charm and saves on beverages.

Why It Works: Guests love customization, and you can buy ingredients in bulk or use what you already have.

4. Limit the Guest List for Quality Over Quantity

Keep it intimate by inviting 4–6 guests. A smaller group:

  • Reduces food and decor costs
  • Allows more personalized touches
  • Enhances conversation and comfort

Hosting fewer people means you can spend a bit more on presentation or ingredients without going over budget.

✅ Benefits of a Budget-Friendly May Brunch

Here are some benefits of a budget-friendly May brunch:

source:pixabay
  1. Cost Savings
    A budget-friendly May brunch allows you to enjoy a fun, social meal without breaking the bank. You can prioritize affordability by preparing simple yet delicious dishes or hosting a potluck where everyone contributes.
  2. Encourages Creativity in Cooking
    When you’re working with a budget, you’re more likely to get creative with ingredients and recipes. This can lead to discovering new, budget-friendly dishes that are just as satisfying as more expensive ones.
  3. Healthier Eating Options
    Hosting a budget-friendly brunch often means using fresh, seasonal ingredients, which are healthier and more affordable than processed foods. You can incorporate fruits, vegetables, and whole grains, making the meal both nutritious and delicious.
  4. Time for Quality Conversations
    Without the pressure of overspending on extravagant food or decor, you can focus more on the quality of the gathering. A relaxed, budget-friendly brunch allows you to connect with friends and family, encouraging meaningful conversations and bonding.
  5. Sustainability
    Preparing a brunch with local, in-season ingredients can support sustainability. By avoiding expensive, imported ingredients, you can reduce your environmental impact and encourage more eco-friendly choices in your meals.
  6. Flexibility in Menu Options
    A budget-friendly brunch doesn’t limit you to specific dishes. You can cater to different dietary preferences and restrictions while staying within budget. Think of making a variety of items like egg-based dishes, salads, fruits, and pastries that cater to various tastes.
  7. More Opportunities for Hosting
    Budget-friendly brunches allow you to host gatherings more frequently. Since you’re not spending too much on each event, you can create more opportunities to bring people together and nurture relationships.
  8. Builds Stronger Social Connections
    Hosting a brunch with a focus on affordability and simplicity often feels more relaxed and welcoming. Guests may feel more at ease, knowing the event isn’t extravagant, allowing for stronger social connections.

A budget-friendly May brunch can be both fun and fulfilling, offering a wonderful way to gather with loved ones while keeping costs low!

💬 Suggestions for an Even Smoother Hosting Experience

Here are some suggestions for an even smoother hosting experience for your budget-friendly May brunch:

  1. Plan Ahead
    The more prepared you are, the smoother the event will go. Create a detailed shopping list, plan the menu, and organize the timeline for when to start cooking and setting up. This will help you avoid last-minute stress.
  2. Simplify the Menu
    Opt for easy-to-make dishes that don’t require a lot of last-minute attention. Casseroles, quiches, and sheet pan meals are great options that can be prepared in advance and baked or reheated when it’s time to serve.
  3. Delegate Tasks
    Don’t hesitate to ask your guests to contribute. Consider having a potluck-style brunch where everyone brings a dish or a drink. This lightens the load on you and allows for more variety without extra cost.
  4. Prepare in Advance
    Prep as much as possible the day before. Chop fruits, vegetables, and herbs, and prepare any components that can be made ahead of time. You can also set the table and arrange decor the night before to save time on the day of the brunch.
  5. Have a Flexible Beverage Station
    Set up a self-serve beverage station where guests can help themselves. Include options like coffee, tea, lemonade, and water. You can also have a pitcher of a signature cocktail or mocktail for a festive touch.
  6. Keep Decor Simple
    Embrace a minimalist approach when it comes to decor. A few fresh flowers, simple table settings, and a colorful tablecloth can create a warm atmosphere without much effort or expense. Let the food and company be the main focus.
  7. Use Disposable or Reusable Serveware
    To save time on cleanup, consider using disposable plates, cups, and utensils made from eco-friendly materials. Alternatively, use reusable serveware that doesn’t require heavy-duty cleaning afterward, allowing you to spend more time with guests.
  8. Set a Relaxed Atmosphere
    Keep the vibe casual and easygoing. Play soft background music and encourage guests to mingle and enjoy themselves. Having a stress-free environment will make everyone feel comfortable and allow you to enjoy the moment as well.
  9. Provide a Variety of Options
    Make sure there are a variety of options to cater to different dietary preferences (vegetarian, vegan, gluten-free, etc.). This not only ensures everyone has something to eat but also takes the pressure off you in case of last-minute requests or dietary restrictions.
  10. Prepare for Leftovers
    Have storage containers ready to pack up leftovers. This way, you don’t have to worry about food going to waste, and your guests will appreciate the option of taking home some of the delicious food they enjoyed.

By taking these steps, you can ensure that hosting your May brunch is not only budget-friendly but also stress-free, leaving you more time to enjoy the company of your friends and family!

📝 Conclusion

A beautiful and budget-conscious May 2025 brunch is completely within reach. With smart planning, DIY touches, and a few creative menu ideas, you can host a celebration that feels luxe without the hefty price tag. Whether it’s Mother’s Day or a casual Sunday gathering, focus on simplicity, warmth, and intentional details—and your guests will remember the experience long after the dishes are done.

📚 References

  • Real Simple – Hosting a Budget-Friendly Brunch
  • Good Housekeeping – Easy Brunch Recipes for Spring
  • Taste of Home – Make-Ahead Brunch Ideas
  • Country Living – DIY Spring Party Decor
  • Better Homes & Gardens – Outdoor Brunch on a Budget

❓ FAQs

Q1: How much should I budget for a small brunch at home?
A: You can host a stylish brunch for 4–6 guests on $30–$60 by cooking at home and using DIY decor.

Q2: What are the most affordable brunch foods?
A: Eggs, toast, potatoes, fruits in season, pancakes, and homemade baked goods are budget-friendly staples.

Q3: How can I make my brunch feel elegant on a budget?
A: Use cloth napkins, fresh flowers, handwritten menu cards, and a curated playlist to enhance the atmosphere.

Q4: Can I host a brunch outdoors without extra cost?
A: Yes! Use picnic blankets, folding chairs, and your patio or backyard space for a beautiful, free outdoor setting.

Q5: Should I ask guests to bring food to a brunch?
A: Yes, a potluck-style brunch is both cost-effective and makes guests feel involved in the celebration.

read more

7 Ladder Shelf Hacks for Storing Blankets, Books, and More

Introduction

7 Ladder Shelf Hacks for Storing Blankets, Books, and More

Ladder shelves have become a staple in modern home decor for their sleek design and incredible versatility. Whether you’re living in a compact apartment or simply looking for a creative way to display your favorite items, ladder shelves offer smart storage without sacrificing style. In this article, we’ll explore 7 ladder shelf hacks for storing blankets, books, and other home essentials to maximize function and elevate your living space.

Tips: 7 Ladder Shelf Hacks to Maximize Storage

source:pixabay

1. Add Hanging Baskets to Lower Rungs

Attach small wire or wicker baskets to the lower steps of your ladder shelf to hold throws, socks, or even kid’s toys. This keeps your essentials accessible and adds a rustic charm.

2. Use Folded Blankets as Visual Anchors

Neatly folded throws or quilts can act as both storage and design elements. Stack 2–3 folded blankets on one or two rungs for a cozy, layered look.

3. Install Mini Trays or Crates

Secure lightweight trays or wooden crates to the steps using zip ties or hooks. These are perfect for storing books, mail, or potted plants without compromising shelf space.

4. Mix Vertical and Horizontal Book Placement

Store books upright on one rung and horizontally on another to break visual monotony. Add a small decorative item, like a candle or plant, to complete the look.

5. Create a Charging Station

Use one rung to place a small tray for storing devices and charging cords. Secure a surge protector or USB hub to the back of the shelf to keep things tidy.

6. Add Hooks for Hanging Items

Screw in small hooks underneath a step to hang keys, headphones, scarves, or light bags. This makes your ladder shelf a multi-functional entryway station.

7. Rotate Decor Seasonally

Keep your ladder shelf fresh by rotating decorations with the seasons. Use it to display holiday decor, seasonal reads, or themed throw pillows.

Benefits of a Ladder Shelf for Storage

source:pixabay

1. Space-Saving Design

Ladder shelves lean vertically against a wall, using minimal floor space while maximizing vertical space. This makes them ideal for small apartments, bathrooms, bedrooms, or home offices.

2. Versatile Storage Solution

They can be used in almost any room—for books in the living room, towels in the bathroom, plants in the hallway, or spices in the kitchen. Their open shelving allows easy access and display.

3. Decorative Appeal

Ladder shelves add a modern, rustic, or minimalist touch depending on the material and finish. They double as decor elements, enhancing the overall interior design.

4. Easy to Assemble and Move

Most ladder shelves are lightweight and simple to assemble without special tools. They’re also easy to relocate, making them perfect for renters or frequent redecorators.

5. Budget-Friendly

Compared to bulky storage cabinets, ladder shelves are often more affordable and provide an elegant look without breaking the bank.

6. Encourages Organization

With clearly defined tiers, ladder shelves help keep items sorted and tidy, from folded blankets to collectibles and office supplies.

7. Ideal for Displaying Items

Open shelves are perfect for showcasing decorative items like photo frames, candles, books, and plants—blending storage with personality.

8. Suitable for Indoor Plants

Thanks to their tiered design, ladder shelves provide great light exposure for potted plants, especially in well-lit areas near windows.

Suggestions for Styling and Functionality of a Ladder Shelf

source:pixabay

1. Use a Theme or Color Palette

Coordinate items on your shelf using a consistent color scheme or theme (e.g., coastal, boho, industrial). This adds a cohesive and intentional look.

2. Mix Decorative and Functional Items

Combine stylish pieces like candles, vases, or framed photos with functional ones like storage baskets or boxes to balance beauty with utility.

3. Add Greenery

Place small potted plants or hanging greenery on various tiers to introduce life and texture. Succulents, ferns, or trailing vines work especially well.

4. Incorporate Storage Bins or Baskets

Use woven or fabric baskets on lower shelves to store miscellaneous items like electronics, toiletries, or toys—great for hiding clutter while keeping it accessible.

5. Arrange Items by Height

Varying the height of items (books, jars, decor) helps create visual interest. Taller items can go at the back with shorter ones in front for layering.

6. Balance the Weight Distribution

Heavier items should go on the bottom shelves to stabilize the unit, while lighter decor and accessories can be placed on the higher tiers.

7. Use It as a Bookshelf with Personality

Stack books vertically and horizontally, and intersperse them with decorative objects to avoid a stiff, library-like feel.

8. Make It Seasonal

Switch up shelf decor according to the season—like fall pumpkins, winter candles, spring florals, or summer shells—to keep the space fresh and updated.

9. Lighting Enhancements

Add small LED string lights or a clip-on lamp to give the shelf a cozy, ambient glow in the evenings.

10. Display Personal Touches

Include personal elements like travel souvenirs, framed quotes, or art pieces that reflect your personality and make the shelf unique to your space.

Conclusion

A ladder shelf is more than just a decorative piece—it’s a functional, stylish storage solution for any home. By using clever hacks like hanging baskets, mini trays, and decorative styling, you can transform this simple shelf into an essential part of your living space. Whether you’re storing books, blankets, or everyday essentials, these ideas help you stay organized while enhancing your home’s aesthetic appeal.

References

  1. HGTV: Stylish Ways to Use Ladder Shelves
  2. Better Homes & Gardens: Ladder Shelf Decorating Ideas
  3. Apartment Therapy: Clever Storage Hacks for Small Spaces

FAQs

1. Can I build a ladder shelf myself?

Yes, many DIY tutorials are available online, and a basic ladder shelf requires only a few tools and materials like wood, screws, and brackets.

2. What materials work best for ladder shelves?

Wood and metal are both popular. Wood gives a warm, rustic look, while metal provides a sleek, industrial vibe.

3. How do I secure baskets or trays to the rungs?

Use zip ties, small hooks, or screw-on brackets depending on the weight of the items you plan to store.

4. Are ladder shelves safe around kids or pets?

Yes, as long as they are anchored to the wall for stability and loaded with light, safe items on the lower rungs.

5. Where can I place a ladder shelf in my home?

Ideal locations include living rooms, bedrooms, bathrooms, hallways, or even balconies depending on the design.

10 Offline Social Media-Inspired Games to Play with Friends

Introduction

10 Offline Social Media-Inspired Games to Play with Friends

In a world dominated by digital screens and endless scrolling, it’s refreshing to unplug and connect with friends in real life. What if you could enjoy your favorite aspects of social media—like challenges, creativity, and viral trends—without needing Wi-Fi? That’s where offline social media-inspired games come in!

These games blend the fun of platforms like Instagram, TikTok, and Snapchat into real-life activities, perfect for parties, game nights, or just casual hangouts..

🎯 10 Offline Social Media-Inspired Games to Play

source:pixabay

1. Hashtag Charades

Act out popular hashtags (like #ThrowbackThursday or #NoFilter) while your friends guess. No words—only gestures!

2. IRL “Instagram Story” Challenge

Take turns creating short “stories” using props and narration in real life. Use a timer to keep it under 15 seconds for each “story.”

3. TikTok Dance-Off (No Phones Allowed!)

Recreate viral dances from memory or invent new ones together. Judge based on originality and performance.

4. Comment Battle

Write witty “comments” on paper about a random image or topic. Everyone votes for the funniest or most “liked” response.

5. Reel Reaction Game

Pick a theme (e.g., cute animals, fails, or food) and act out your exaggerated real-life reaction as if you were watching a viral video.

6. Snapchat Drawing Game

Use a whiteboard or paper to draw something in under 10 seconds—others have to guess what it is before time runs out.

7. Unfiltered Confessions

Inspired by anonymous social media apps, write a true or fake confession on paper. Others must guess who wrote it!

8. #OOTD Relay (Outfit of the Day)

Set a timer and put together the best outfit using random clothes. Score on creativity, style, and speed.

9. Emoji Charades

Act out a series of emojis without speaking. For example: 😱🍕🚗 = “Scared of eating pizza in the car.”

10. Influencer Challenge

Each person must “promote” a random household item like it’s the hottest new product on the market. Funniest pitch wins!

Benefits of Offline Social Media-Inspired Games

source:pixabay

Offline social media-inspired games—board games, card games, or roleplay scenarios based on social platforms like Instagram, TikTok, or Facebook—bring the essence of online interaction into real-world play. These games combine the appeal of digital trends with face-to-face engagement, offering unique benefits across all age groups.

1. Encourages Real-World Social Interaction

Unlike online platforms, these games foster direct human connection. Players engage in eye contact, read body language, and practice empathy in real time, enhancing communication skills and emotional intelligence.

2. Boosts Creativity and Imagination

Games inspired by content creation (e.g., “recreate a viral challenge” or “build your dream profile”) stimulate creative thinking. Kids, teens, and even adults enjoy roleplaying influencers or content curators in fun, imaginative ways.

3. Reduces Screen Time

These games offer a tech-free alternative to social media scrolling, helping players—especially children and teens—take healthy breaks from screens while still enjoying their favorite online trends.

4. Promotes Teamwork and Collaboration

Many games require group participation, idea sharing, and cooperative play. This strengthens group dynamics, fosters inclusiveness, and builds problem-solving skills in a supportive environment.

5. Improves Critical Thinking

Activities like mock comment moderation, profile building, or storytelling from hashtags help develop decision-making and critical thinking skills as players navigate digital scenarios offline.

6. Teaches Media Literacy

By simulating social media actions offline, players become more aware of online behaviors, trends, and potential consequences—helping them better understand and manage their digital identities.

7. Makes Learning Fun

Educators and parents can use social media-inspired games to teach lessons about cyberbullying, online etiquette, branding, or marketing in a playful and memorable way.

8. Enhances Confidence and Public Speaking

From mock influencer speeches to challenge-based storytelling, these games offer opportunities for self-expression, helping shy individuals practice public speaking in a low-pressure setting.

Offline social media-inspired games cleverly blend modern interests with timeless play, offering fun, educational, and developmental benefits. Whether used at home, in classrooms, or during therapy sessions, these games are powerful tools to bridge the digital and physical worlds in a positive way..

💡 Suggestions for Hosting an Offline Social Media Game Night

Hosting an offline social media-themed game night is a fun and creative way to bring people together and blend the digital and real-world experiences. Here are some practical and engaging suggestions to make it a memorable event:

source:pixabay

🎯 Theme & Planning

  1. Pick a Clear Theme: Go with a specific platform (Instagram, TikTok, X/Twitter) or general social media vibe. Design the décor and activities to reflect it.
  2. Create Invitations Inspired by Posts: Send out invites that look like IG stories, tweets, or reels screenshots.
  3. Dress Code: Ask guests to come dressed as their favorite influencer or viral meme.

🎲 Game Ideas Inspired by Social Media

  1. Caption This: Show random photos and let players write the funniest or most creative captions.
  2. Hashtag Charades: Act out popular hashtags (like #MondayMotivation or #ThrowbackThursday).
  3. Viral Video Challenge: Have players recreate viral dances, lip-syncs, or trends in teams.
  4. Who Posted It?: Share real or made-up posts and let players guess who posted it (among friends or celebs).
  5. Social Media Bingo: Fill a bingo card with things like “Selfie with filter,” “Someone says ‘hashtag IRL,’” or “TikTok dance break.”
  6. Filter Roulette: Use a phone or a printed set of funny photo filters; people must act out the personality of the filter they get.

🍿 Food & Drink

  1. Themed Snacks: Serve Instagrammable food with hashtag labels (e.g., #NoFilterNachos, #SelfieSnacks).
  2. DIY Drink Station: Let guests mix and name their own drinks, and vote on the best-named one.
  3. Photo Booth: Set up a backdrop with props so guests can snap photos—even though it’s offline, it keeps the social vibe going.

🎁 Extras & Takeaways

  1. Award Prizes: Fun categories like “Most Viral Performance,” “Top Influencer Energy,” or “Best Caption.”
  2. Printed “Likes” Cards: Hand out paper “likes” for people to vote on outfits, performances, or jokes.
  3. Memory Wall: Have a corkboard or wall where people can stick Polaroids and write their favorite moment of the night.

📌 Tips for Success

  • Keep it inclusive: Make sure games are fun even for guests who aren’t on social media.
  • Encourage team play to help guests mingle.
  • Limit screen use during the night to keep it truly offline—maybe even collect phones at the door for a retro experience.

📝 Conclusion

Offline social media-inspired games are a creative and interactive way to enjoy the fun of social media without relying on devices. Whether you’re looking to strengthen friendships, boost creativity, or just have a good laugh, these games offer the perfect mix of nostalgia, entertainment, and human connection. So next time you’re hanging out with friends, ditch the screens and try one of these unique, real-life games!

🔗 References

  1. Pew Research Center – Teens and Social Media Trends
  2. Harvard Health – Benefits of Reducing Screen Time
  3. Psychology Today – Why We Need Face-to-Face Communication
  4. Wired – Offline Activities in a Digital Age

❓FAQs

Q1: Are these games suitable for kids and teens?

Yes! Most of these games can be adapted for different age groups with appropriate themes and content.

Q2: How long do these games typically last?

Each game can last 5–15 minutes, depending on the number of players and rounds.

Q3: Can I use these games in classrooms or team-building events?

Absolutely. These games are great for building trust, breaking the ice, and encouraging creativity in group settings.

Q4: What materials do I need to play?

Most games require basic items like paper, pens, timers, props, or costumes—but many need nothing at all!

Q5: How can I make the night more fun?

Add themed decorations, snacks, or prizes to make it more festive and engaging.

Top 9 Brunch Recipes and Decor Ideas for May 2025 Celebrations

Introduction

Top 9 Brunch Recipes and Decor Ideas for May 2025 Celebrations

May brings warm weather, blooming flowers, and perfect opportunities to host beautiful brunches for Mother’s Day, spring birthdays, and Memorial Day gatherings. Whether you’re planning a backyard garden party or an indoor celebration, combining delightful dishes with stylish decor can elevate the entire experience.

In this guide, discover the top 9 brunch recipes and decor ideas to make your May 2025 celebration memorable, trendy, and delicious..

🌿 Top 9 Brunch Recipes and Decor Ideas

source:pixabay

1. Avocado Toast Bar

  • Recipe Idea: Offer a DIY avocado toast station with toppings like cherry tomatoes, radishes, smoked salmon, poached eggs, and microgreens.
  • Decor Tip: Use rustic wooden boards and vintage ceramic dishes for a farmhouse feel.

2. Mini Quiche Assortment

  • Recipe Idea: Prepare mini quiches with fillings like spinach and feta, mushroom and Swiss, or bacon and cheddar.
  • Decor Tip: Display in a tiered tray with floral napkins and small chalkboard labels.

3. Strawberry Shortcake Waffles

  • Recipe Idea: Stack waffles with layers of whipped cream and macerated strawberries.
  • Decor Tip: Serve on pastel plates with fresh flowers as centerpieces.

4. Spring Veggie Frittata

  • Recipe Idea: Use asparagus, peas, bell peppers, and goat cheese for a colorful seasonal frittata.
  • Decor Tip: Match the tablecloth or placemats to the colors in the dish for a cohesive look.

5. Herb-Infused Lemonade Bar

  • Recipe Idea: Offer pitchers of lemonade infused with rosemary, mint, or lavender.
  • Decor Tip: Use mason jars with paper straws and a handwritten sign saying “Sip and Bloom.”

6. Pancake Charcuterie Board

  • Recipe Idea: Create a board with mini pancakes, syrups, fruits, and toppings like chocolate chips and whipped cream.
  • Decor Tip: Use floral garlands and wood slice platters for a nature-inspired display.

7. Smoked Salmon Bagel Station

  • Recipe Idea: Set out toasted bagels, cream cheese, capers, red onions, and smoked salmon.
  • Decor Tip: Use marble serving trays for an upscale touch.

8. Mimosa & Mocktail Flight

  • Recipe Idea: Offer various mimosa flavors—classic orange, peach, and berry—as well as non-alcoholic versions.
  • Decor Tip: Display drinks in mini glasses with fruit garnishes on a mirrored tray.

9. Edible Flower Salad

  • Recipe Idea: Toss arugula, goat cheese, and berries with edible flowers and a light vinaigrette.
  • Decor Tip: Serve in clear bowls to showcase the colors and pair with floral-patterned napkins.

Tips for Hosting a May Brunch Party

Hosting a brunch this May? Make it effortlessly chic and seasonally delightful with these easy tips:

source:pixabay

1. Plan Ahead
Choose recipes that can be made in advance or served at room temperature—think quiches, fruit tarts, and salads.

2. Embrace Spring Colors
Decorate with pastels, soft greens, and floral accents to capture the essence of springtime.

3. Mix Up Your Seating
Create a cozy, casual vibe using benches, outdoor cushions, and bistro chairs for flexible seating.

4. Bring Nature In
Add a fresh touch with cut flowers, potted herbs, or decor featuring floral prints.

5. Label Your Stations
Use chalkboard signs or tent cards to identify food and drink areas—stylish and helpful for guests!

💡 Benefits of Brunch Celebrations in May

Planning a gathering? Here’s why brunch in May just makes sense:

1. Ideal Outdoor Weather
With mild temperatures and blooming backdrops, May is perfect for hosting in the garden, on a patio, or even a balcony.

2. Flexible Food Choices
From sweet to savory, brunch offers a range of dishes that suit all dietary preferences—gluten-free, vegetarian, vegan, or classic comfort foods.

3. Celebrate Multiple Occasions
May is packed with reasons to gather: Mother’s Day, birthdays, graduations, and even Memorial Day weekend.

4. Budget-Friendly Options
Use seasonal blooms, DIY centerpieces, and make-ahead recipes to keep things affordable yet stylish.

5. Casual & Meaningful Connections
Brunch creates a relaxed atmosphere that encourages conversation, laughter, and quality time during the daylight hours.

🔥 Trending Now (May 2025)

Hosting a brunch this May? Stay on-trend with these fresh and fun ideas that blend style, sustainability, and creativity:

source:pixabay

1. Garden-Inspired Themes
Think lush floral arrangements, potted herbs, and eco-friendly table settings that bring the outdoors to your table.

2. Interactive Food Bars
Get guests involved with build-your-own toast stations, pancake boards, or yogurt parfait bars—delicious and Instagram-worthy.

3. Floral Ice Cubes
Add edible flowers to ice trays for stunning cocktails and mocktails that double as decor.

4. Vintage Tableware
Mix and match thrifted or rented vintage plates, glasses, and cutlery for a charming, sustainable touch.

5. Eco-Chic Invitations
Skip the paper waste with digital invites—or go green with plantable seed cards your guests can take home and grow.

💬 Suggestions for a Successful Brunch

Planning the perfect brunch? These thoughtful touches will elevate your event and make guests feel truly special:

1. Set the Mood with Music
Curate a playlist featuring soft jazz, acoustic tunes, or cheerful spring melodies to create a warm, inviting vibe.

2. Keep Guests Comfortable
If you’re hosting outdoors, provide shaded areas with umbrellas, canopies, or even large hats for comfort and style.

3. Cater to All Dietary Needs
Include gluten-free, dairy-free, and vegetarian options to ensure every guest feels considered and welcomed.

4. Choose a Fun, Seasonal Theme
Go with playful themes like Brunch in Bloom, Spring Soirée, or Floral Fiesta to guide your decor and menu.

5. Add Personal Touches
Handwritten menus, name cards, or a memory corner with photo displays make your brunch uniquely meaningful.

📝 Conclusion

Brunch in May is more than just a meal—it’s a celebration of new beginnings, blooming nature, and shared joy. With the right blend of flavorful recipes and stylish decor, your brunch event can become the highlight of the season. Whether you’re planning a cozy family gathering or a lively garden party, these top 9 ideas will help you impress your guests and make lasting memories.

📚 References

  1. Martha Stewart Living – “Spring Brunch Ideas”
  2. Bon Appétit – “Top Brunch Recipes of the Season”
  3. HGTV – “Outdoor Brunch Decor Trends 2025”
  4. Delish – “Easy and Elegant Brunch Dishes”
  5. Pinterest Trends – “Spring Party Decor 2025”

❓FAQs

Q1: What is the best time to host a brunch in May?

A: Between 10:00 AM and 1:00 PM is ideal, especially on weekends or Mother’s Day Sunday.

Q2: How can I make my brunch menu more inclusive?

A: Offer a mix of vegetarian, gluten-free, and dairy-free options to suit various dietary needs.

Q3: Can I host a brunch indoors if the weather is bad?

A: Absolutely! Use floral decorations, fresh herbs, and soft lighting to bring the spring vibe indoors.

Q4: How far in advance should I prepare?

A: Plan your menu a week in advance and prep dishes like quiche, frittatas, and baked goods a day before.

Q5: What are some budget-friendly decor ideas?

A: DIY paper flowers, thrifted tableware, fresh flowers from your garden, and reusable linen napkins work great.

12 Inspiring Ideas to Plan the Perfect May 2025 Sunday Brunch

Introduction

12 Inspiring Ideas to Plan the Perfect May 2025 Sunday Brunch

Mother’s Day, spring celebrations, or simply a sunny weekend—May Sundays are perfect for gathering friends and family around a delicious, well-styled brunch. Whether you’re hosting indoors or embracing the fresh outdoor air, this guide provides 12 inspiring ideas to help you plan the ultimate May 2025 Sunday brunch that’s both Instagram-worthy and heartwarming.

🌟 12 Inspiring Ideas to Plan the Perfect May 2025 Sunday Brunch

source:pixabay

1. Fresh Fruit & Herb-Infused Water Station

Offer a refreshing hydration station with infused waters (cucumber-mint, lemon-basil, strawberry-rosemary) for a spa-like experience.

2. Build-Your-Own Parfait Bar

Set up a DIY parfait bar with Greek yogurt, granola, nuts, honey, and fresh seasonal fruits.

3. Garden-Inspired Table Decor

Decorate with potted herbs, floral arrangements, or even edible flowers. Choose pastel napkins and soft linen runners for a spring vibe.

4. Signature Brunch Cocktail

Create a signature drink like a lavender mimosa or hibiscus spritz. Provide non-alcoholic versions for inclusivity.

5. Sweet & Savory Waffle Board

Serve waffles with a variety of toppings—whipped cream, fruits, fried chicken, syrup, chocolate, and cheese—for a modern twist.

6. Personal Mini Quiches

Bake individual quiches with mix-and-match fillings like spinach-feta, ham-cheddar, or mushroom-onion.

7. Sunshine-Themed Place Settings

Use yellow napkins, citrus-slice name tags, and sun motifs to brighten the table.

8. Outdoor Picnic Brunch Setup

Host your brunch in the garden or patio with picnic blankets, cushions, and low tables for a relaxed boho feel.

9. Baked French Toast Casserole

Prepare a make-ahead casserole filled with cinnamon, vanilla, and fruit to bake fresh on Sunday morning.

10. Eco-Friendly Serving Essentials

Opt for biodegradable or reusable plates, bamboo cutlery, and cloth napkins to reduce waste.

11. Homemade Jam & Bread Station

Offer a selection of artisan breads and homemade jams or butters—think strawberry-rose, lemon curd, or cinnamon honey.

12. Thoughtful Takeaway Favors

Send guests home with mini potted plants, homemade granola, or lavender sachets as brunch mementos.

✅ Tips to Host a Flawless Sunday Brunch

Hosting a Sunday brunch? Here’s how to make it effortless, elegant, and totally memorable:

source:pixabay

📝 1. Plan the Menu a Week Ahead

Avoid last-minute stress by selecting your dishes in advance. Include a mix of sweet, savory, and seasonal favorites.

🛒 2. Shop Early for Fresh Ingredients

Head to the market a few days before. Fresh produce and bakery items taste better and look more inviting on the plate.

🍽️ 3. Set the Table the Night Before

Get a head start by arranging your table setting, cutlery, napkins, and centerpieces in advance—it’ll free up your morning for cooking and hosting.

🥗 4. Offer Both Vegetarian & Non-Vegetarian Options

Cater to all tastes and dietary preferences. Think quiche and frittata, avocado toast, fresh fruit, and protein platters.

🎶 5. Create a Light Background Playlist

Soft jazz, acoustic covers, or mellow Sunday morning vibes—background music sets the tone without overpowering the conversation.

✨ With a little prep and a warm welcome, your Sunday brunch will feel effortless and inviting!

💡 Benefits of Hosting a Sunday Brunch in May

May is the perfect month to bring people together—and what better way than with a cozy Sunday brunch? Here’s why this time of year makes it extra special:

🌼 1. Perfect Weather

Mild temperatures and blooming flowers make outdoor dining not just possible, but delightful. Whether it’s your backyard, patio, or balcony—May brunches are made for fresh air and sunshine.

⏰ 2. Flexible Timing

Brunch offers a relaxed, late-morning start—perfect for slow Sundays. Plus, it wraps up early enough to leave the rest of the day open for rest, errands, or more socializing.

💐 3. Celebration-Ready

With occasions like Mother’s Day, graduation parties, and spring birthdays, May naturally invites meaningful gatherings—and brunch is the ideal format for heartfelt toasts and shared smiles.

👨‍👩‍👧‍👦 4. Family Bonding

Brunch creates a low-pressure environment where conversation flows easily and everyone feels at home. It’s an ideal setting for laughter, connection, and memory-making.

☀️ Make your May Sundays extra memorable—with great food, warm company, and springtime joy.

🔥 Trending Now: 2025 Brunch Trends

Looking to spice up your next brunch gathering or café menu? These hot 2025 brunch trends are redefining how we gather, eat, and celebrate mid-mornings—with sustainability, wellness, and creativity taking center stage.

source:pixabay

🥗 1. Zero-Waste Menus & Compostable Decor

Say goodbye to single-use plastics! Eco-conscious brunches are in full swing with:

  • Thoughtfully crafted dishes using all parts of ingredients
  • Reusable or compostable tableware
  • Chic, biodegradable decor like seed paper name cards and bamboo cutlery

🌿 2. Garden-to-Table Ingredients

Freshness is key in 2025. Homegrown herbs, rooftop veggies, and hyper-local sourcing bring:

  • Crisp, seasonal flavors
  • A beautiful farm-to-plate aesthetic
  • An opportunity to support local growers or grow your own!

🍹 3. Mocktail & Craft Juice Bars

Health meets celebration with:

  • Hand-pressed juices and infused waters
  • Botanical mocktails using ingredients like hibiscus, rosemary, and ginger
  • Customizable drink stations with natural sweeteners and adaptogens

✨ Whether you’re a host, café owner, or brunch lover, these trends bring sustainability, health, and fun to the table in 2025.

  • Multicultural fusion brunch dishes
  • Minimalist yet elegant tablescapes

💬 Suggestions for Different Hosting Styles

1. Formal Hosting Style

Best for: Corporate events, award ceremonies, academic conferences
Key Traits: Polished language, structured transitions, professional demeanor
Suggestions:

  • Use a clear script with smooth introductions and closings.
  • Dress appropriately to set the tone.
  • Maintain a poised posture and calm pace.
  • Be time-conscious and keep to the schedule.

2. Casual Hosting Style

Best for: Lifestyle podcasts, vlogs, social events
Key Traits: Relaxed tone, conversational flow, friendly demeanor
Suggestions:

  • Speak naturally as if you’re chatting with friends.
  • Use humor, personal anecdotes, and open body language.
  • Wear comfortable and casual clothing that matches your audience.
  • Be flexible with the structure to allow spontaneity.

3. Interactive Hosting Style

Best for: Live streams, webinars, game shows
Key Traits: Audience-focused, engaging, spontaneous
Suggestions:

  • Ask questions and encourage real-time feedback.
  • Use polls, chats, and Q&A sessions.
  • Be energetic and responsive to comments.
  • Keep the mood upbeat and dynamic.

4. Storytelling Hosting Style

Best for: Documentaries, educational content, spiritual gatherings
Key Traits: Narrative-driven, emotional connection, thematic flow
Suggestions:

  • Weave personal stories or case studies into the content.
  • Use vocal variation to create suspense and emotion.
  • Set the scene with vivid language and pacing.
  • Align your appearance and tone with the story’s mood.

5. Humorous Hosting Style

Best for: Comedy shows, entertainment podcasts, informal gatherings
Key Traits: Witty, lighthearted, charismatic
Suggestions:

  • Open with a joke or humorous anecdote.
  • Use timing and facial expressions to enhance punchlines.
  • Don’t be afraid to improvise.
  • Be mindful of your audience’s sense of humor.

6. Educational Hosting Style

Best for: Tutorials, online courses, workshops
Key Traits: Informative, structured, clear
Suggestions:

  • Break down information into digestible parts.
  • Use visual aids, examples, and summaries.
  • Keep a calm, articulate delivery.
  • Invite questions for clarity and interaction.

7. Inspirational Hosting Style

Best for: Motivational events, church services, wellness podcasts
Key Traits: Passionate, hopeful, motivational
Suggestions:

  • Speak from the heart and use uplifting language.
  • Share real-life transformations or personal victories.
  • Use pauses to emphasize key points.
  • End on a powerful note or call to action.

📝 Conclusion

Planning a May 2025 Sunday brunch is all about combining fresh, flavorful dishes with cozy, thoughtful touches. Whether you’re celebrating Mother’s Day, a birthday, or just the joy of spring, these 12 inspiring ideas will help you curate a brunch that’s delicious, stylish, and memorable. Keep it simple, seasonal, and full of love—and your guests will feel it in every bite.

📚 References

  • Better Homes & Gardens – Brunch Menu Ideas
  • Real Simple – Spring Table Settings
  • Food Network – Best Brunch Recipes
  • Country Living – DIY Mother’s Day Brunch
  • Martha Stewart – Outdoor Entertaining Tips

FAQs

Q1: What are the best make-ahead dishes for brunch?
A: Baked casseroles, muffins, mini quiches, and fruit salads can be made the night before.

Q2: How can I make a brunch gluten-free or vegan?
A: Use almond flour or gluten-free mixes, and offer tofu scrambles, fruit smoothies, or vegan pancakes.

Q3: What’s a good brunch start time?
A: Aim for between 10:30 AM and 12:00 PM to keep it relaxed and still leave room for other plans.

Q4: How do I decorate on a budget?
A: Use fresh flowers from your garden, recycled jars for vases, and printed name tags or menus.

Q5: Can I host a brunch indoors if it rains?
A: Absolutely—set up near windows for natural light and add fresh flowers to bring the outdoors in.

3 Common Mistakes to Avoid When Designing an Herb Spiral Garden

Introduction

3 Common Mistakes to Avoid When Designing an Herb Spiral Garden

Herb spiral gardens are a popular feature in sustainable gardening, thanks to their beautiful design and efficient use of space. These spiraling structures allow for multiple microclimates in a compact footprint, making them ideal for growing a diverse range of herbs even in small backyards or patios.

However, as with any garden project, poor planning or simple oversights can hinder your success. If you’re thinking of building an herb spiral, it’s essential to avoid some common pitfalls that can affect your plants’ health and the garden’s functionality.

In this article, we’ll explore 3 common mistakes to avoid when designing your herb spiral garden—and how to do it the right way from the start.

3 Common Mistakes to Avoid When Designing an Herb Spiral Garden

source:pixabay

1. Ignoring Sunlight and Location

One of the biggest mistakes is placing your herb spiral in a shady or poorly lit spot. Most herbs thrive in full sunlight, needing at least 6–8 hours of direct sun daily. Choosing the wrong location can result in weak growth, reduced aroma, and low yields.

Fix it:
Before building, observe your garden space throughout the day to identify the sunniest area. South-facing locations are typically best in the Northern Hemisphere. Be sure to account for nearby trees or structures that might cast shadows.

2. Improper Water Management and Drainage

Another common issue is neglecting proper drainage and water flow. Herb spirals are designed to allow water to trickle down from top to bottom, creating a dry zone at the top and a moist zone at the base. If you don’t build with proper drainage in mind, your herbs may suffer from root rot or inconsistent watering.

Fix it:

  • Use well-draining soil with compost or sand mixed in.
  • Build the spiral on a slight mound or create a slope to ensure water flows downward.
  • Position thirsty herbs (like mint or chives) at the bottom, and drought-tolerant herbs (like rosemary or oregano) at the top.

3. Planting Incompatible Herbs Together

Not all herbs thrive under the same conditions. Planting incompatible herbs side by side can lead to overcrowding, competition for nutrients, or even stunted growth.

Fix it:
Group herbs based on similar light, water, and soil needs. For example:

  • Mediterranean herbs (thyme, sage, oregano) prefer dry, sunny spots.
  • Moisture-loving herbs (parsley, mint, basil) should go near the base. Also, be careful with invasive herbs like mint—plant them in containers to prevent spreading.

Tips for a Successful Herb Spiral Garden

  1. Plan Your Design First
    Sketch your spiral layout to visualize plant placement and sun exposure. This helps ensure efficient use of space and a smoother building process.
  2. Choose Eco-Friendly Materials
    Build your spiral using natural or recycled items like stones, bricks, or logs. These materials promote sustainability and add a rustic charm to your garden.
  3. Add a Compost Tube or Worm Tower
    Install a central compost tube or worm tower to naturally fertilize your garden. This enriches the soil and reduces kitchen waste.
  4. Start Small
    If you’re new to spiral gardening, begin with a compact design. It’s easier to manage and lets you learn the technique before scaling up.
  5. Rotate Crops Annually
    Change plant locations each season to maintain soil health, reduce disease buildup, and discourage pests.

Current Trends in Herb Spiral Gardening

source:pixabay
  1. Eco-Friendly Materials
    Sustainability is key—gardeners are embracing reclaimed wood, repurposed bricks, and even glass bottles to build herb spirals with minimal environmental impact.
  2. Smart Gardening Tools
    Tech-savvy growers are using tools like moisture meters and sunlight tracking apps to optimize plant placement and care with precision.
  3. Pollinator-Friendly Design
    Flowering herbs like lavender, thyme, and basil are being added to spirals to attract bees, butterflies, and other beneficial pollinators, boosting biodiversity.
  4. Urban Spiral Gardens
    Herb spirals are making a stylish statement on rooftops, balconies, and patios—perfect for space-conscious city dwellers who want fresh herbs at arm’s reach.

Suggestions for Avoiding Common Herb Spiral Garden Mistakes

  1. Know Your Herbs
    Research each herb’s sunlight, water, and spacing requirements before planting. This ensures healthier growth and better placement in the spiral.
  2. Learn from Experts
    Watch tutorial videos or attend local gardening workshops to gain hands-on tips and avoid common construction errors.
  3. Install Efficient Watering
    A drip irrigation system or a basic watering setup can help regulate moisture levels and save time, especially during dry spells.
  4. Apply Mulch or Straw
    Mulching helps retain moisture, reduce weed growth, and protect the soil from temperature fluctuations.
  5. Monitor for Structural Issues
    After heavy rain, check your spiral for signs of erosion, settling, or shifting stones to prevent long-term damage and maintain its shape.

Conclusion

Designing an herb spiral garden is a fantastic way to blend beauty, function, and sustainability in your backyard. But to reap the full benefits, it’s important to avoid common pitfalls such as poor location, improper drainage, and mismatched planting. With thoughtful planning and a few smart adjustments, your herb spiral can become a thriving, low-maintenance centerpiece of your garden.

Start your spiral with care, and your herbs will thank you with flavor, fragrance, and flourishing growth.

References

  1. Permaculture Research Institute – Herb Spiral Construction
  2. Mother Earth News – Building a Spiral Garden
  3. Royal Horticultural Society – Herb Growing Guide

Frequently Asked Questions (FAQs)

Q1: Can I build an herb spiral garden on a balcony or patio?

Yes, you can build a mini spiral garden in a large container or with stackable pots if you have limited space.

Q2: How tall should an herb spiral be?

Typically, herb spirals are 2 to 3 feet tall, which allows for proper drainage and plant variation.

Q3: What materials are best for building the spiral walls?

Natural materials like bricks, rocks, clay pots, or logs are best. They provide structure and retain heat

10 Stylish Ladder Blanket Holder Ideas for a Cozy Home

Introduction

10 Stylish Ladder Blanket Holder Ideas for a Cozy Home

In the world of modern home decor, functionality and aesthetics often go hand in hand. One of the most charming and practical trends is the ladder blanket holder — a simple, rustic piece that adds warmth and organization to any room. Whether you’re into farmhouse vibes, minimalist styles, or vintage appeal, a repurposed wooden ladder can transform your space while keeping your cozy throws neatly displayed. In this article, we’ll explore 10 stylish ladder blanket holder ideas that bring both charm and function to your home.

Top 10 Stylish Ladder Blanket Holder Ideas

source:pixabay

1. Rustic Farmhouse Charm

Use a distressed wooden ladder and lean it against your living room wall. Drape soft plaid or knitted blankets for a farmhouse finish.

2. Whitewashed Elegance

Paint an old ladder white for a shabby chic look. Ideal for neutral-toned rooms, especially bedrooms or cozy reading nooks.

3. Industrial Pipe and Wood Combo

Combine black metal piping with stained wood for a rugged, industrial aesthetic. Perfect for lofts or modern interiors.

4. Boho Vibe with Macrame Touch

Hang macrame elements along the rungs or use colorful tribal print blankets to enhance your bohemian decor.

5. Floating Wall Ladder

Mount a short ladder horizontally on the wall for a unique floating effect. Works great in small apartments or bathrooms.

6. Minimalist Black Ladder

A sleek, matte-black metal ladder offers a clean and minimal look. Match it with monochrome or color-blocked throws.

7. Reclaimed Barn Wood Ladder

Use aged, natural barn wood to craft a warm and eco-friendly blanket holder. Ideal for rustic cabins or eco-conscious homes.

8. Corner Standing Ladder

Maximize unused corners with a corner-standing ladder that fits snugly and displays multiple blankets vertically.

9. Two-Toned Ladder

Paint the side rails and rungs in contrasting colors (e.g., grey + white or black + gold) to add a modern twist to traditional decor.

10. Multi-Functional Ladder Shelf

Attach small trays or baskets to lower rungs for added storage of books or essentials along with blankets.

Tips for Using a Ladder Blanket Holder Effectively

source:pixabay

1. Choose the Right Location

  • Tip: Place your ladder blanket holder near a couch, reading nook, or bed for easy access.
  • Why: This maximizes functionality while adding visual interest to the room.

2. Layer by Size and Texture

  • Tip: Drape larger, heavier blankets on the bottom rungs and lighter throws on top.
  • Why: It balances the display visually and ensures sturdiness.

3. Mix Colors and Patterns

  • Tip: Combine solids, patterns, and textures for a dynamic look.
  • Why: This adds depth and complements various home décor styles.

4. Don’t Overload It

  • Tip: Limit to 3–5 blankets depending on ladder size.
  • Why: Too many blankets can look cluttered and risk tipping the ladder.

5. Secure the Ladder (If Needed)

  • Tip: Use anti-slip pads or wall brackets if you have children or pets.
  • Why: Safety is key—especially if the ladder is freestanding and within reach.

6. Rotate Seasonally

  • Tip: Change blankets seasonally—light linens in summer, chunky knits in winter.
  • Why: Keeps your space feeling fresh and relevant year-round.

7. Use as a Multi-Purpose Organizer

  • Tip: Hang magazines, scarves, or string lights along with blankets.
  • Why: Enhances the holder’s utility and decorative appeal.

8. Keep It Clean

  • Tip: Dust the ladder regularly and wash blankets as needed.
  • Why: Ensures the setup stays attractive and hygienic.

Trends in Ladder Blanket Holders

source:pixabay

🪵 1. Natural Wood Finishes

  • Trend: Raw, reclaimed, or light-stained wood finishes are increasingly popular.
  • Why: They add a warm, rustic, or Scandinavian vibe to interiors.

🎨 2. Bold Colors and Painted Ladders

  • Trend: Ladders painted in bold hues (navy, forest green, matte black) are on the rise.
  • Why: These stand out as accent pieces while complementing contemporary décor.

🔄 3. Dual-Purpose Designs

  • Trend: Some ladder blanket holders double as towel racks, plant stands, or even bookshelves.
  • Why: Consumers value multifunctional furniture, especially in small spaces.

🌿 4. Boho and Farmhouse Aesthetics

  • Trend: Woven textures, macramé accents, and distressed finishes give a cozy, lived-in look.
  • Why: These styles align with the ongoing popularity of boho and farmhouse interiors.

🧩 5. Minimalist Metal Frames

  • Trend: Sleek ladder holders made from black or gold metal are gaining popularity.
  • Why: Perfect for industrial, minimalist, or modern urban homes.

📏 6. Adjustable or Modular Ladders

  • Trend: Some designs offer adjustable heights or foldable features for flexibility.
  • Why: Urban living calls for space-saving and customizable solutions.

💡 7. Decorative Add-Ons

  • Trend: Ladders with hooks, hanging baskets, or fairy lights enhance decorative potential.
  • Why: They add charm and increase the holder’s usability.

Suggestions for Placement

🛋️ 1. Next to the Sofa or Armchair

  • Why: Keeps cozy throws within arm’s reach for lounging.
  • Style Tip: Use it to soften a modern or minimalist living room corner.

🛏️ 2. At the Foot or Side of the Bed

  • Why: Offers a stylish way to store extra blankets in a bedroom.
  • Style Tip: Coordinate blanket colors with your bedding for a cohesive look.

🚪 3. Behind the Door or in a Corner

  • Why: Maximizes unused vertical space, especially in small rooms.
  • Style Tip: Choose a slim ladder to avoid blocking door movement.

🛁 4. In the Bathroom

  • Why: Great for hanging towels if made of moisture-resistant material.
  • Style Tip: Add small baskets or hooks for toiletries or spa accessories.

🏠 5. Entryway or Mudroom

  • Why: Useful for hanging scarves, hats, or light outerwear.
  • Style Tip: Combine with a bench and basket for a cozy, organized look.

🌞 6. On a Covered Porch or Sunroom

  • Why: Ideal for storing outdoor throws or seasonal decor.
  • Style Tip: Pair with potted plants and lanterns for an inviting touch.

🖼️ 7. As a Decorative Accent Wall

  • Why: Works as a statement piece even without frequent use.
  • Style Tip: Style with layered textiles, string lights, or wall art around it.

Conclusion

Ladder blanket holders are more than just storage—they’re a decorative statement. Whether rustic, modern, or eclectic, these ladders add personality to any room while keeping your favorite blankets within reach. Try one of these 10 stylish ladder blanket holder ideas and turn a simple ladder into a cozy home essential.

References

  1. Better Homes & Gardens – “Creative Ways to Decorate with Ladders”
  2. HGTV – “DIY Blanket Ladder Projects”
  3. Apartment Therapy – “Space-Saving Blanket Storage Solutions”
  4. Pinterest – “Ladder Blanket Holder Inspiration Boards”

FAQs

Q1: Can I make a ladder blanket holder myself?

Yes. With basic tools and a bit of reclaimed wood, you can create a stylish ladder holder in a few hours.

Q2: Is it safe to lean a ladder holder against the wall?

Yes, if secured properly. Use wall anchors or rubber feet to prevent slipping.

Q3: What size ladder works best?

Typically, 4-6 feet tall ladders are ideal for blanket holders, depending on room height and number of blankets.

Q4: Can I use metal ladders instead of wood?

Absolutely. Metal ladders give a sleek, modern look and are durable for heavy blankets.

Q5: How do I maintain a wooden ladder holder?

Dust regularly, and if it’s unfinished wood, consider sealing it with a clear coat to prevent wear or mold.

5 Genius Ways to Start Solo Travelling with Zero Investment

Introduction

5 Genius Ways to Start Solo Travelling with Zero Investment

Dreaming of exploring the world but your wallet says no? Good news: solo travelling doesn’t have to break the bank. In fact, with a little creativity, smart planning, and courage, you can start your journey with zero investment.
Here are five genius ways to kickstart your solo adventures without spending a dime!

5 Genius Ways to Start Solo Travelling with Zero Investment

source:pixabay

1. Volunteer Abroad

Programs like Workaway, WWOOF, and HelpX connect travelers with hosts who provide free food and accommodation in exchange for work. Tasks can range from teaching English to helping on farms.

2. House Sitting

Sign up for platforms like TrustedHousesitters or MindMyHouse where homeowners seek responsible people to watch their houses (and often pets) while they’re away. Free stay in beautiful locations? Yes, please!

3. Use Travel Rewards and Points

Take advantage of credit card rewards, sign-up bonuses, and loyalty programs. Collect miles and hotel points by everyday spending and use them to fund your flights and stays.

4. Hitchhiking and Carpooling

In many parts of the world, hitchhiking is safe and common. Apps like BlaBlaCar connect you with drivers heading your way for free or a very minimal cost.

5. Couchsurfing

Couchsurfing.com offers a network of travelers and hosts who offer free accommodation purely for cultural exchange. It’s a great way to meet locals and stay for free.

Benefits of Solo Travelling with Zero Investment

Solo traveling often sounds like an expensive dream, but with the right mindset and strategies, it’s possible to embark on incredible adventures with almost zero investment. Beyond saving money, solo traveling offers unique personal, emotional, and social benefits that can transform your life in unexpected ways.

source:pixabay

1. Self-Discovery and Confidence Boost

Traveling alone, especially when you’re working with little to no money, pushes you to make decisions, solve problems, and adapt quickly. You’ll discover inner strengths you never knew you had, building confidence that stays with you long after the journey ends.

2. Freedom and Flexibility

Without a companion’s schedule to worry about, you’re free to follow your own rhythm. You can spontaneously accept opportunities like a free couch to sleep on, a ride from a local, or an invitation to a local festival — all of which can lower your costs and enrich your experience.

3. Creativity in Resourcefulness

Zero-investment travel encourages creative thinking. You might volunteer in exchange for meals and accommodation, use travel hacking techniques like points and miles, or find free events and walking tours. This creativity can spill over into other parts of your life.

4. Deep Cultural Immersion

When you’re traveling minimally, you often interact more directly with locals rather than staying in tourist areas. You’ll likely stay in people’s homes, eat homemade meals, and join authentic experiences, gaining a deeper understanding of the local culture.

5. Minimalism and Appreciation

Solo, budget-conscious travel forces you to live simply. You begin to appreciate small comforts — a warm bed, a good meal, a genuine smile. This shift in perspective often leads to greater gratitude and contentment in everyday life.

6. Building Global Friendships

Zero-investment travel often means couchsurfing, volunteering, hitchhiking, or working short gigs — all of which open doors to meeting new people. These raw, real-world interactions often blossom into long-lasting global friendships.

7. Skill Development

You’ll likely pick up new languages, bargaining skills, navigation abilities, and even survival skills. These talents can be personally enriching and professionally valuable down the line.

8. Breaking Comfort Zones

Traveling with no financial safety net teaches you to embrace uncertainty. You become comfortable with the uncomfortable, making you resilient and adaptable — traits that help you succeed in all areas of life.

9. Environmental Awareness

Low-cost solo travelers often use eco-friendly means like walking, cycling, or public transport. Staying close to nature or small communities also fosters a deeper respect for the environment.

10. A Life Story Worth Telling

Every day becomes an adventure when you travel with almost no money. The challenges you overcome and the experiences you gather will become powerful stories that inspire others — and remind you of what you’re truly capable of.

Solo traveling with zero investment isn’t just a financial achievement — it’s a journey into self-growth, resilience, and genuine connection. When you step out with trust in yourself and the world, the experiences you collect are priceless.

Trending Now: How People are Travelling for Free in 2025

source:pixabay

1. Work-Exchange Platforms Are Booming

Sites like Worldpackers, Workaway, and HelpStay have exploded in popularity. Travelers offer a few hours of work per day — think farming, hostel management, teaching English — in exchange for free accommodation and meals.

2. Digital Nomad Gigs for Free Stays

With remote work becoming the norm, many nomads are leveraging skills like social media management, photography, or website development to barter for free lodging in hotels, resorts, or Airbnbs looking for online exposure.

3. Housesitting and Petsitting

Platforms like TrustedHousesitters have made it normal to live in beautiful homes worldwide for free — in exchange for looking after pets or properties. It’s a win-win for homeowners and budget-savvy travelers.

4. Flight Hacking and Points Travel

Travel hackers are mastering the art of using credit card points, airline miles, and cashback offers. Some travelers are booking round-the-world tickets with zero actual cash — just points they earned without overspending.

5. Couchsurfing 2.0

The old idea of couchsurfing is evolving into community living. New apps are connecting travelers with locals eager to share their homes, offer meals, and show off their cities — all for the sake of cultural exchange, not cash.

6. Social Media Collaborations

Micro-influencers (even with a few thousand followers) are getting free trips, stays, and experiences in exchange for authentic content. Brands are valuing personal, genuine reach over huge follower numbers.

7. Eco-Travel and Voluntourism

Eco-villages, farms, and sustainability projects are inviting travelers to work on conservation efforts in exchange for food, shelter, and priceless experience. Many of these initiatives also offer certification or education credits.

8. Hitchhiking and Ride-Share Communities

In many parts of Europe, South America, and Asia, hitchhiking is seeing a revival. Apps like BlaBlaCar are making ride-sharing safe and accessible, allowing travelers to move from city to city for little to no money.

9. Travel Challenges and Sponsorships

Creative travelers are setting personal challenges — like crossing a continent with no money — and gaining sponsors or viral support through platforms like TikTok, YouTube, or Instagram. Free travel, and sometimes even a career, follows.

10. Global Hospitality Networks

Newer networks (like BeWelcome and Trustroots) emphasize traveler solidarity — connecting people offering free hosting, meals, or simply local advice, building friendships and travel opportunities without commercial interests.

Traveling for free in 2025 isn’t about luck — it’s about creativity, community, and courage. With the right mix of tech tools, networking, and open-mindedness, almost anyone can turn the dream of free global exploration into a vibrant reality. The world is opening up like never before — and it’s waiting for you.

Suggestions for Beginners

  • Start Local: Explore nearby cities or countryside to build confidence before going international.
  • Network First: Join solo travel communities online (like Facebook groups, Reddit’s r/solotravel) to find safe opportunities.
  • Pack Smart: Carry essentials like a first aid kit, portable charger, versatile clothing, and copies of important documents.
  • Stay Flexible: Be ready to change plans if opportunities arise or situations change.
  • Respect Cultures: Always be a responsible and respectful traveler wherever you go.

Conclusion

Solo travelling with zero investment isn’t just a dream—it’s completely achievable with the right mindset and strategies. Volunteering, house sitting, travel rewards, hitchhiking, and couchsurfing are just the beginning.
In 2025 and beyond, with the world more connected than ever, the opportunities for free solo travel are endless. All you need is an adventurous spirit and a smart approach.
Start small, dream big, and let your journey begin!

References

FAQs

Q1: Is it really possible to travel solo with zero money?

Yes! With programs like volunteering, house sitting, and couchsurfing, you can travel without spending on accommodation and sometimes even food.

Q2: How do I stay safe while travelling for free?

Always research beforehand, stay connected with friends or family, and trust your instincts. Use reputable platforms and read reviews carefully.

Q3: What skills are useful for zero-investment travel?

Skills like language basics, first aid, cooking, teaching, and even gardening can open up many volunteer or exchange opportunities.

Q4: Can beginners try hitchhiking safely?

In some regions (like New Zealand, Canada, parts of Europe), hitchhiking is common and safe. Always check local customs, stay alert, and travel during the day.

Q5: How can I earn money while travelling for free?

Consider freelance gigs, remote work, or even odd jobs you pick up along the way. Websites like Upwork and Fiverr can be helpful.

5 Easy DIY Neem Oil Spray Recipes for a Healthier Garden

Introduction

5 Easy DIY Neem Oil Spray Recipes for a Healthier Garden

Neem oil is a gardener’s secret weapon against pests and fungal diseases. It’s organic, effective, and safe when prepared correctly. Instead of buying commercial sprays packed with chemicals, many gardeners now prefer DIY neem oil sprays for a natural, affordable, and customizable plant treatment.
In this article, we’ll share 5 easy DIY neem oil spray recipes, plus tips, benefits, trending ideas, suggestions, and FAQs to help you grow a thriving, chemical-free garden.

5 Easy DIY Neem Oil Spray Recipes

source:pixabay

1. Basic Neem Oil Spray

Ingredients:

  • 1 teaspoon cold-pressed neem oil
  • 1 liter (4 cups) of warm water
  • 2-3 drops of mild liquid soap (like Castile soap)

Instructions:
Mix water and soap first, then slowly add neem oil while stirring. Pour into a spray bottle and shake well before each use. Spray on leaves (top and bottom) every 7-14 days.

2. Neem Oil and Garlic Pest Spray

Ingredients:

  • 1 teaspoon neem oil
  • 1 liter warm water
  • 1 tablespoon minced garlic
  • 2-3 drops of soap

Instructions:
Steep garlic in warm water for 2-3 hours, strain, then add soap and neem oil. Spray around garden beds to repel insects like aphids and spider mites.

3. Neem Oil Fungus Fighter

Ingredients:

  • 2 teaspoons neem oil
  • 1 liter warm water
  • 1 tablespoon baking soda
  • 2-3 drops of soap

Instructions:
Mix baking soda with warm water first, add soap, and finally neem oil. Use this solution on plants suffering from powdery mildew, black spot, and other fungal infections.

4. Strong Neem Oil Spray for Heavy Infestations

Ingredients:

  • 2 tablespoons neem oil
  • 1 liter warm water
  • 1 teaspoon soap

Instructions:
Mix well and apply directly to severely infested plants every 5-7 days until the problem resolves. Always test on a small area first to avoid leaf burn.

5. Neem Oil Soil Drench

Ingredients:

  • 1 teaspoon neem oil
  • 1 liter water
  • 2-3 drops soap

Instructions:
Instead of spraying the leaves, pour this mix directly into the soil around the base of the plant. It helps control soil-borne pests and promotes root health.

Tips for Using DIY Neem Oil Sprays

source:pixabay
  • Always Shake Before Use: Neem oil separates from water, so shake your spray bottle thoroughly before each use.
  • Apply Early or Late: Spray early in the morning or late evening to avoid burning plants in direct sun.
  • Use Fresh: DIY sprays work best when freshly mixed. Use within 24 hours.
  • Test First: Try spraying a small area first to check plant sensitivity.
  • Store Properly: Keep neem oil in a cool, dark place to maintain its potency.

Benefits of Using DIY Neem Oil Sprays

  • Eco-Friendly: Protects plants without harming beneficial insects like bees.
  • Chemical-Free: Avoids harmful additives often found in commercial products.
  • Cost-Effective: One bottle of neem oil can make dozens of homemade sprays.
  • Multi-Purpose: Acts as an insecticide, fungicide, and soil booster.
  • Customizable: Adjust strength based on your garden’s specific needs.

Trending Now: Why DIY Neem Oil Sprays Are So Popular

source:pixabay
  • Sustainability Focus: Gardeners are embracing organic, eco-conscious methods.
  • Rise of Urban Gardening: Balcony and rooftop gardeners prefer natural treatments.
  • Awareness of Pollinator Health: Protecting bees and butterflies by avoiding synthetic chemicals is a major trend.
  • DIY Gardening Movements: Online communities promote homemade, effective garden solutions.

Suggestions for Best Results

  • Combine with Companion Planting: Use neem spray alongside companion plants like basil, marigold, and mint for maximum pest control.
  • Monitor Regularly: Inspect plants weekly to catch problems early.
  • Adjust Recipes Seasonally: In hotter months, use weaker solutions to prevent leaf damage.
  • Use Clean Equipment: Dirty sprayers can clog or reduce neem oil effectiveness.

Conclusion

Making your own DIY neem oil sprays is simple, affordable, and highly effective. With just a few ingredients, you can protect your garden naturally while supporting a healthier ecosystem. Whether you’re growing tomatoes, roses, or herbs, neem oil can be your go-to organic solution for pests and diseases.

Embrace the DIY spirit — your plants (and the planet) will thank you!

References

  • National Gardening Association: Neem Oil Use in Organic Gardening
  • University of Maryland Extension: Neem Oil Factsheet
  • Royal Horticultural Society: Managing Pests with Natural Remedies

FAQs

Q1: How often should I spray neem oil on my plants?
A: You should spray neem oil on your plants every 7 to 14 days for regular prevention. 🌿

If you’re treating an active pest problem or fungal infection:

  • Spray every 5 to 7 days until the issue is under control.

Important Tips:

  • Always spray in the early morning or late evening to avoid leaf burn from the sun.
  • Reapply after heavy rain, since rain can wash the neem oil off the plants.
  • Be consistent — neem oil works best when used regularly, as it interrupts pests’ life cycles over time.

Would you like a simple weekly schedule you can follow depending on whether you’re doing pest prevention or pest treatment? 📅🌸

Q2: Can neem oil harm my plants?
A Yes, neem oil can harm your plants if it’s not used correctly — but don’t worry, it’s easy to avoid problems! 🌿

Here’s how neem oil might cause harm:

  • Overapplication: Using too much neem oil or spraying too frequently can clog plant pores (stomata), affecting photosynthesis and breathing.
  • Spraying under direct sunlight: Neem oil can act like a magnifying glass under strong sun, causing leaf burn.
  • High concentration: A mixture that’s too strong can damage tender leaves, especially on young or sensitive plants.
  • Wrong timing: Applying to stressed or very young seedlings can sometimes stunt growth temporarily.

How to avoid plant damage:

  • Always dilute properly (e.g., 1 teaspoon neem oil per 1 liter water).
  • Spray early morning or late evening when it’s cooler.
  • Test first on a few leaves before spraying the whole plant.
  • Don’t spray during extreme heat or drought stress.

When used carefully, neem oil is a fantastic, gentle protector for your plants! 🌱

Q3: Is DIY neem oil spray safe for edible plants?
A: Yes, DIY neem oil spray is safe for edible plants when used correctly! 🌿

Here are a few important tips to keep it safe:

  • Dilute properly: Always follow recommended dilution rates (like 1 teaspoon neem oil per 1 liter of water with a little soap).
  • Timing: Stop spraying at least 5–7 days before harvest to ensure any residue breaks down naturally.
  • Wash produce: Rinse fruits, vegetables, and herbs thoroughly with water before eating.
  • Use pure neem oil: Make sure you’re using 100% cold-pressed neem oil without added chemicals.

Neem oil breaks down quickly in sunlight and doesn’t leave toxic residues, making it one of the best organic options for protecting food crops naturally.

Would you like me to also show you a quick chart on “When and How to Use Neem Oil on Common Edible Plants”? 🌿🍅🥬

Q4: What pests does neem oil control?
A Neem oil controls a wide range of common garden pests — that’s why so many gardeners love it! 🌿🪲

Here are some of the pests neem oil helps manage:

  • Aphids (tiny insects that suck sap from plants)
  • Spider mites (tiny, web-spinning mites that damage leaves)
  • Whiteflies (small white-winged insects that weaken plants)
  • Mealybugs (white, cotton-like insects found on stems and leaves)
  • Scale insects (hard or soft-shelled pests that cling to plant surfaces)
  • Thrips (small, slender insects that puncture and suck plant juices)
  • Leaf miners (larvae that tunnel through leaves)
  • Caterpillars (young of moths and butterflies that eat leaves)
  • Fungus gnats (larvae that attack plant roots)
  • Japanese beetles (chew leaves and flowers)

Bonus: Neem oil also helps fight fungal diseases like powdery mildew, black spot, and rust!

It works by:

  • Disrupting insect hormones (so they stop eating, growing, and reproducing)
  • Coating and smothering soft-bodied pests
  • Boosting the plant’s natural defenses

Q5: How long does homemade neem spray last?
A: Homemade neem oil spray lasts about 24 hours after mixing for best effectiveness. 🌿

Here’s why:

  • Neem oil breaks down quickly once mixed with water, especially when exposed to air, light, and heat.
  • After 24 hours, the spray may start losing its potency and might not work as well against pests or diseases.
  • Unlike chemical pesticides, neem oil doesn’t have preservatives, which is good for your plants — but it means you need to mix small batches fresh when needed.

Quick Tip:

  • Only mix as much as you plan to use that day.
  • Store leftover spray in a cool, dark place for up to 1–2 days if absolutely necessary, but always shake well before reuse.

9Quick Solutions for a Pest-Free Vegetable Garden

Introduction

9Quick Solutions for a Pest-Free Vegetable Garden

A flourishing vegetable garden is a dream come true — until pests come in and start ruining your hard work! Fortunately, keeping your garden pest-free doesn’t have to be complicated or chemical-heavy. With the right strategies, you can maintain a healthy, thriving garden naturally and efficiently. Let’s dive into 9 quick solutions for a pest-free vegetable garden that every gardener should know.

9Quick Solutions for a Pest-Free Vegetable Garden

source:pixabay

1. Plant Pest-Repelling Companion Plants

Grow herbs and flowers like basil, marigolds, chives, and nasturtiums alongside your vegetables. These natural repellents keep pests like aphids, mosquitoes, and beetles at bay.

2. Use Organic Pest Sprays

Homemade sprays using neem oil, garlic, or soap water can deter harmful insects without damaging your crops or the environment.

3. Introduce Beneficial Insects

Ladybugs, lacewings, and parasitic wasps are nature’s pest control army. These beneficial bugs feed on destructive pests and help maintain garden balance.

4. Practice Crop Rotation

Changing the location of your crops each season confuses pests and reduces the chance of infestation year after year.

5. Keep Your Garden Clean

Remove dead leaves, weeds, and rotting produce. A tidy garden makes it harder for pests to hide and breed.

6. Install Row Covers

Lightweight row covers protect young plants from insects while still allowing sunlight and rain to nourish them.

7. Handpick Larger Pests

For larger intruders like caterpillars and beetles, a simple handpicking method can be surprisingly effective, especially when done regularly.

8. Apply Mulch

A thick layer of organic mulch not only conserves soil moisture but also keeps soil-borne pests from reaching your plants.

9. Monitor Your Plants Daily

Early detection is key. A quick daily inspection lets you catch any pest problems before they become overwhelming.

Benefits of a Pest-Free Vegetable Garden

A thriving vegetable garden is a joy to behold — and even more rewarding when it’s free from harmful pests. Maintaining a pest-free environment ensures healthier plants, bigger harvests, and a more enjoyable gardening experience.

source:pixabay

1. Healthier Plants and Crops

When pests are controlled, your plants can grow strong without stress or damage. Healthy plants are better able to resist disease, produce more vegetables, and recover from minor environmental issues like heatwaves or heavy rain.

2. Higher Yields

Fewer pests mean more vegetables for you! Without insects chewing on leaves, roots, or fruits, your plants can channel their energy into producing abundant, quality crops.

3. Better Quality Produce

Pest-free vegetables look and taste better. You’ll enjoy crisper lettuces, unblemished tomatoes, and smooth, beautiful zucchinis — perfect for eating fresh or sharing with friends and family.

4. Reduced Need for Chemicals

A naturally pest-free garden decreases the need for chemical pesticides, leading to cleaner, healthier produce. It also benefits the environment by protecting beneficial insects, birds, and soil health.

5. Saves Time and Money

Controlling pests early prevents major infestations that can wipe out your crops and force expensive fixes. A little prevention now saves a lot of time, effort, and money later.

6. Encourages Biodiversity

Natural pest control methods (like attracting beneficial insects or companion planting) create a more diverse and resilient garden ecosystem, where pests are less likely to get out of control.

7. Boosts Personal Satisfaction

Nothing beats the pride of harvesting beautiful, healthy vegetables you nurtured yourself. A pest-free garden adds to your overall gardening joy and sense of accomplishment.

8. Promotes Organic Gardening

Managing pests naturally supports organic gardening practices, meaning your food is free of synthetic chemicals and your garden becomes a safer place for kids, pets, and pollinators.

🌱 What’s Trending Now in Natural Pest Control?

source:pixabay

📱 Companion Planting Apps

Mobile apps are making it easier than ever for gardeners to design natural pest control strategies. These tools recommend plant pairings — like basil with tomatoes or marigolds with peppers — that naturally deter pests without chemicals.

🌿 Biodegradable Pest Barriers

Eco-friendly garden fabrics and row covers made from biodegradable materials are trending. They protect crops from insects and harsh weather, then break down harmlessly into the soil after the growing season — no plastic waste!

🐞 Predator Hotels

Gardeners are installing “predator hotels” — structures that provide shelter for ladybugs, lacewings, and solitary bees. These beneficial insects keep aphid and mite populations under control, boosting garden health year-round.

🧴 DIY Neem Oil Sprays

Homemade neem oil pest sprays are booming in popularity. Gardeners prefer mixing their own blends (often combining neem oil, water, and a few drops of natural soap) to avoid additives and create safer, customized treatments for their plants.

🌾 Regenerative Gardening Practices

Rather than focusing only on pests, regenerative gardening strengthens the entire ecosystem. Healthy, biodiverse soil reduces pest problems naturally by supporting stronger plants and beneficial microbes that outcompete harmful ones.

🌿 Smart Suggestions for Natural Pest Control in Your Garden

1. Start with Healthy Soil

Healthy soil is the foundation of a resilient garden. Enrich it with compost and organic matter to grow stronger plants that naturally resist pests and diseases.

2. Choose Pest-Resistant Varieties

Opt for vegetable and flower varieties bred for natural pest resistance. Local nurseries often recommend options that thrive best in your area.

3. Practice Good Spacing

Overcrowded plants invite pests and diseases. Proper spacing improves air circulation, reduces humidity, and lowers the risk of infestations.

4. Rotate Crops Regularly

Switch the location of plant families each season. Crop rotation disrupts pest and disease cycles that build up in the soil over time.

5. Water at the Base

Always water at the soil level rather than overhead. This keeps leaves dry, discouraging fungal growth and deterring moisture-loving pests.

6. Attract Natural Predators

Grow companion flowers like dill, yarrow, and fennel to attract beneficial insects such as ladybugs, hoverflies, and lacewings — nature’s own pest control squad!

7. Use Physical Barriers

Garden fabrics, netting, and cloches physically block pests from reaching your crops, offering a simple and chemical-free defense.

8. Inspect New Plants Before Planting

Always check new plants for signs of pests or diseases before adding them to your garden to prevent introducing new problems.

9. Stay Consistent

Daily garden checkups, regular pruning, and prompt removal of debris help catch issues early — before pests get out of control.

10. Educate Yourself Seasonally

Every season brings different pests. Stay informed about the insects active during spring, summer, and fall to prepare proactive defenses.

Conclusion

Pests don’t have to rule your vegetable garden! By applying these 9 quick solutions, you can create a healthy, vibrant, and pest-resistant garden naturally. Remember, prevention is better than cure — and a little daily attention goes a long way. Grow smart, stay observant, and enjoy a bountiful, pest-free harvest!

References

  • University of California Agriculture and Natural Resources: Pest Management Guidelines
  • Royal Horticultural Society: Organic Pest Control Methods
  • National Garden Association: Beneficial Insects for Your Garden

FAQs

1. What is the best natural pest control for vegetable gardens?

Companion planting, beneficial insects, and organic sprays like neem oil are some of the best natural methods.

2. How often should I check my vegetable garden for pests?

Ideally, check your garden daily for early signs of pests to catch problems before they escalate.

3. Can mulching attract pests instead of deterring them?

If done properly with clean, organic materials, mulch deters pests. Poor-quality or overly wet mulch might attract unwanted insects, so monitor closely.

4. Do homemade sprays really work?

Yes! Homemade sprays like garlic water or neem oil are highly effective against many common pests when used consistently.

5. How can I attract beneficial insects to my garden?

Plant native flowers, provide fresh water, and limit pesticide use to create a welcoming environment for helpful insects.